Data Source
To create an external form, you must first have an external data source (database) configured in Fusion.
Note
To access Data Source creation from the menu go to Setup > Data Source.
On the Data Sources screen, click New to add a new data source. To add more than one, click New:

The settings for creating a new data source are available on this screen:
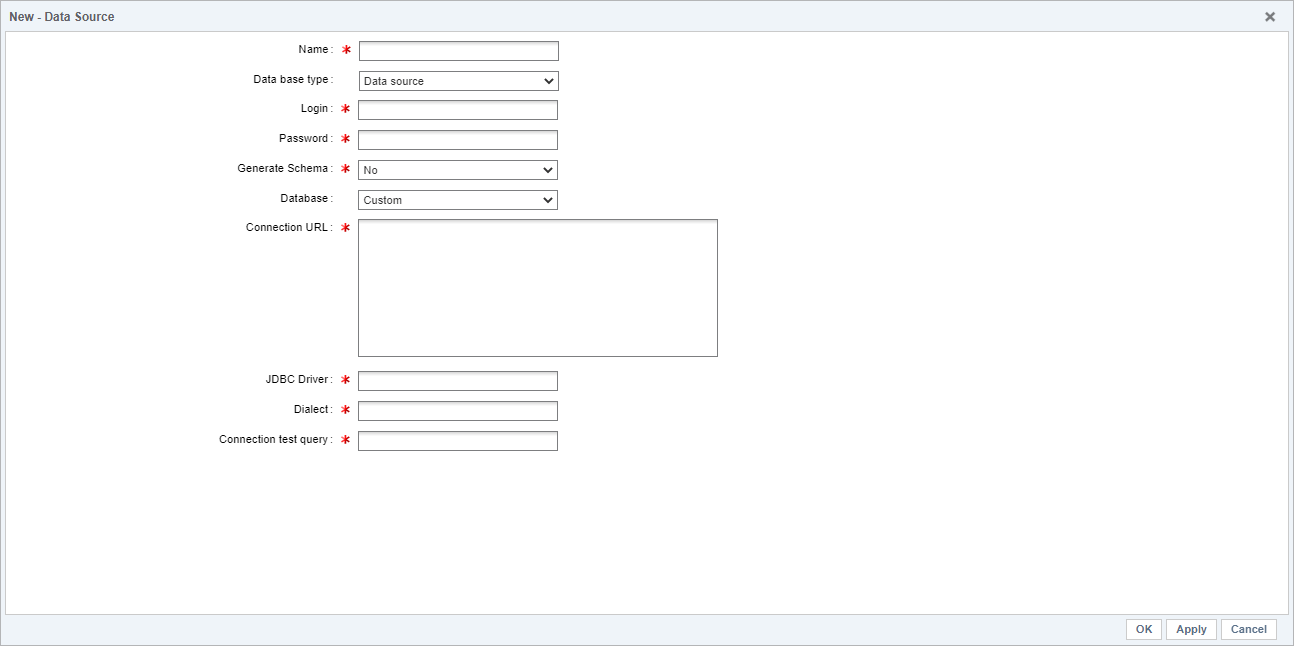
- Name: Create a name for the data source being registered.
- Data Source Type: May vary between Data Source or Web Service.
If it is a Web Service, the available fields will be as follows:

If you are a Data Source, the available fields will be as follows:

- Login: Enter the login to access the database.
- Password: Enter the password corresponding to the login.
- Generate Schema: Select Yes to define whether Fusion should save data to the external database. This setting is not recommended. When you select No, you will need to create the external form separately in Fusion.
- Database: You can choose the database from which you want to connect to Fusion. Depending on the type, different fields appear for configuration. By default, the “Custom” option is selected, but the other options are:

Personalized
With the default Custom option, the fields are available:
- Connection URL: Enter the URL to connect to the database that will be connected by Fusion.
- JDBC Driver: Enter the class that represents the JDBC driver.
- Dialect: Enter the class that defines the language for communication between the database and the Fusion persistence layer.
- Query for connection tests: Enter the test command to verify the correct functioning of the database.
Informix
With the Informix option, the following fields are available:
- Host: Enter the IP or hostname of the database server.
- Database: Enter the Fusion database.
- Server: Enter the database server.
Microsoft SQL Server
With the Microsoft SQL Server option, the fields are available:
- Host: Enter the IP or hostname of the database server.
- Database: Enter the Fusion database, which must be populated with the name of the database.
My SQL
With the My SQL option, the fields are available:
- Host: Enter the IP or hostname of the database server.
- Database: Enter the Fusion database, which must be populated with the name of the database.
- Port: Enter the port to connect to the database.
#ODBC
With the ODBC option, the following fields are available:
- Dialect: Enter the class that defines the language for communication between the database and the Fusion persistence layer.
- Schema: Enter the name of the schema where the database is located.
- ODBC Data Source: Enter the ODBC data source.
Oracle
With the Oracle option, the fields are available:
- Version: Enter if the Oracle version is 8, 9, 10, or 12c.
- Connection Driver: Enter the name of the schema where the database is located. The selection options are Thin, Oci, or Kprb.
- Connection: You can choose between SID and SERVICE_NAME. Note that the choice made in this field affects field X
- Host: Enter the IP or hostname of the Database server.
- Port: Enter the database port.
- SID or SERVICE_NAME: Enter the name of your bank's SID or SERVICE_NAME.
- Schema: Enter the name of the schema where the database is located.
Thin
When you select the Thin option, the following fields are left to be filled in:

Oci
When you select the Oci option, the following fields are left to be filled in:

Korb
When selecting the Kprb option, the following fields are left to be filled in:

Progress
With the Progress option, the following fields are available:
- Host: Enter the IP or hostname of the Database server.
- Database: Enter the Fusion database.
- Port: Enter the database port.
Sybase
With the Sybase option, the fields are available:
- Host: Enter the IP or hostname of the Database server.
- Database: Enter the Fusion database.
- Port: Enter the database port.