First Steps
Accessing the Fusion Platform
To access the Fusion login screen, open the browser (check the approved browsers: Chrome 80.0, Edge 80.0, and Safari 10.0) and enter the Fusion access URL, for example: http://server:port/fusion.
To access Fusion, enter your login and password, as exemplified by the following screen:
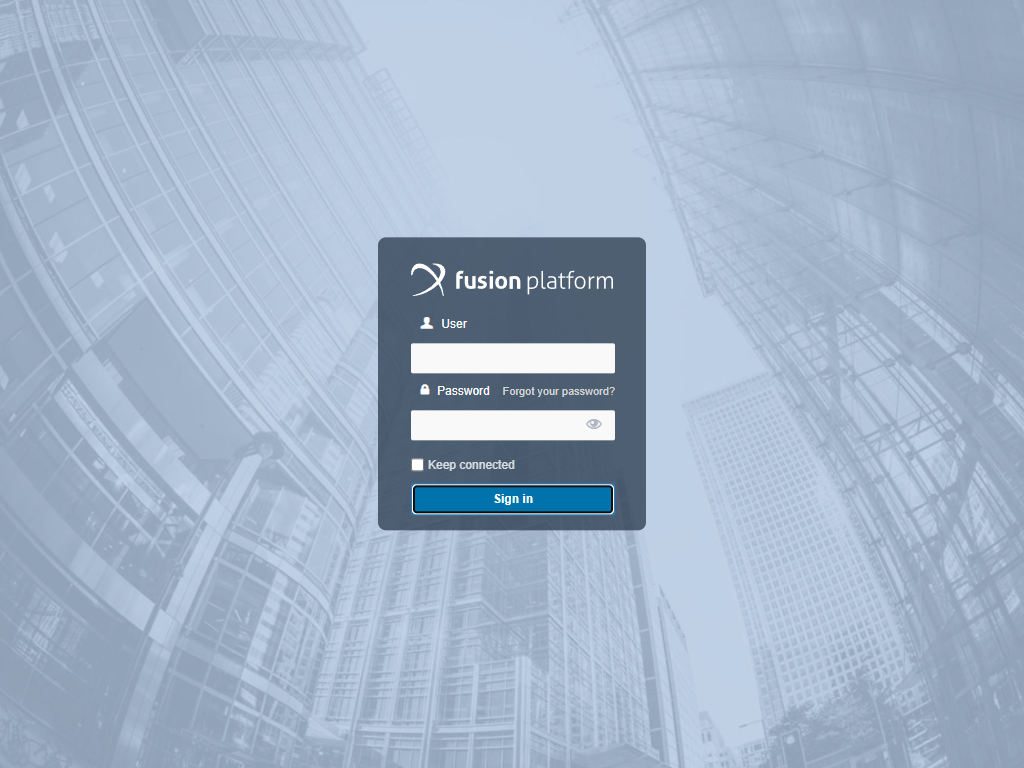
Attention: User creation must be done by the system administrator. If you forget your login and password, ask for help directly with your administrator.
Attention
The Forgot your password? option will only be available for environments with:
- Email sending set;
- System Authentication set to Default, in other words if it is set to LDAP, CAS, SAML or Custom, this option cannot be used.
Check the “Keep connected” option so that on your next access to Fusion, you do not have to re-enter the login information, as this will automatically be forwarded to the system.
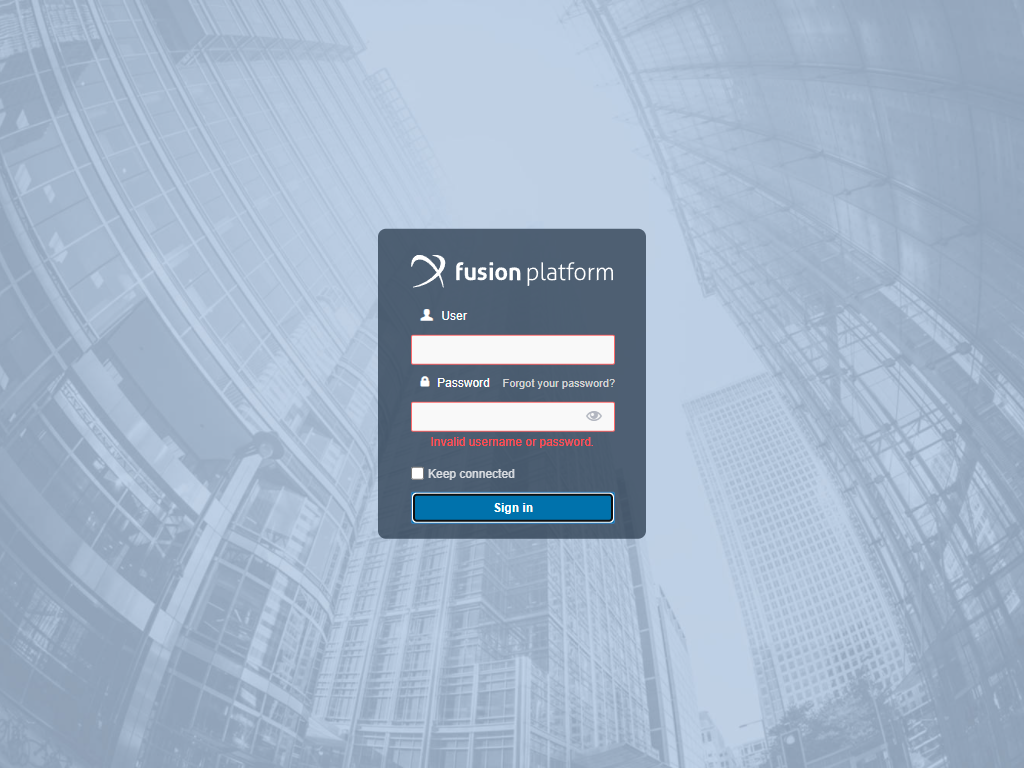
The screen below exemplifies the validation message that will be displayed when entering the incorrect login or password.
For greater security, if the user errors their login multiple times, they will also have to fill out the Captcha, as shown in the following screen:
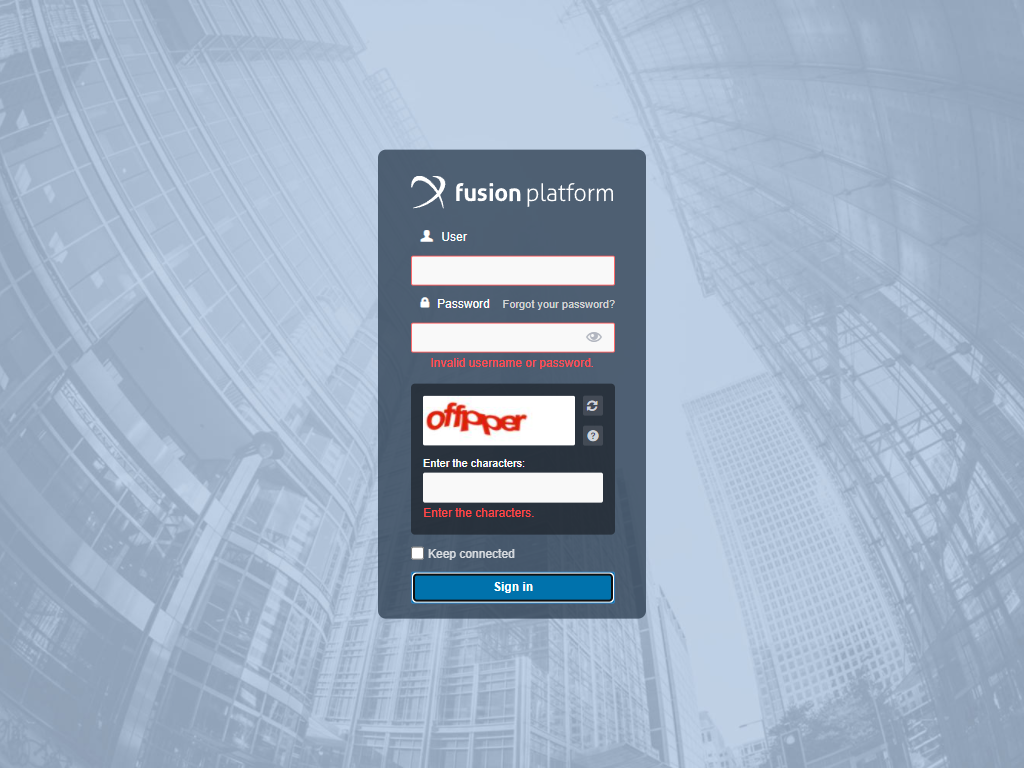
Attention: The number of login errors can be configured under System Settings.
Complete the completion and click Sign In.
Note
In cases where the environment has other authentication methods configured besides the default ones in the System settings, the login screen you encounter may be different from the one specified earlier. In such a case, you can check all available screens by clicking on Login Screen.
Starting from version 3.19.0, email can also be used as a login key in Fusion. To enable this, you need to set the Allow login by email option to Yes in the System settings. Once this is done, users can use their email as the username when logging in.
When logging in using an email, that email address should be unique to each user. If there are multiple users with the same email address, you will encounter an authentication error. Each email should correspond to a single user account to avoid conflicts during the login process.
In the case where multiple users have the same email address, an email will be sent explaining the reason for the login block. This informative email will be sent only if the email and password combination corresponds to a Fusion account. If the user enters the password incorrectly, there is no need to send an email about duplicate email addresses.
Authentication Properties
On the first access to the environment after updating the password settings by the Administrator, when attempting to log in, the system will verify that the password meets the requirements defined in the system properties. If they don't answer, the user is redirected to a password reset screen.
You can then enter your new password and confirm the new password, respecting the conditions that the password must meet according to what was defined in the system properties by the Administrator.
Note: Until the user reset their password on this screen, they will not be able to access Fusion. Therefore, after resetting the password, it will be redirected to the login screen.
Clicking Forgot Password on the login screen takes the user to the password reset page.
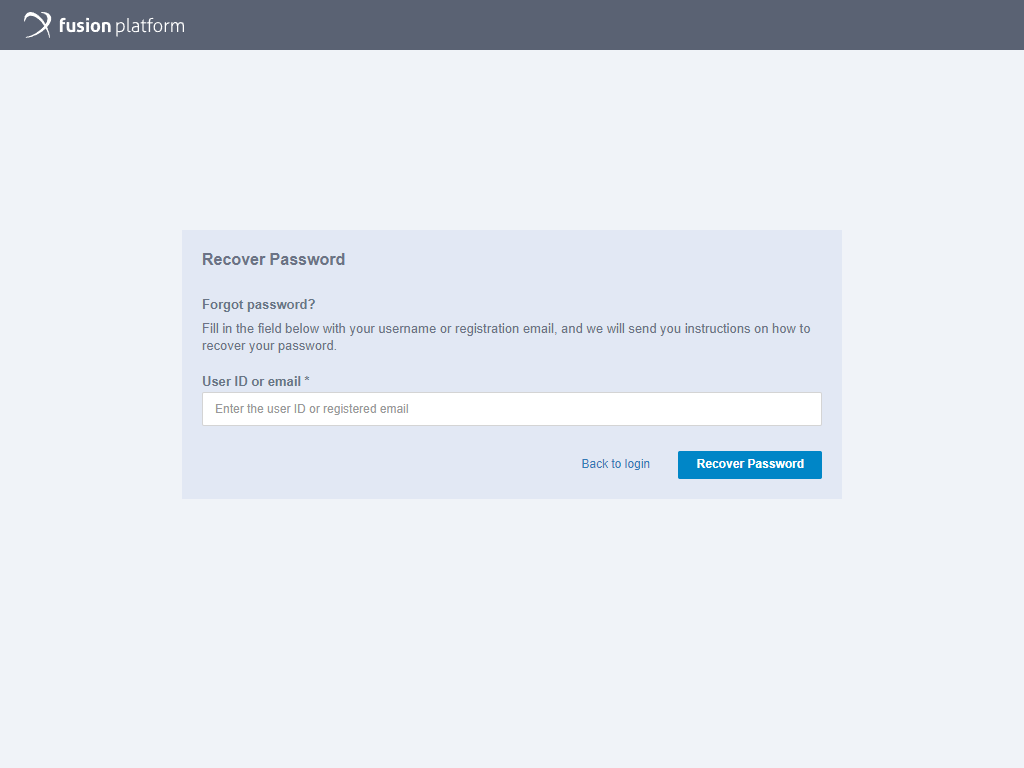
In it, the user must enter their User ID or E-mail and then click Recover Password to continue or, if not, click Back to login.
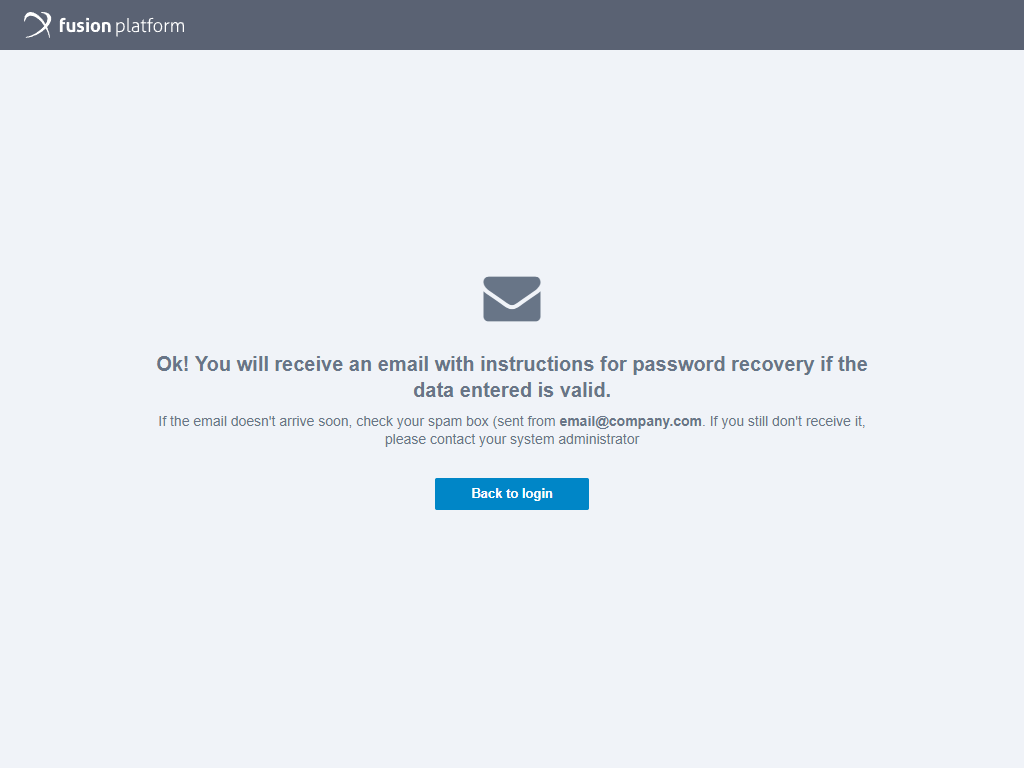
Clicking Recover Password takes the user to a confirmation page stating that an email should arrive shortly with instructions for recovering the password. To leave the page, simply click Back to login.
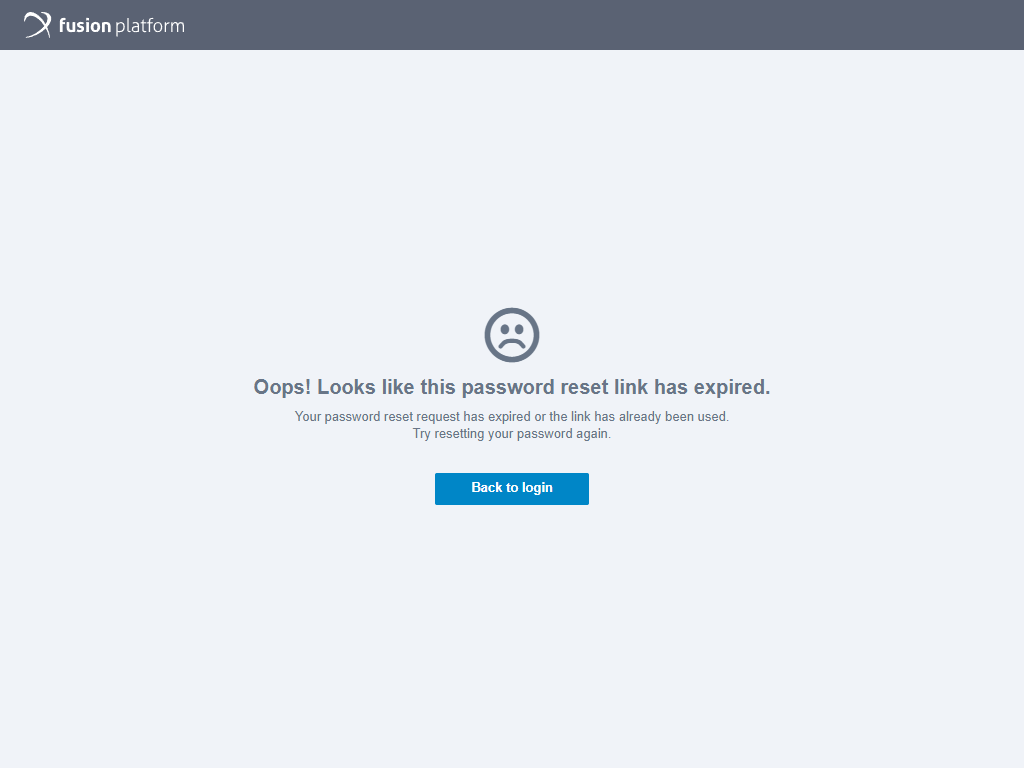
In the received email there will be a link that must be accessed to start resetting the password. This email contains the expiration time of the recovery link. This way, the user has 1 hour from the moment of creating the link to change the password before this link expires and becomes invalid for security reasons.
If the user tries to access the link after it has expired, a message will be displayed stating what happened.
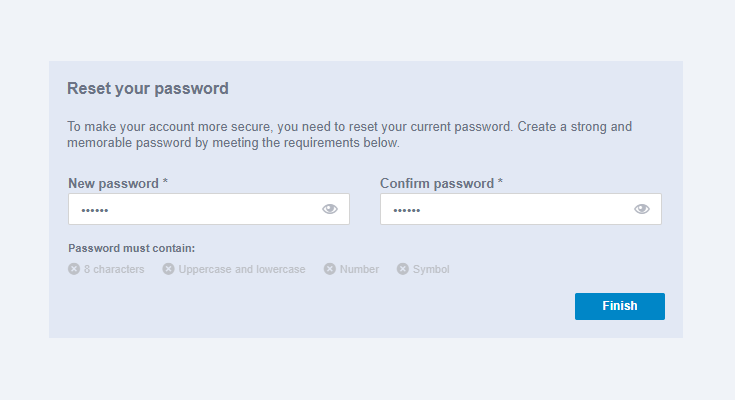
The password reset link will be able to fill in the new password and confirm it. Just below the password completion fields will be the password composition requirements. These requirements update in real time, so as you fill in the password fields, the requirements that are met are highlighted. When finished, just click Finish.
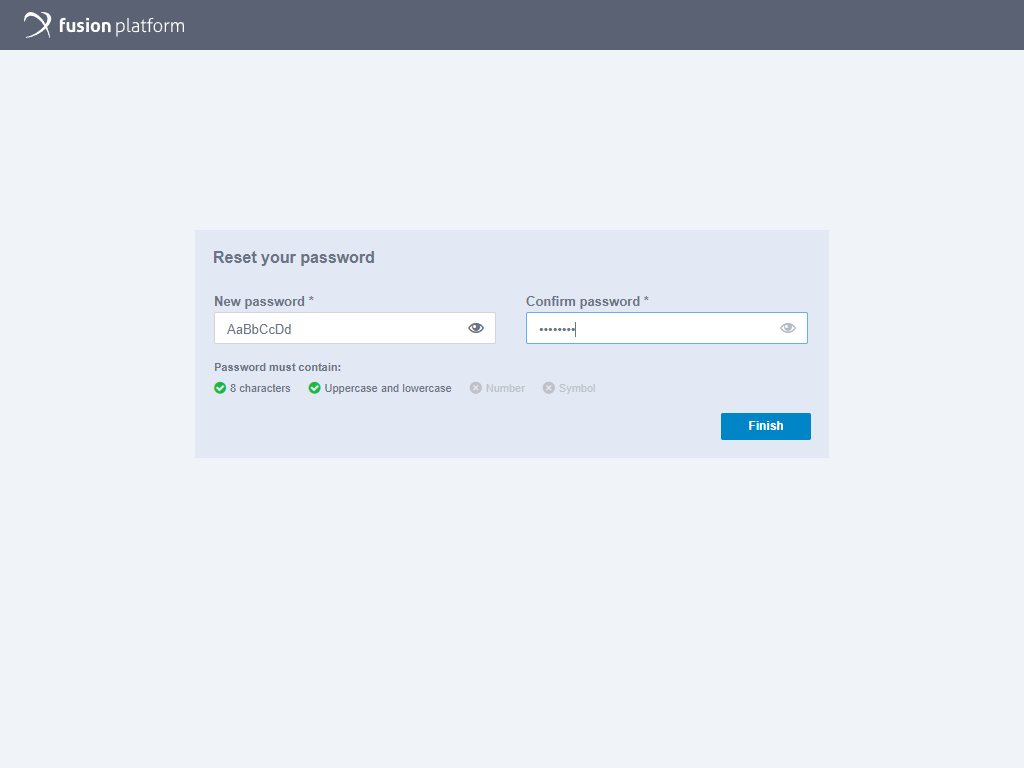
Note: Clicking the Eye icon will allow you to hide or display the completed password.
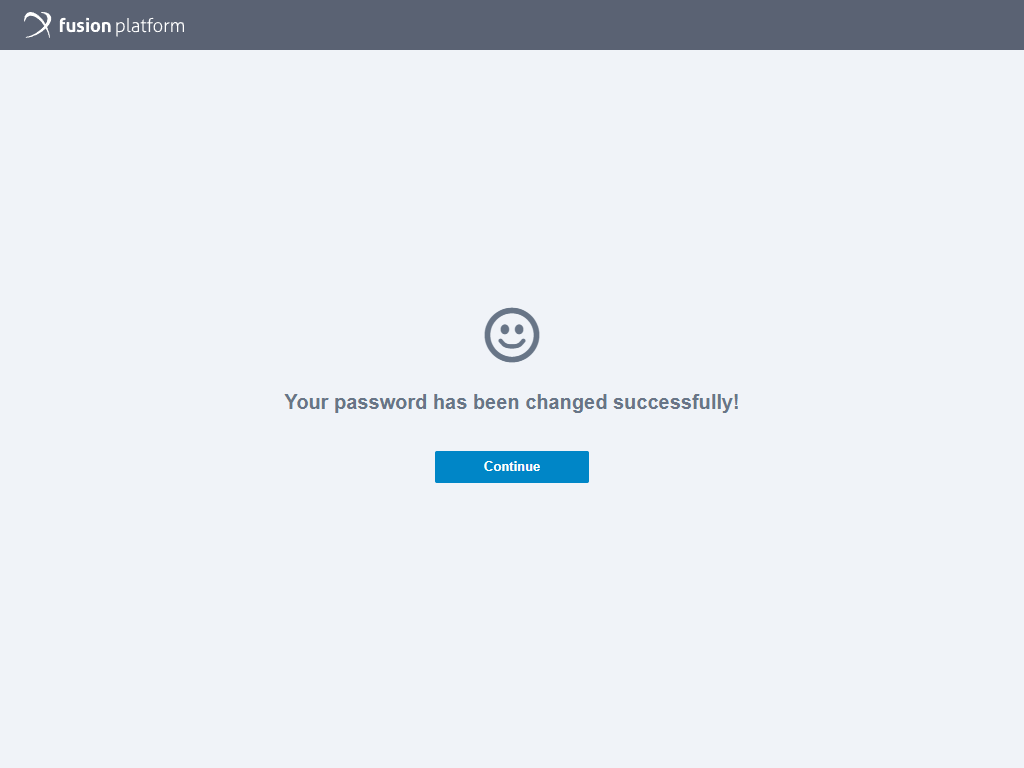
Upon completion of the password reset the user will see a confirmation screen and clicking the Continue button on it, the system was to direct the user to the login screen.
Minimum System Requirements
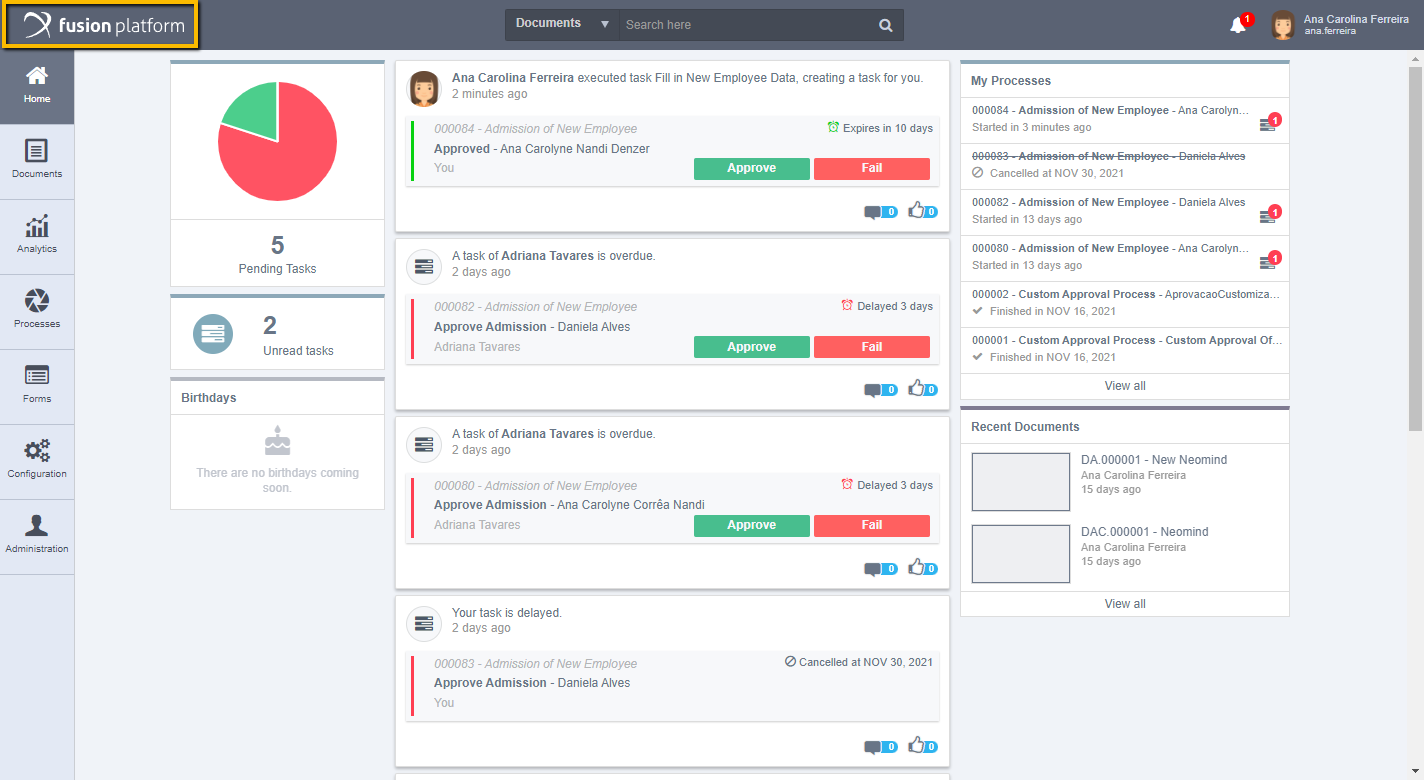
For better performance and quality in your Fusion experience, your computer must have some minimum requirements. To access this information, click on the Fusion Platform icon, as shown in the image below:
Clicking will display the following information screen:
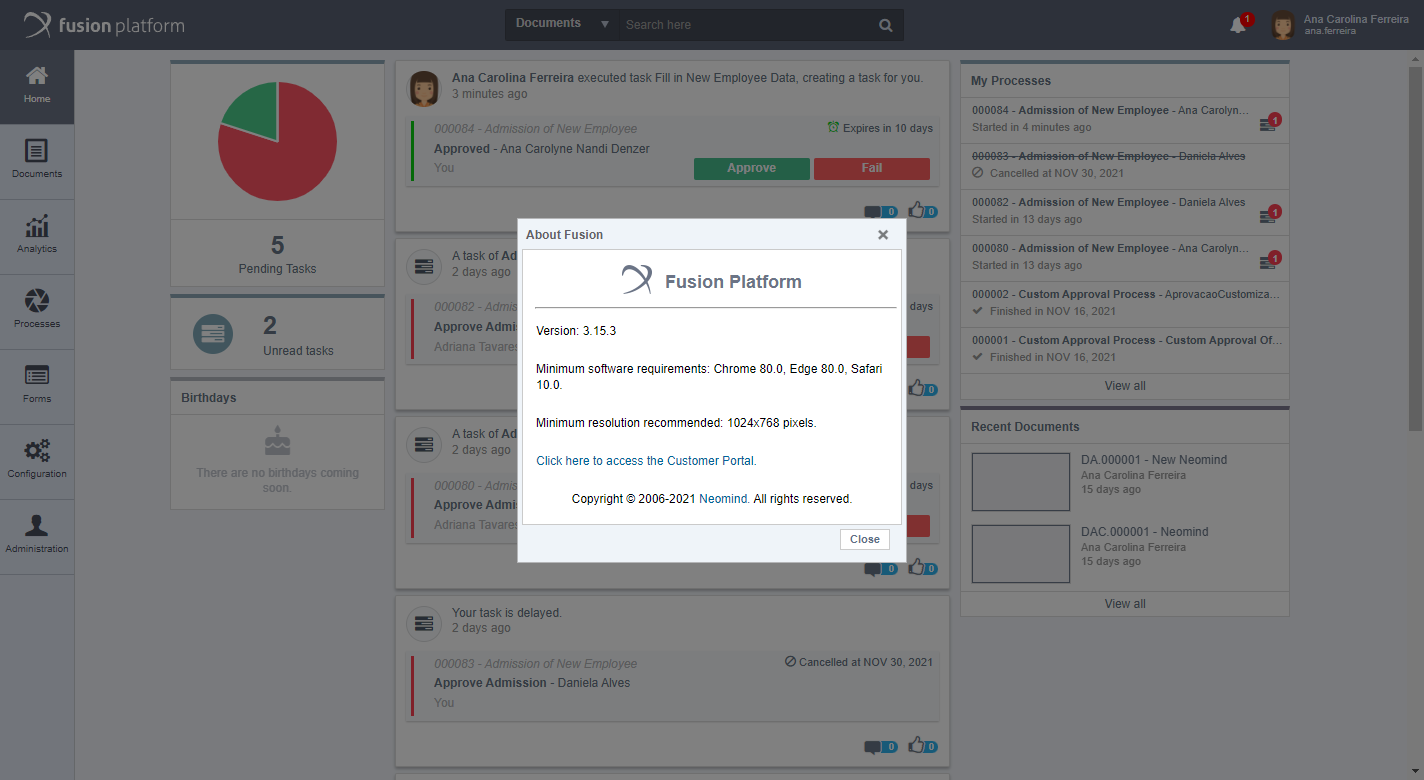
Fusion Platform is approved to run on browsers: Google Chrome, Microsoft Edge, and Safari. Install Google Chrome with minimum version 80.0, Microsoft Edge version 80.0, or Safari version 10.0. If you want to use Chrome version 45, you need to do the following: Chrome Setup. For Java applications, such as the document scanner and opening documents with Office, use the minimum version 1.8.111.
Getting to Know Fusion
When you log in to Fusion, a screen appears as shown in the image below:
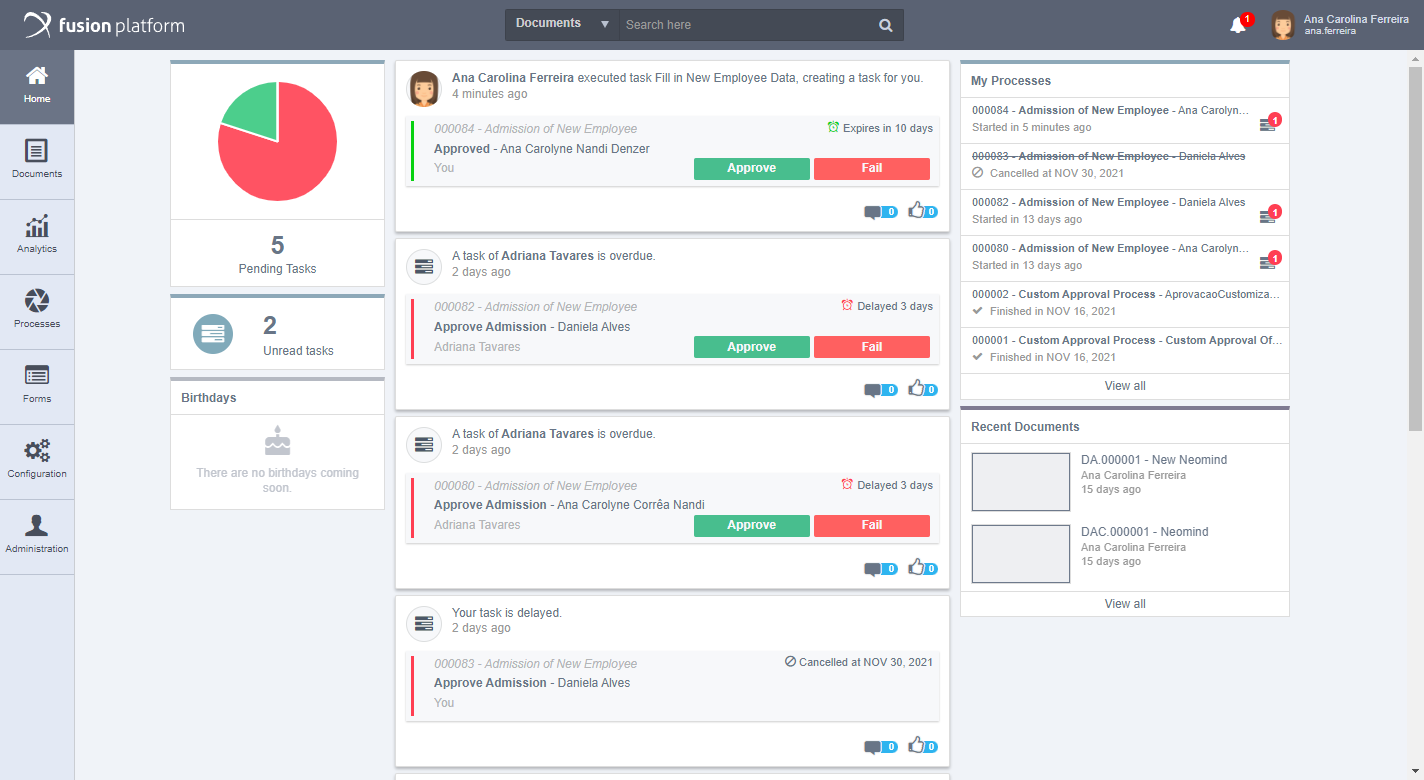
This screen presents the menus and functionalities offered by the system. Located on the left are the menus: Home, Documents, Analytics, Processes, Forms, Configuration, and Administration. When you click on any of these menus, they expand for a better view, as shown in the next image:

If you want to return to the main screen and/or remove the extended menus, simply click Home or outside the menu area. From the bell icon located in the upper right corner of the home screen, you can access your new notifications.
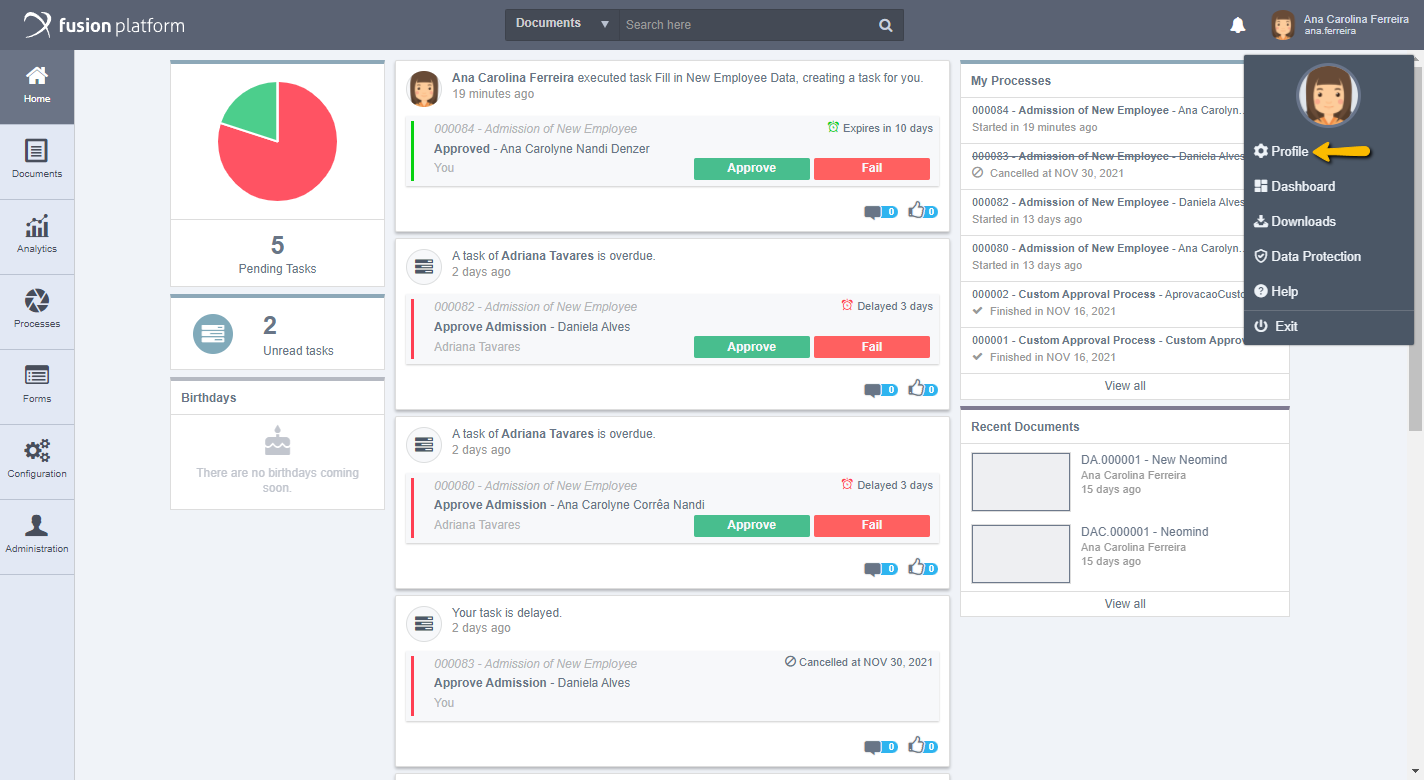
By clicking on your username, next to the notifications, go to Profile, for user profile settings, Dashboard to be redirected to the user's Dashboard screen, Downloads to open the Downloads box, Data Protection to access documents related to data usage ( Privacy and the Terms and Conditions of Use), Help opening the Fusion Platform Help Center. In Exit, finalize your access to Fusion.
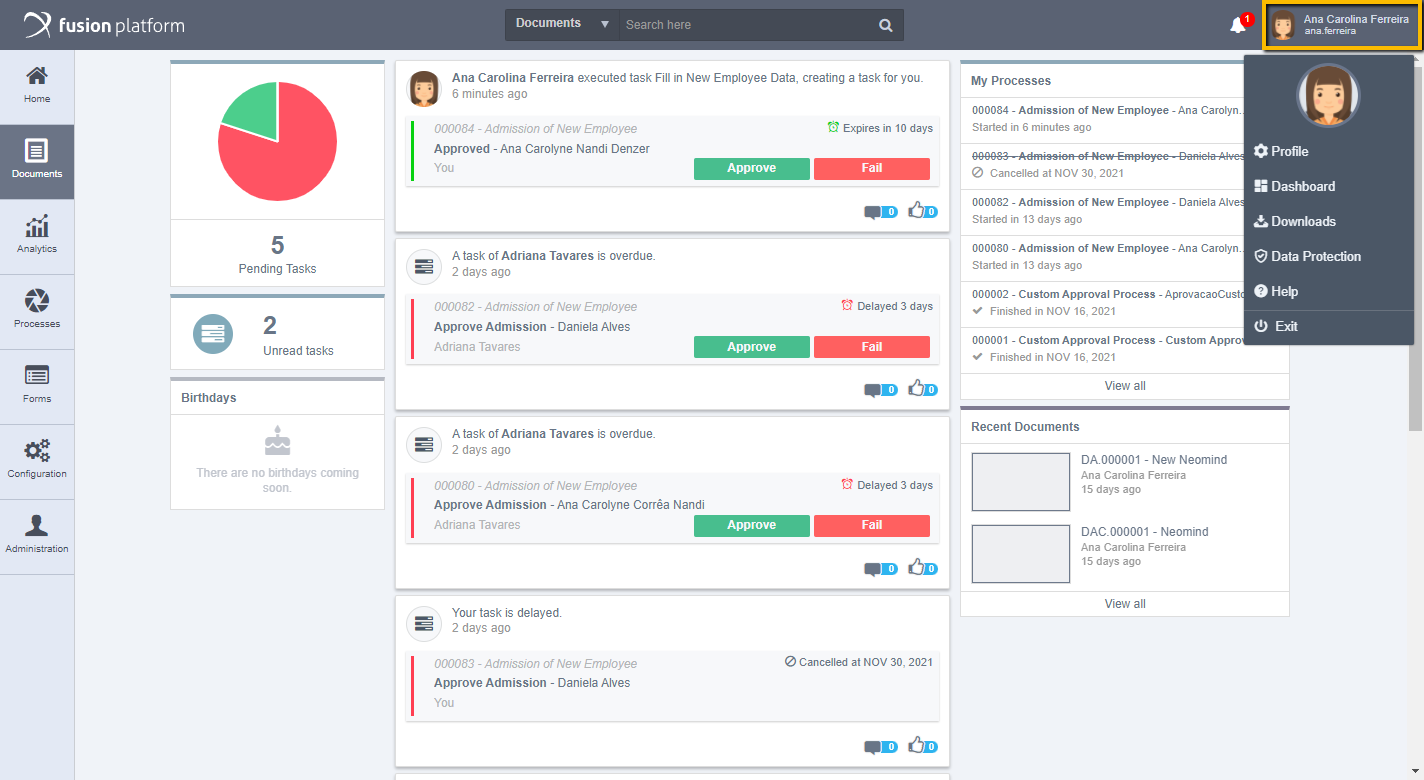
Note: The Data Protection menu option will only be available if there is a document related to data protection registered in the system by the administrator.
Data Protection
If the general administrator of the system has configured the data protection documents, on the first access following the configuration, the user will be directed to a screen with the Fusion document viewer displaying the Privacy Policy and the Terms and Conditions of Use so that it can be accepted by them.
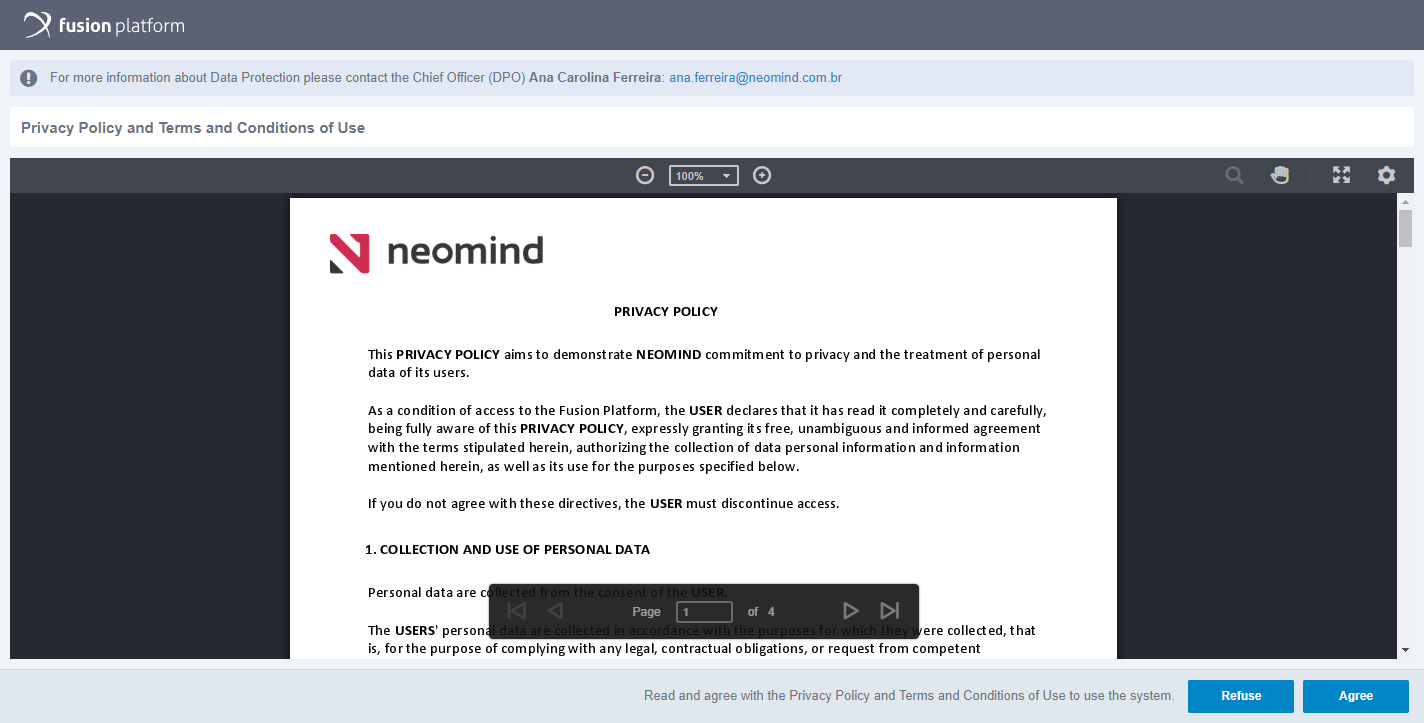
On this screen you can identify some information as well as read the documents and accept them.
Note: Each time one or both of the data protection documents are updated, acceptance must be made again. If multiple updates are made, the most recent one will be displayed for acceptance upon login.
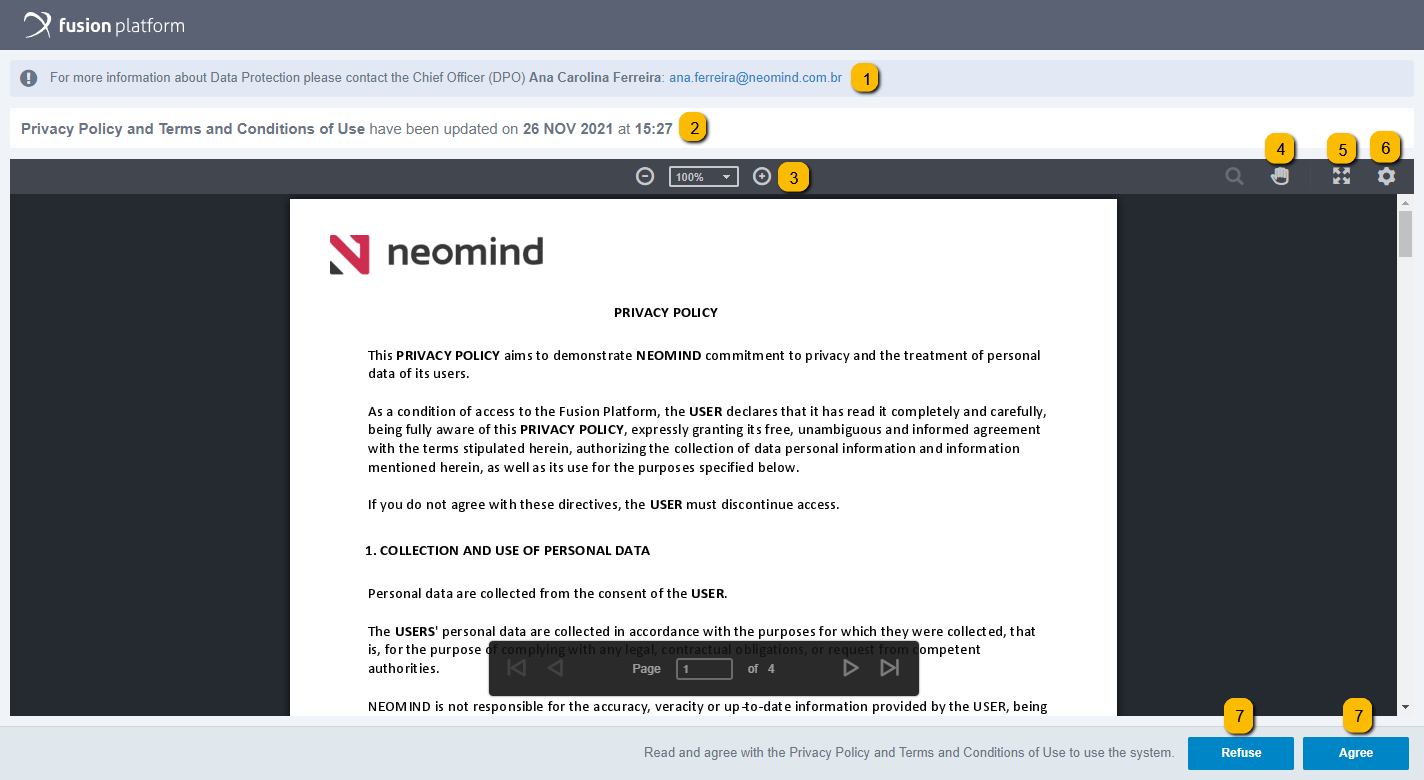
In this block it is possible to identify information such as the name and email of the data protection officer, the DPO. Clicking on the email opens the email application that is installed on your computer so that you can send it with questions, for example.
If changes have been made to the published data protection documents, this notice is displayed identifying which documents were changed and when it was made.
By clicking on the (+) and (-) icons you can zoom in and out respectively. You can click on the box and select a pre-defined percentage size option available.
By clicking on the “hand” icon you can navigate manually, swiping around the page more naturally.
When you click on the “arrows” icon, the preview is displayed in full screen within the browser.
Clicking on the “gear” icon displays the option to lighten the background, you can enable or disable this option.
Finally, after reading the documents, you can accept the document by clicking on the Agree option, or, if you do not accept it, it must be clicked on Refuse, so that your position in relation to data protection is registered.
Note: You can find more detailed information about the Fusion Universal Document Viewer under Documents > Document Center > Document Management > Viewing Documents.
If you agree and accept the documents, the navigation is normally released afterwards.
If you don't accept and click confirm, a screen appears as shown in the following image:
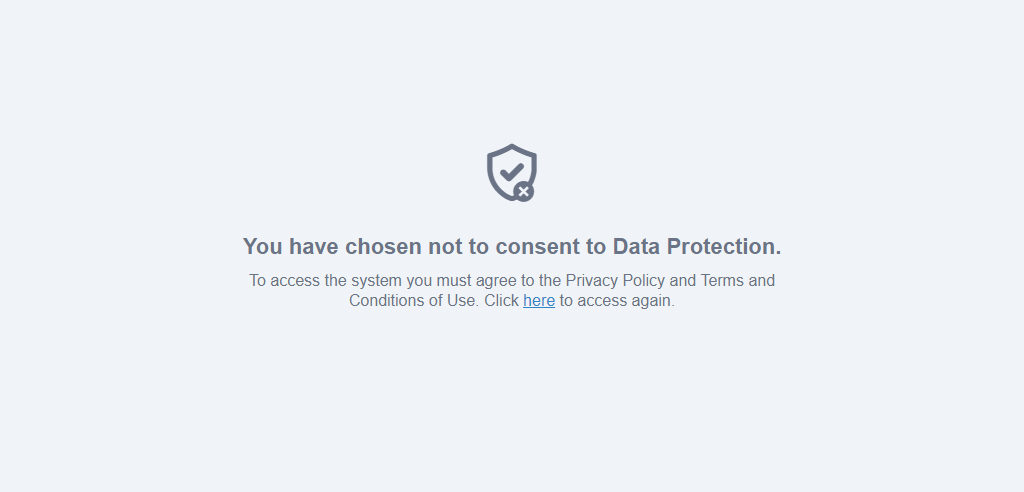
By clicking “Here” you are redirected to log in again, and when you log in, you can interact again with the documents.
Navigation in the system without their acceptance is not allowed, as Fusion will use your data to identify the performer of a task, for example, as well as have data related to the company, such as new projects, for example, and possibly related to customers, such as contracts, and all this data must have its use under legal guardian.
By accessing the user menu, if your administrator has already registered the documents, the user can access the item Data Protection.
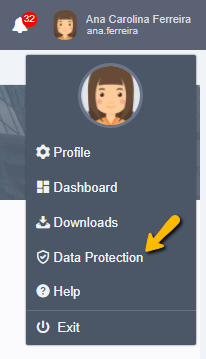
By clicking on Data Protection, the user will be able to access again the documents to which they have accepted, to read again or to revoke consent to them.
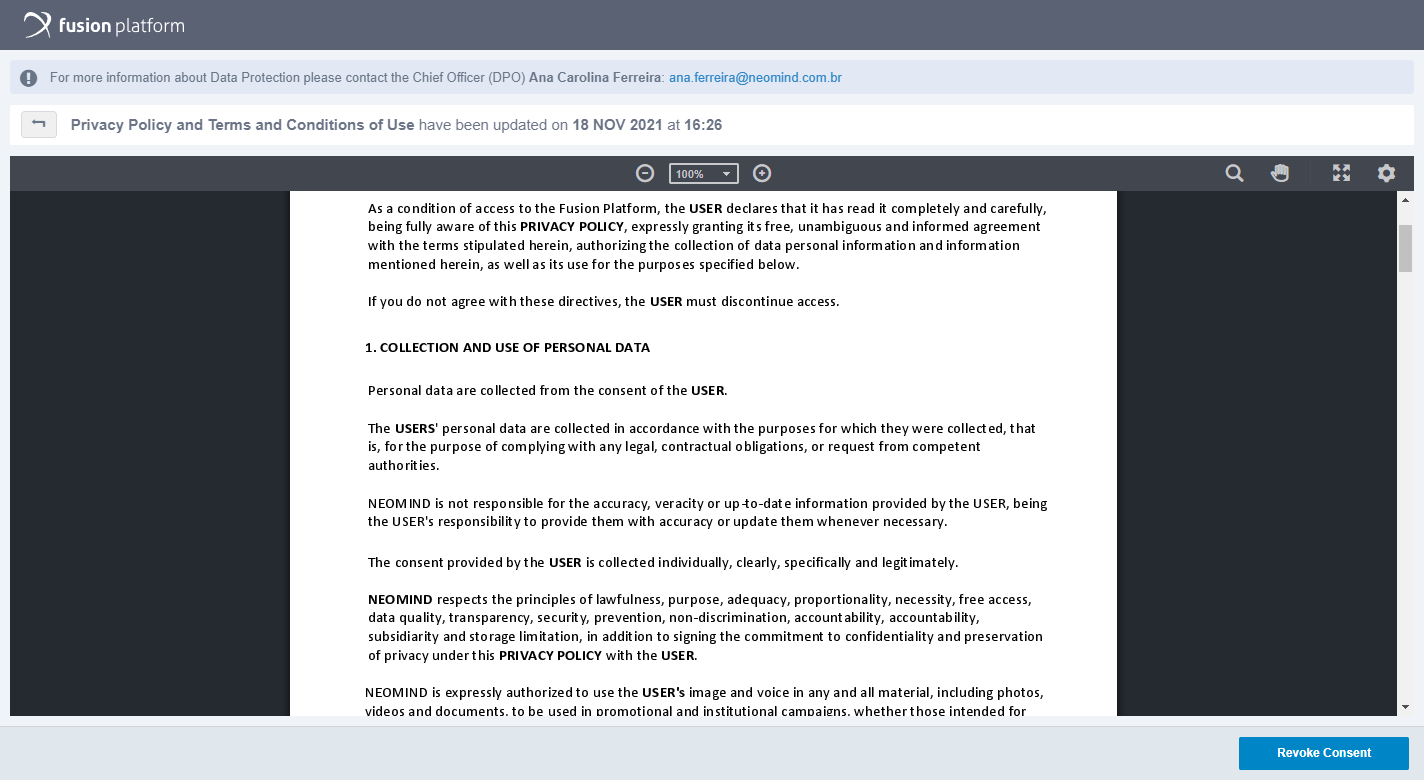
The screen will present the information according to the initial consent screen, but there will be a button to revoke consent. When you click on it, a modal opens according to the screen below:
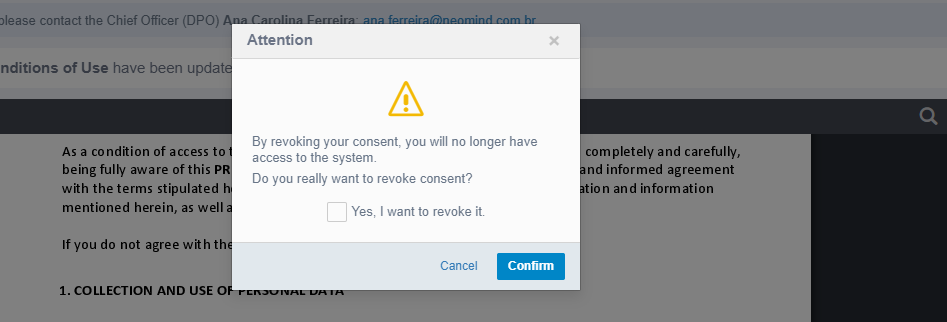
By confirming you will be revoking the acceptance and losing access to the system. Therefore, at the end of the revocation, the following screen is displayed:
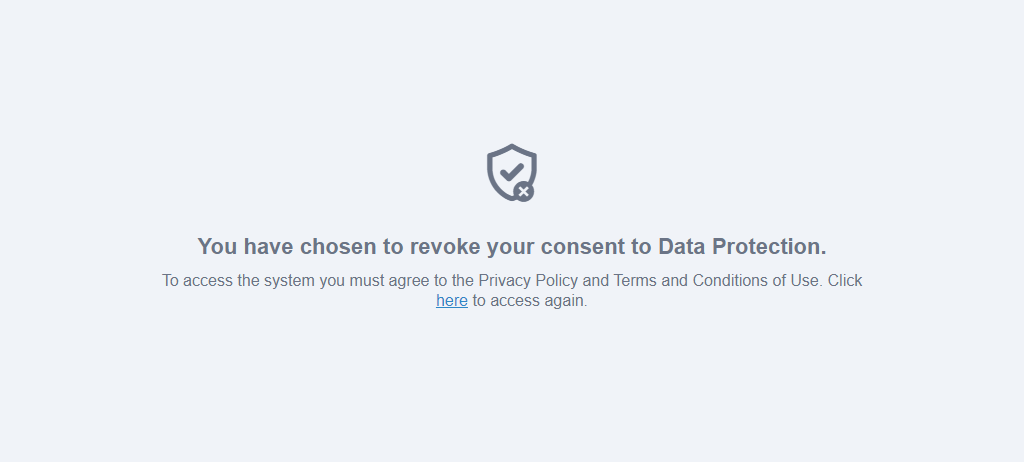
Clicking “here” will take you to the Fusion login screen.
After agreeing to data protection documents, a shield icon will appear next to your name in the user profile.

By hovering the mouse over the icon, you can see information such as the user name, date and time when consent was made to documents related to data protection.
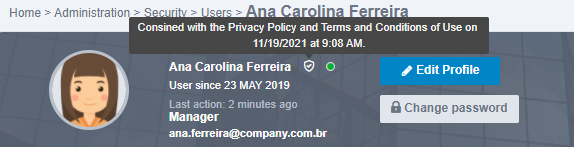
If the system administrator accesses the user's profile, he will be able to identify when the consent was made by hovering the mouse over the icon and, if consent has been made on documents that are no longer in force, the phrase “The version of the consented documents is out of date” will be displayed. also.
Performing Searches
On most Fusion screens, the “Search here” option will be available, where documents or processes can be consulted:
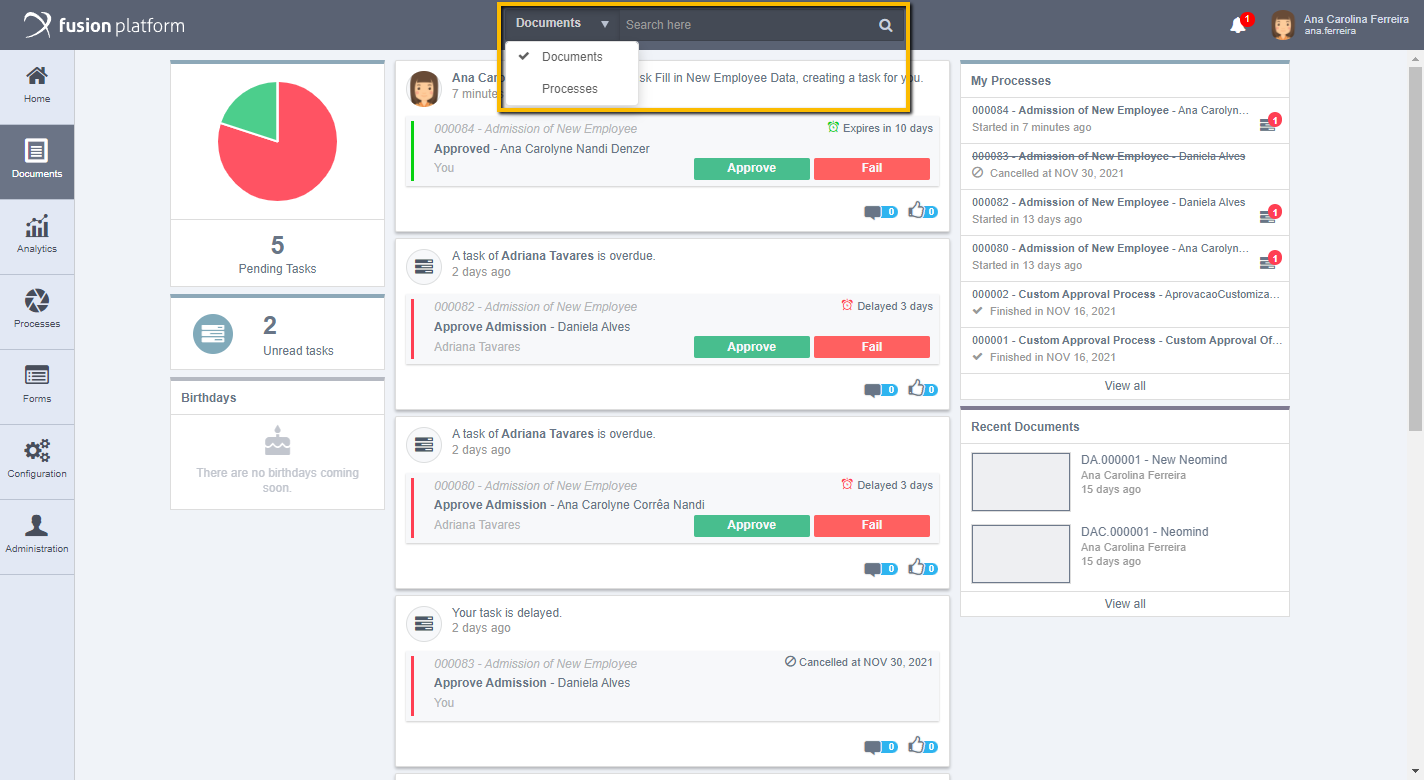
In documents
In Search here, enter terms in common with the document you are looking for, then click on the magnifying glass or press Enter to complete your search. Document or process titles, activity names, subjects in documents, tags on documents, usernames, or even keywords can be searched in the content of a file.
If you are not sure which term you want to search, Fusion allows you to search by fraction of the word, for example: when searching for “collab”, they can return processes that contain the word “Collaborator".
In processes
When you carry out your search with the process option, the following screen will be displayed:
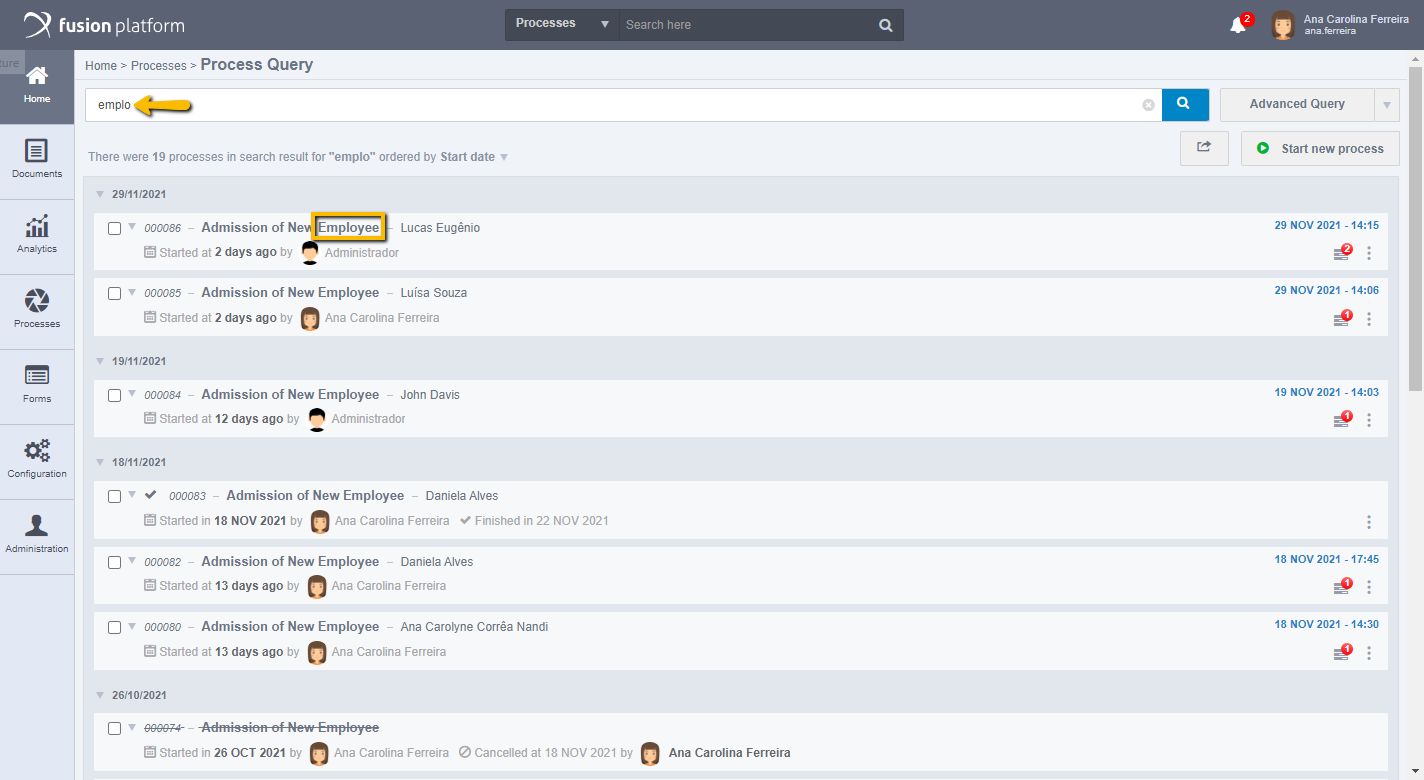
The search result is displayed in a list. For processes, your code, process name, title, date it was started, by which user, and if it has already been completed, will show the completion date.
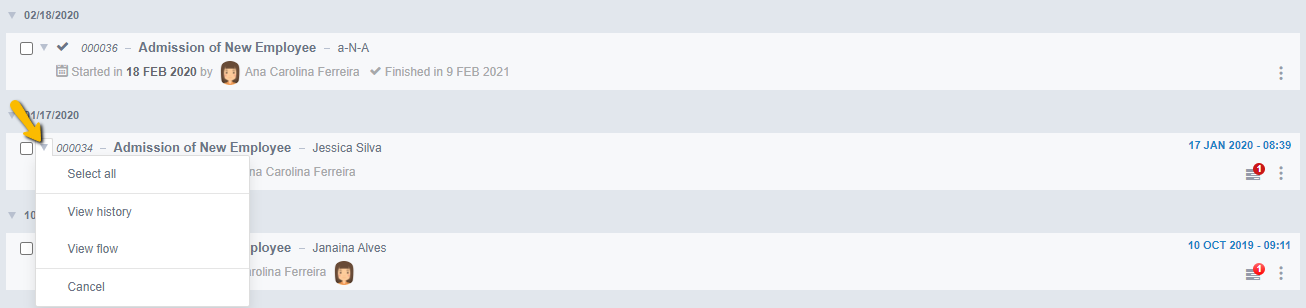
Each search result has a menu of options, being possible: Select all results, view the history, view the flow or cancel that process.
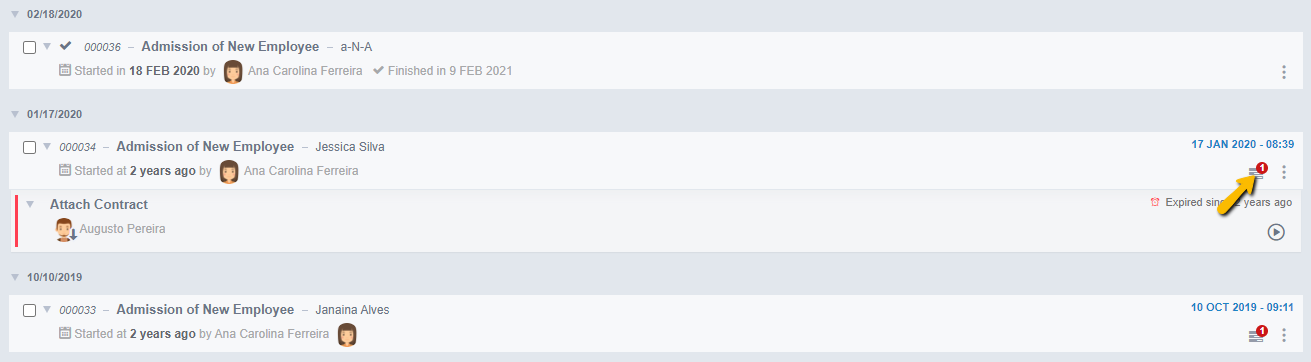
Attention: The options in the menu of each process search result will vary according to the access permissions of each user, in addition to the settings made in the process modeling, such as when the Reopen, or Move options are checked. For processes not yet completed, the pending activities icon will appear, which, when selected, expands the search result showing which activity is pending and which user it is with, in addition to presenting information such as time debrief, task deadline, the icon to put the task on progress and the bookmarks icon, as shown in the image below:
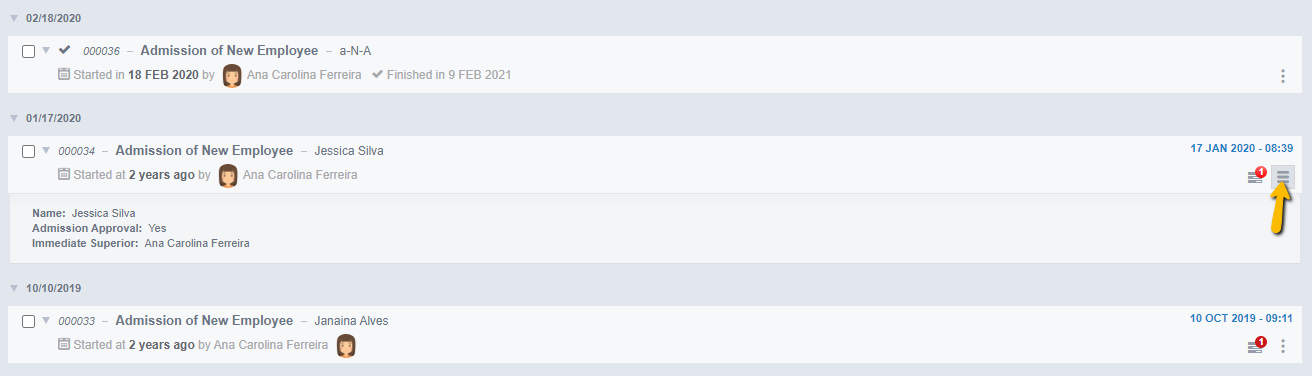
It will also appear next to the to-do icon, the summary fields icon, when you click on it, the process fields that are summary will appear.
Still in Search here, when you carry out your search with the documents option, the following screen will be displayed:
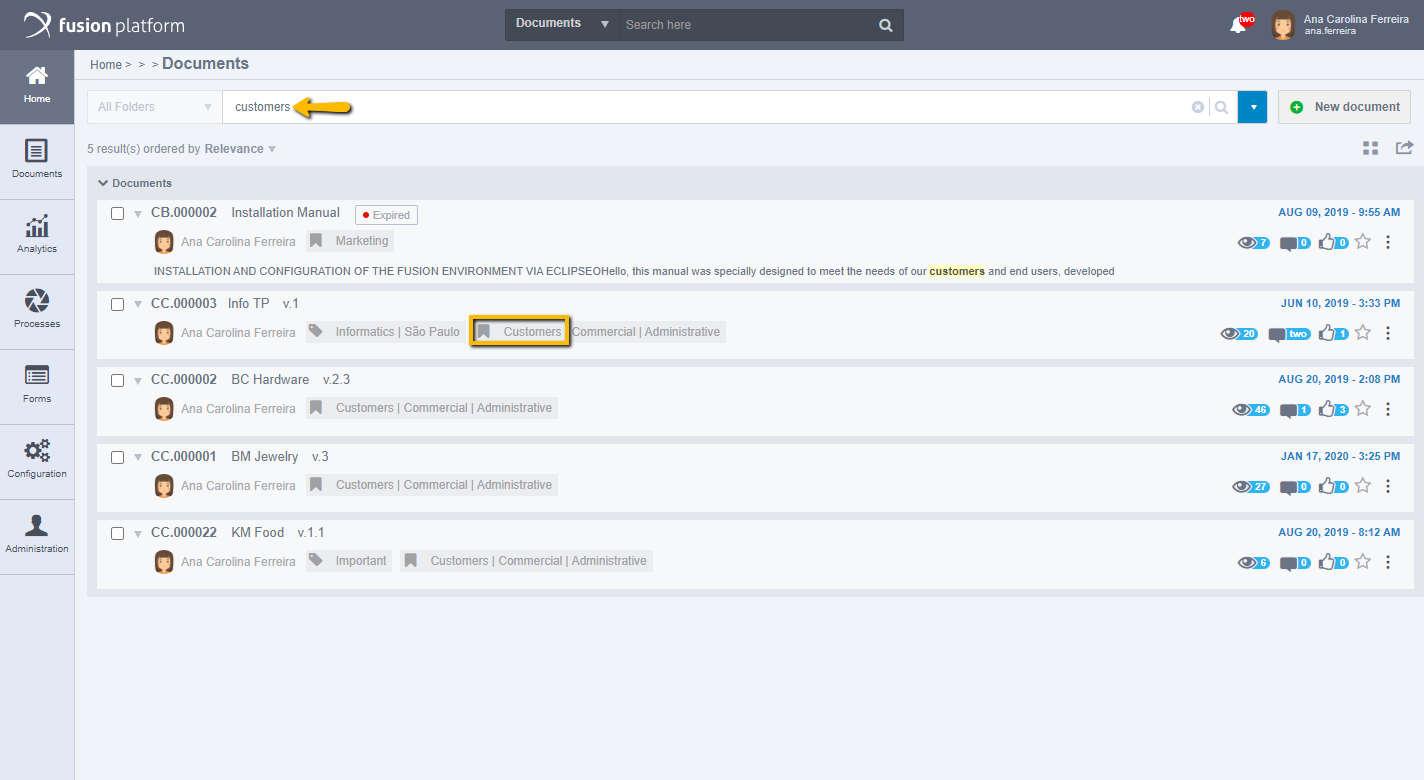
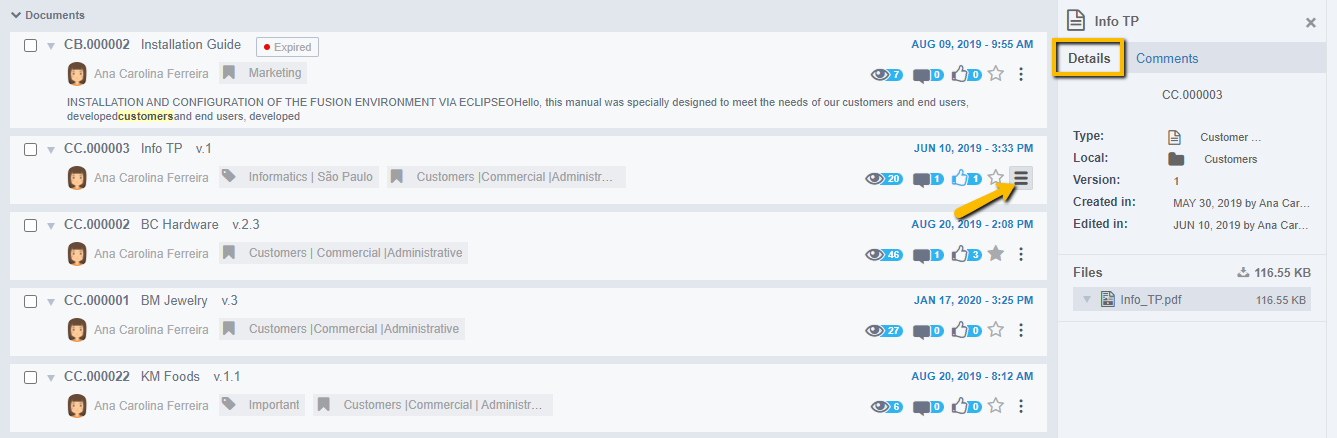
The search result is displayed in a list. For documents, your code, title, which user was published by, tags, and related topics are displayed. While in the right corner of each result you can see the date and time of the publication or last edition of that particular document, below are the social options of the document, favorite document and details that will be displayed in the following images.

Social options include the number of document views, comments, and likes. Also there is the star icon to favorite a document. Next is the icon to view details of that document, when you click on it, information will appear such as what type of document, the folder it was published, whether it has version and what version it is, date of creation and user that created it, date of edition if it has been edited and which user edited, in addition to the user itself file.
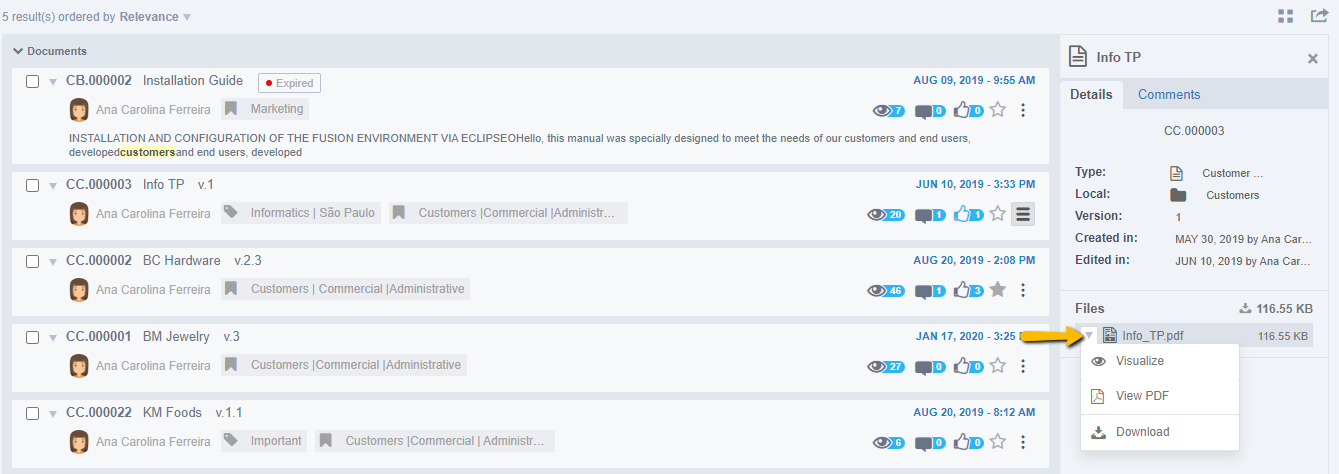
By clicking on the file menu, you can see the options about it.
Being:
- Visualize: This preview will be in the Fusion viewer
- View PDF: preview in PDF format and Download.
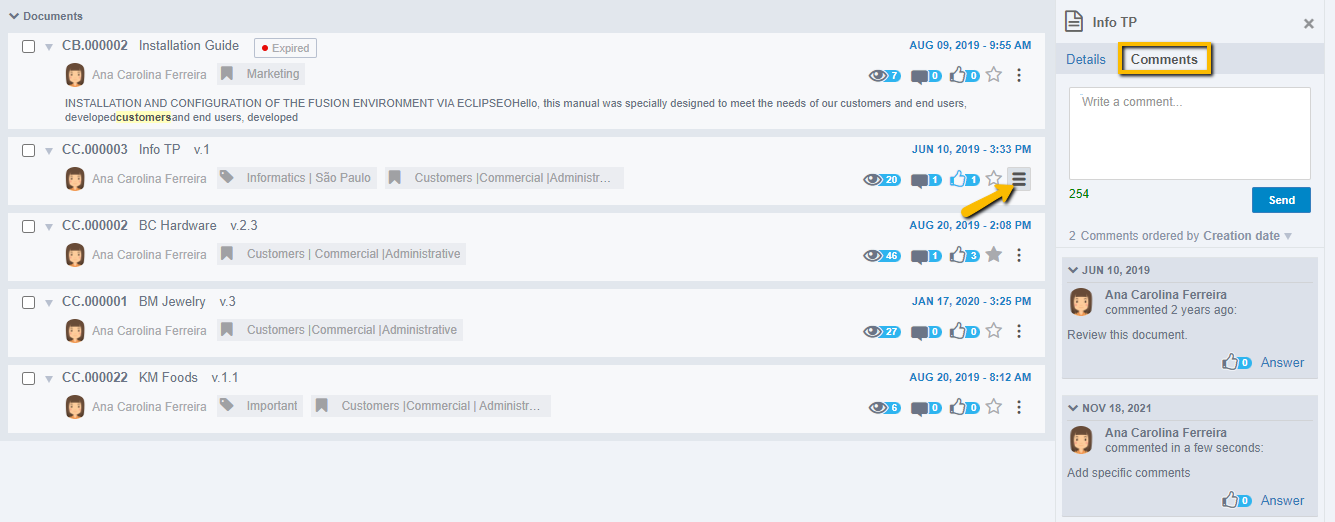
On the side tab are the comments published in that document, seen in the image below:
Also in the search result of Search here with documents, it has a menu of options for each result, being possible: Select all results, or in the management options: edit, visualize, move, remove, inactivate the document. In general options: download, generate link or copy. Or also social options such as like or favorite, as shown in the image below:
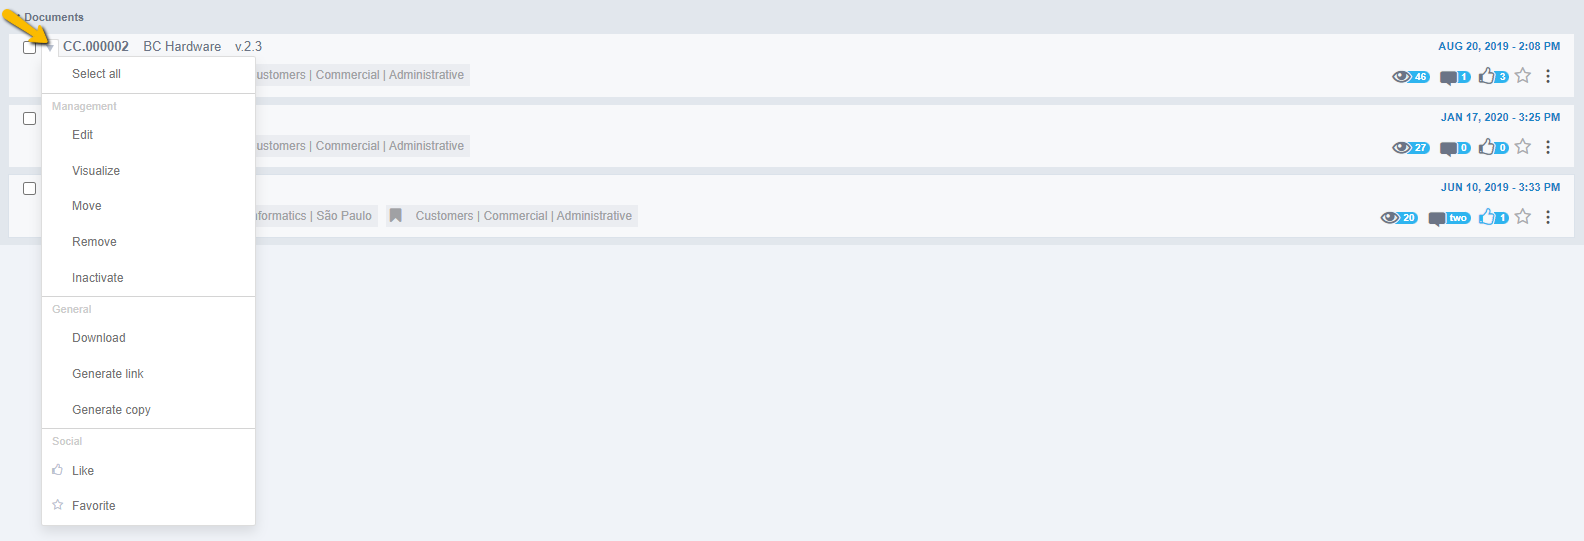
Note: The menu options for each document search result will vary according to the access permissions of each user and the document type settings. To modify these permissions, contact your Administrator.
Accessing Notifications
In notifications, view your interactions, new tasks, document updates, and more. The image below exemplifies the notification screen:
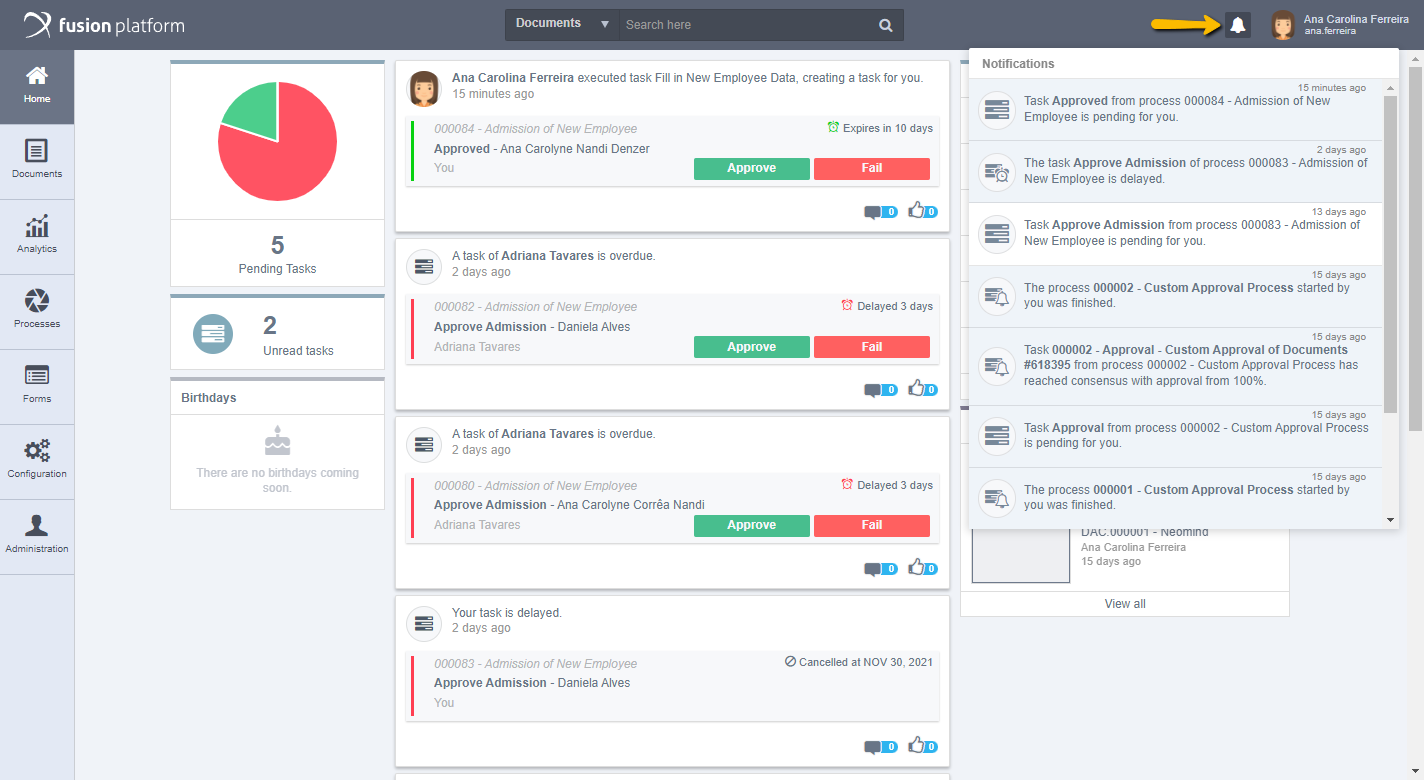
Notifications not yet viewed will appear. When you select any of them, a screen is displayed with the notification data, which can be tasks, documents, according to the notification selected.
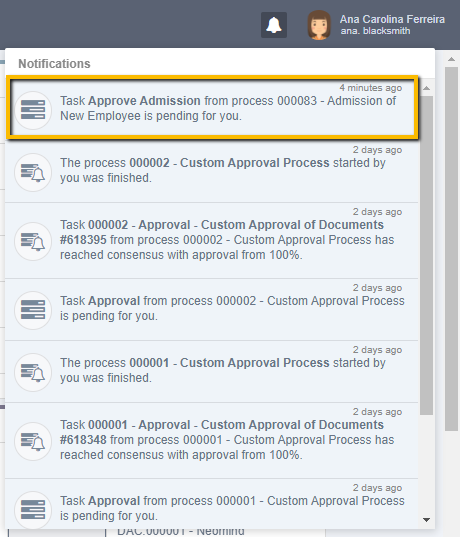
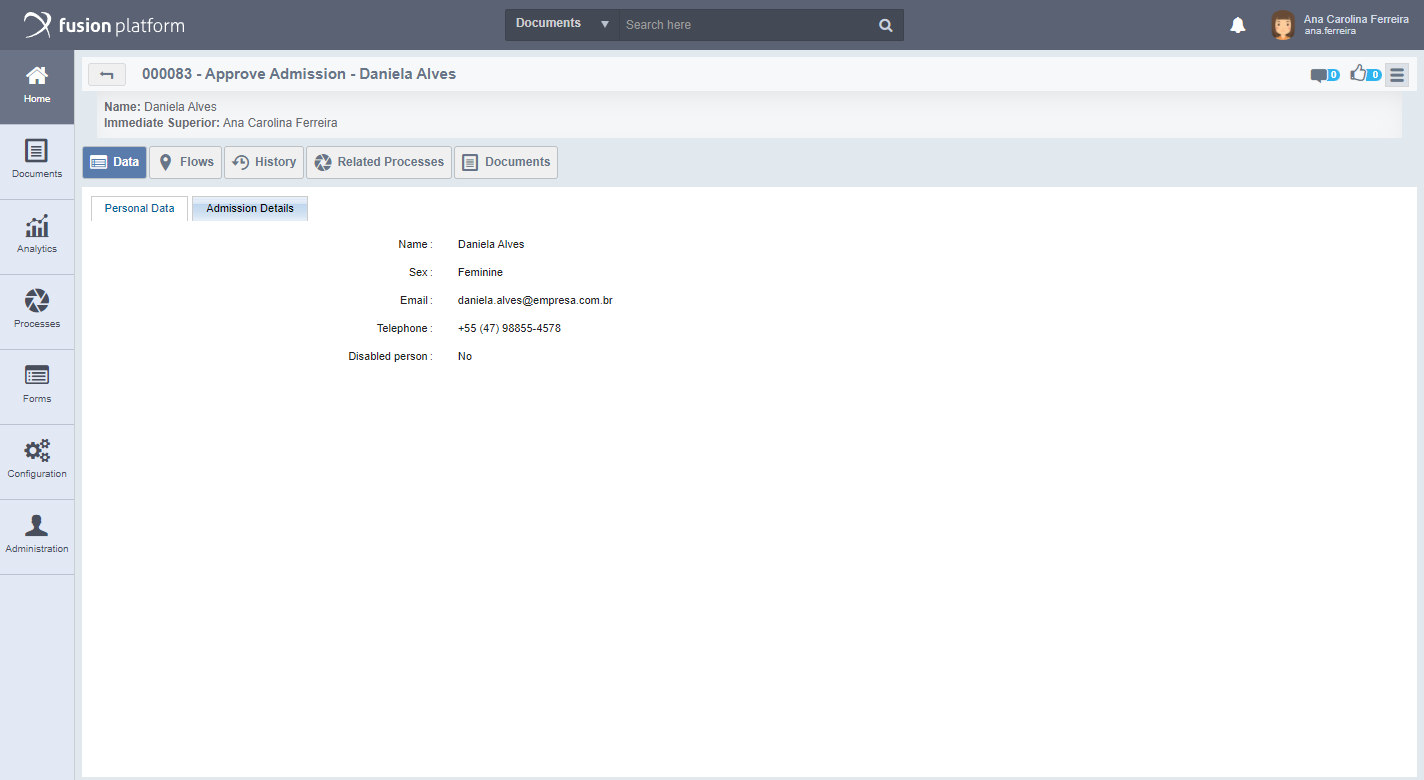
The images below first exemplify the opening of a task notification and redirecting the user to the task in question:
Attention: In Profile in the Notifications tab, customize the notifications you want to receive.
User Settings
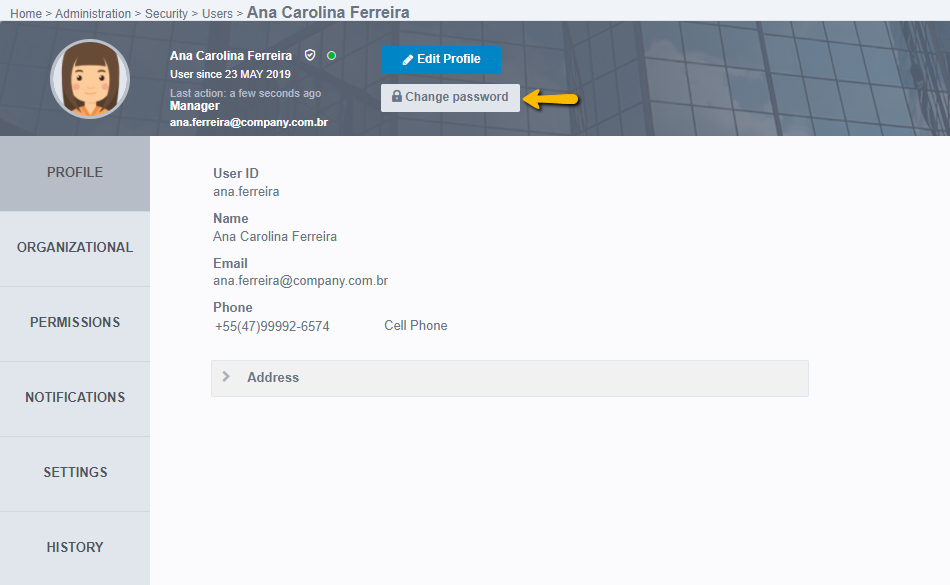
Fusion allows the user to modify certain settings, from personal information to viewing the interface. The user settings screen contains individual information of the logged in user. These are distributed in tabs for better viewing. To access user settings, click the user name. When you open a menu, click Profile, as shown below:
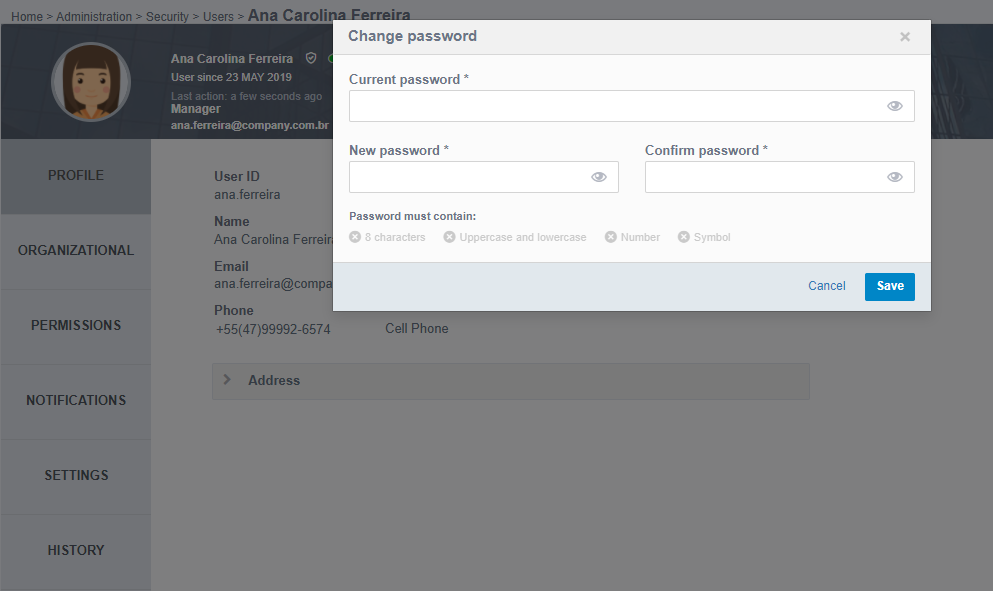
If you want to change a user's password, click Change Password, as shown in the following screen:
Then a screen will open where you can create a new password and confirm it, paying attention to meet all the minimum requirements set for the password.
Note: The change password button is only displayed when the user accessing the profile has edit permission for that user.
Attention
The Change Password option will only be available to:
- Users who have email registered in their profile;
- System authentication configured as Standard, in other words, if it is set as LDAP, CAS, SAML or Custom, this option will not be available.
- System authentication configured as LDAP when the user has a default password already registered by the system's general administrator.
Otherwise, only users with general system administrator permissions can change the user's password.
Click Edit, as the following screen displays:
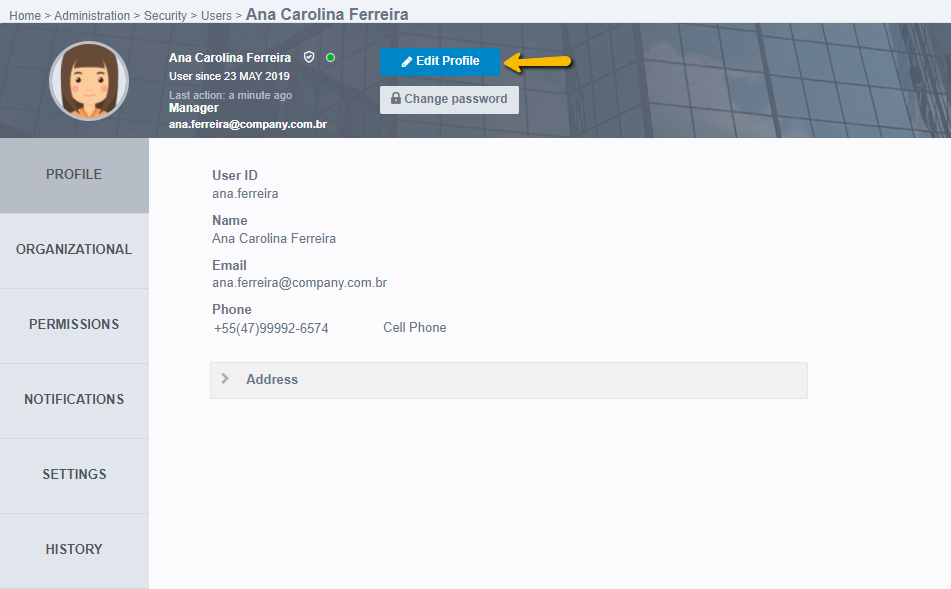
When you click Edit, the fields available to be changed became editable in each tab.
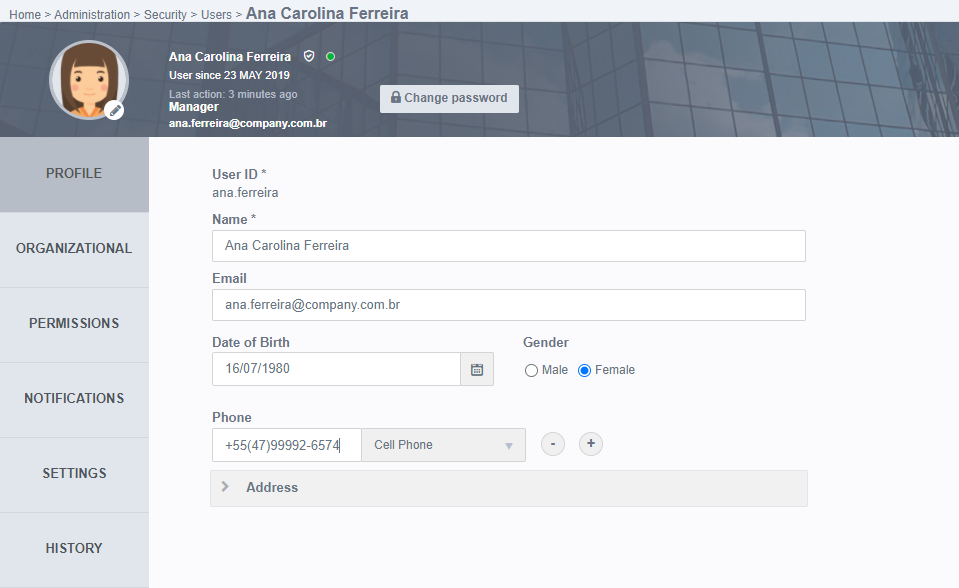
Focusing on the options available in the screen header:
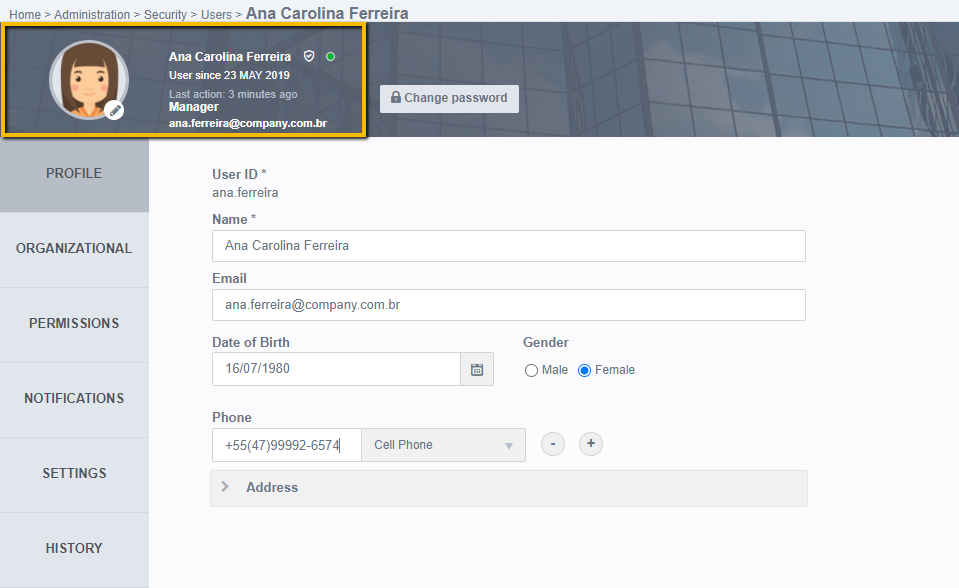
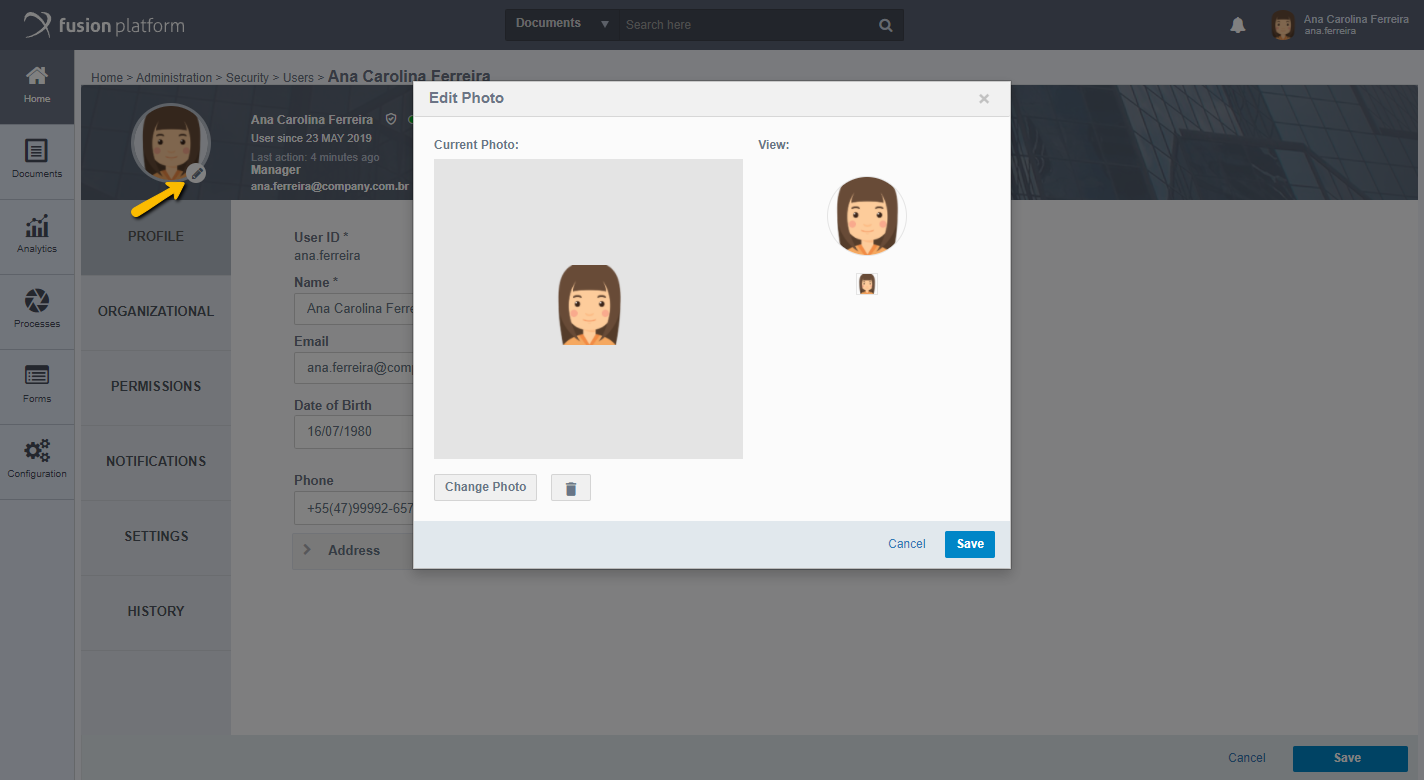
Some user information is available, such as: full name, online icon, time of registration in the system, last action taken, job title and e-mail. Next to it is available to edit the Profile photo, just click on the pencil icon and it will open the screen to edit the photo with the options of “Change photo” and Delete, through the trash can icon. We can see the editing screen in the image below:
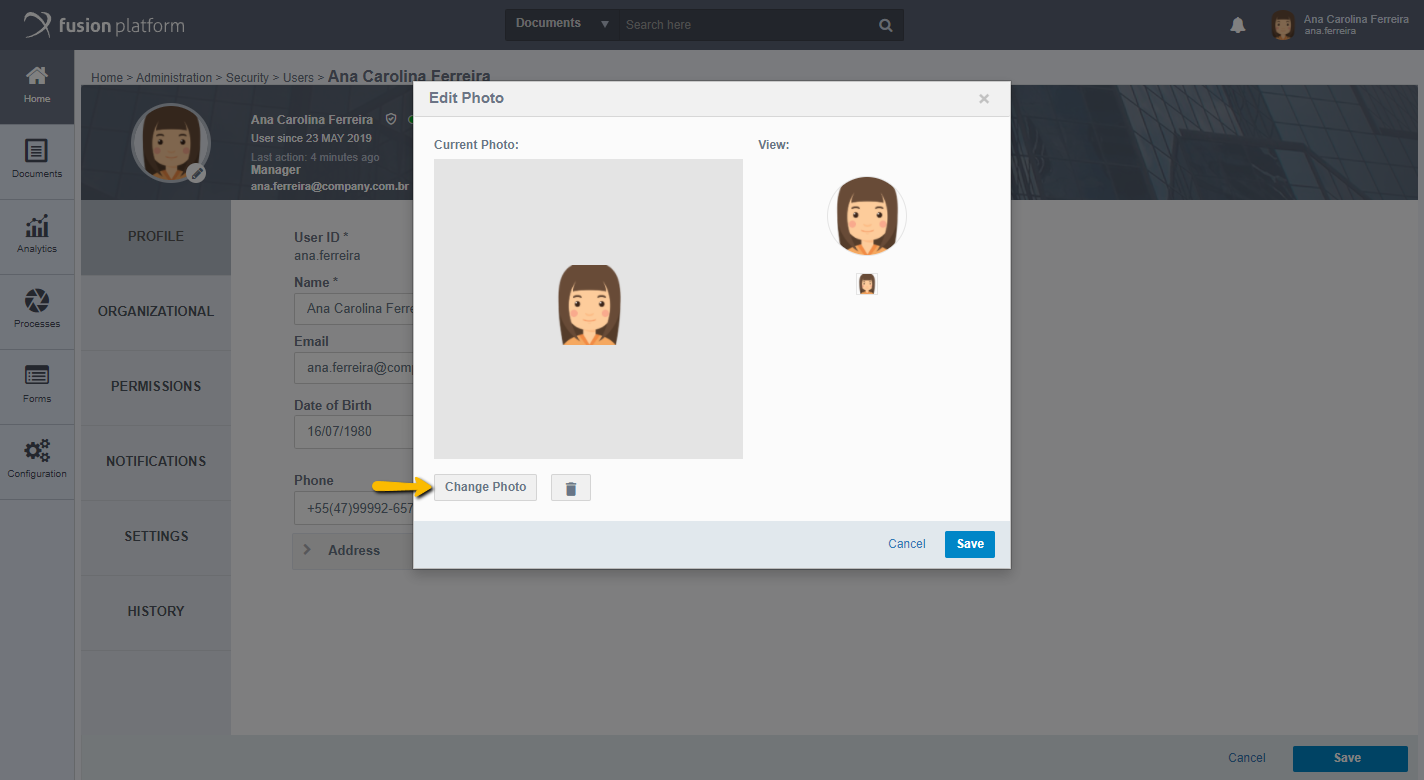
Click on “Change Photo”, as the following screen displays:
After selecting the new photo, you can adjust the image by dragging the clipping lines so that only the desired area of the photo is displayed. In View, you can learn how the photo will appear in Fusion. As the picture below:
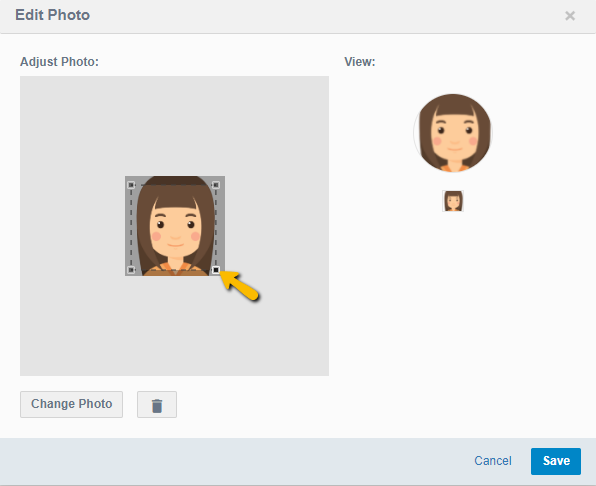
To discard the photo, simply click on the trash can icon. When editing is complete, click Save.
Other information about the user is arranged in tabs, for better organization and visualization. Within each tab there are mandatory fields and others only for information, these will be described below by tab, along with their forms of completion. The first tab available for editing is the Profile tab.
Profile
In the Profile, this is where the user's personal and general data settings are configured.
- User ID: This field informs the user login, which is also considered its code. To create this field there are some requirements:
- It is necessary to create an ID different from the existing ones;
- You can not use special characters (except for the "." and "-");
- There is a character limit for this field, which is 64;
- It cannot contain spacing.
- Name: It is mandatory to enter the user's full name.
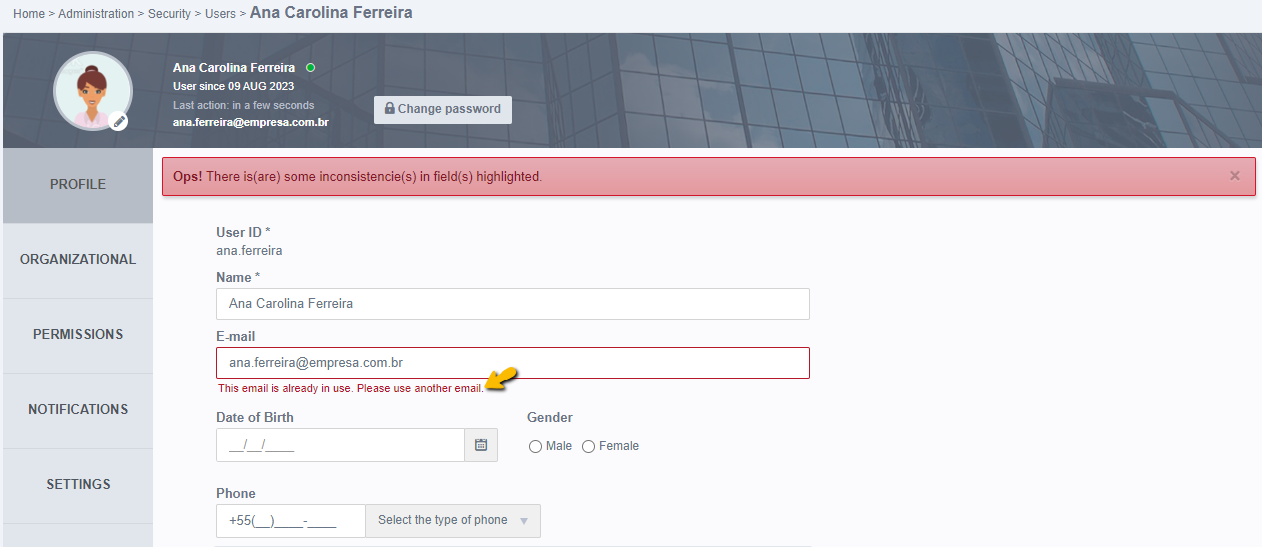
- Email: You must enter the E-mail address so that notifications for Fusion jobs can be sent via email. In addition, if the user forgets the password and has set up sending email, Fusion helps create a new password by sending a confirmation email.
Attention
From version 3.19.0 or higher, when changing or registering a new email for a user, and the same email is already being used in another account, a validation message will appear on the screen informing that the email address is already in use. Therefore, the user cannot be saved until the email is changed.
Note
In all emails forwarded by Fusion, if the "Subject" field exceeds the limit of 255 characters, it will be forwarded as usual, but it will generate three dots at the end of the subject in the email.
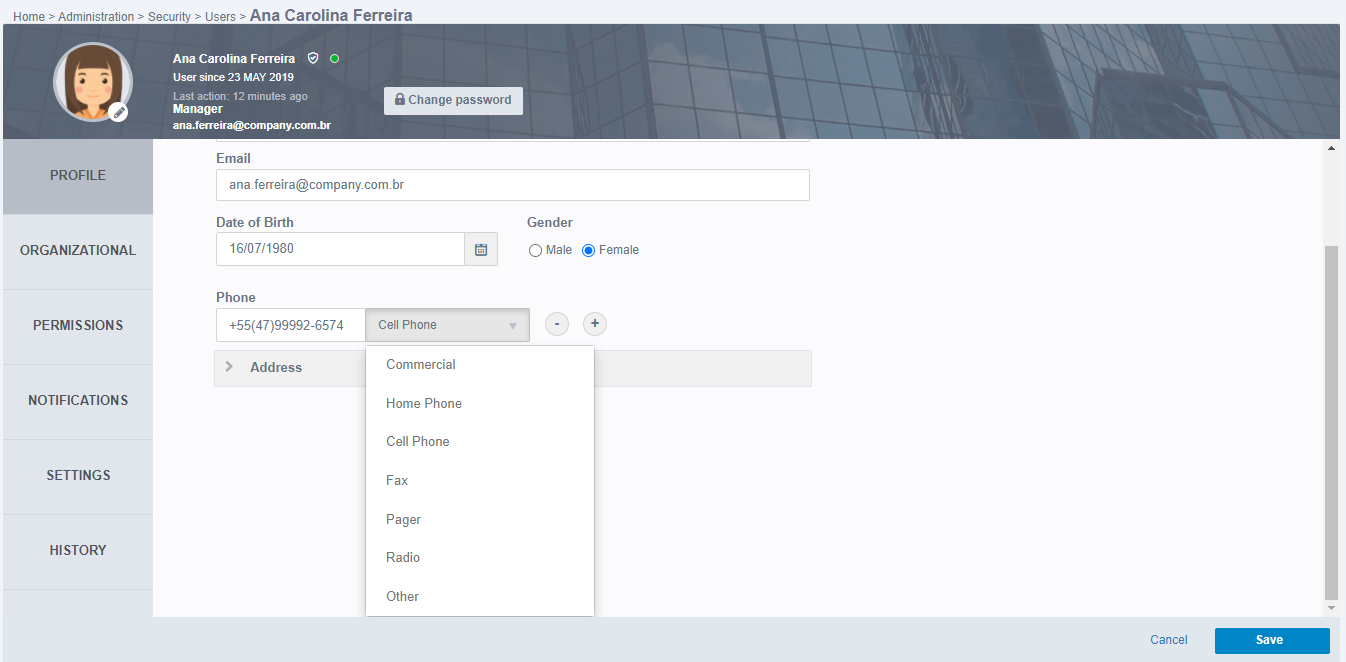
- Date of Birth: Enter your date of birth.
- Gender: Mark gender.
- Phone: Enter phone numbers in this field. It is possible to register as many numbers as needed through the (+) button, and remove numbers from the (-) button. Next to the phone field it is possible to select its type, as shown in the image below:
- Address: During editing the user profile, you can enter or edit the address. When you click to expand the address settings, the following fields appear:
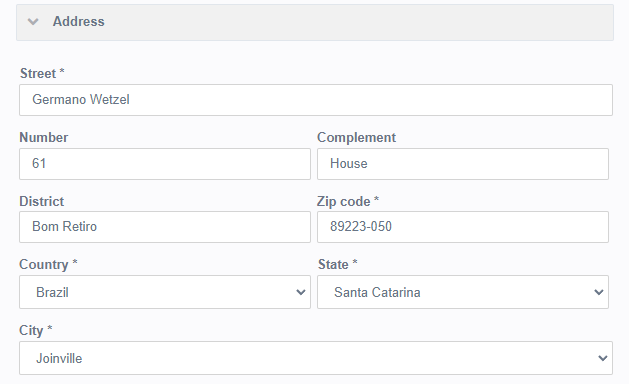
- Street: Street or street information is mandatory.
- Number: Enter the number.
- Complement: Enter a complement. Example: House or Block A - Apartment 10.
- District: Inform the district.
- Zip Code: It is mandatory to inform the ZIP Code.
- Country: Enter the country.
- State: When selecting the Country, they will be displayed to select only the states that belong to that country.
- City: Selecting the State will be displayed to select only the cities that belong to that state.
When complete, click Save to make the data for all tabs effective. If you want to make more edits, you can do this and save all the changes at the end.
Organizational
In the Organizational tab are the fields related to the organization of the institution:
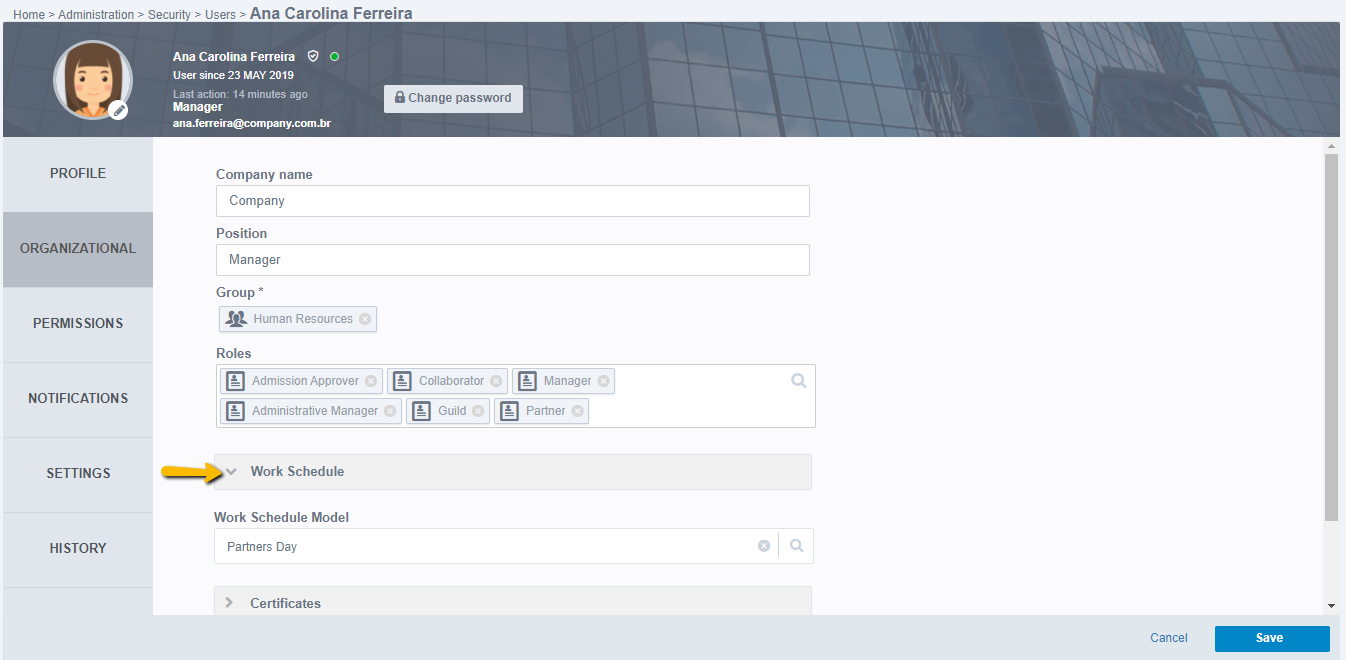
- Company Name: Enter the institution name.
- Position: Enter the position the user has.
- Group: It is mandatory to inform the group that the user belongs to.
Note: Only users with an administrator profile are allowed to change another user's group.
- Roles: Roles allow the user to relate to certain competencies performed in the company. To include roles, click on the magnifying glass icon and select the desired roles.
Note: Note that it is possible to have multiple roles linked to a user, but it is possible to have one and only one group.
- Work Schedule: The user's workday is selected, which contains the periods in which the user will be working. To select a workday for the user, simply click on the Work Schedule field that he will expand according to the image below, all registered journeys for choice will be available.
Attention: The workshops have an influence on notes of hours in activities of a process.
- Certificates: To ensure the user's suitability, Fusion makes electronic certificates available so that the user can enter digital signatures. The digital signature is valid as a paper signature and can be used in fields of type File. To view, simply expand Certificates, according to the following screen:
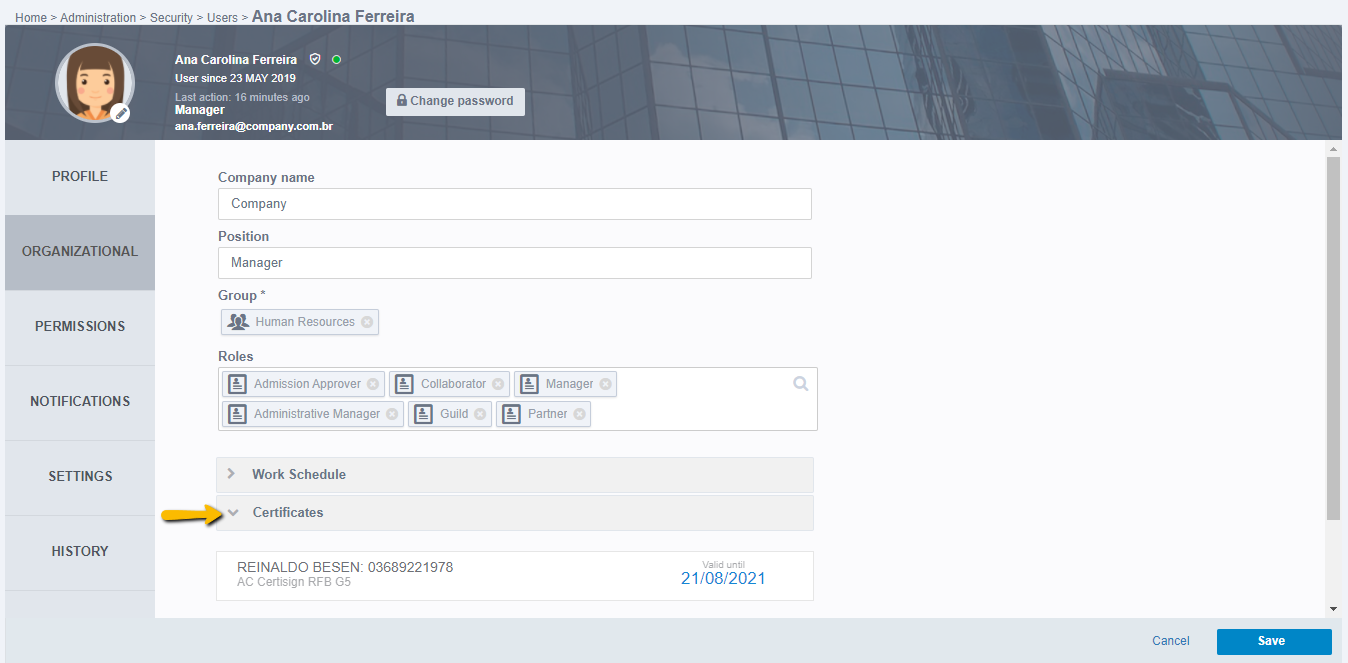
If the user has never signed a digital signature, clicking Certificates will display the message “You do not have Digital Certificates”. For digital certificates to appear, you only need to sign a document. With this, the certificate is automatically registered.
Once your certificate expires, you need to create a new card.
- Signature: In this area it is possible to insert the user's signature image. This image can be used in the construction of Adapters or also for viewing files. To be able to insert or view a signature image, you need to expand the Signature option by clicking on it, according to the image:
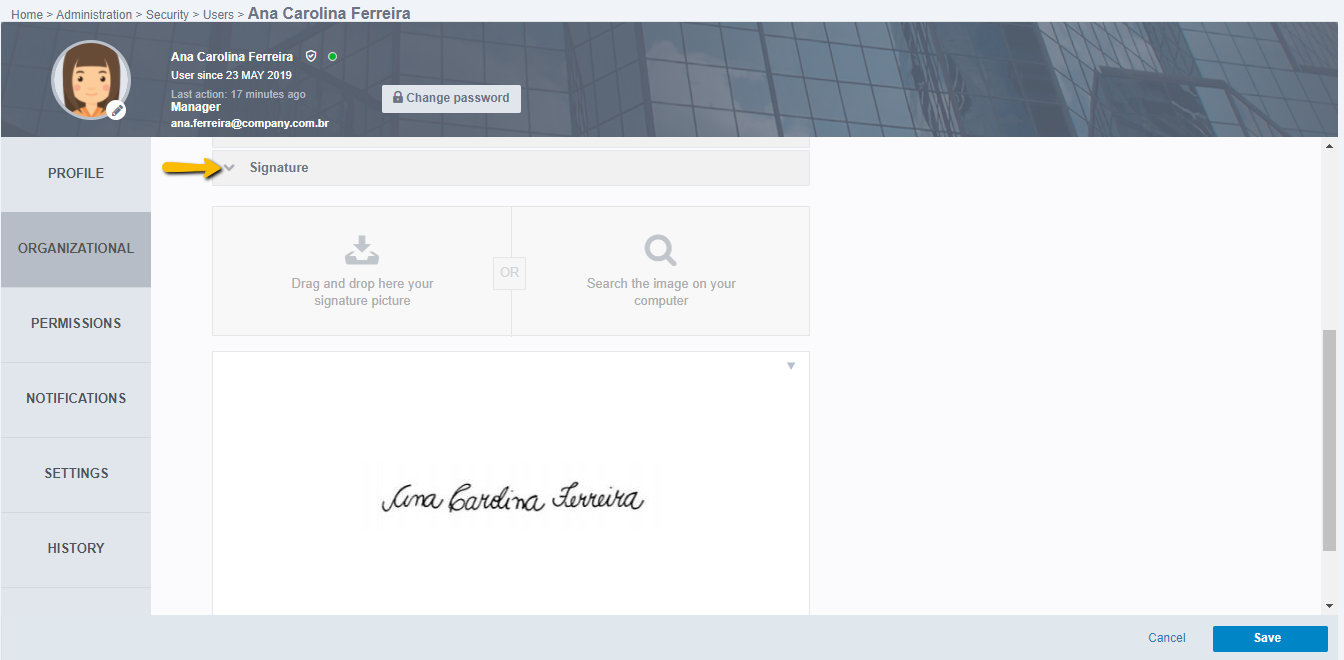
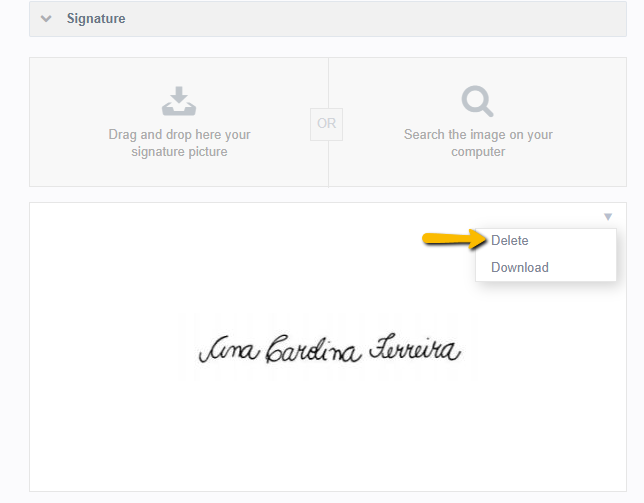
You can drag and drop an image to the specified area, or also click on “Search for the image on your computer” to find the image by navigating between the computer's folders. If you already have an image saved as a user's signature, you can delete or download the image by simply clicking on the image menu, as well as on the next screen:
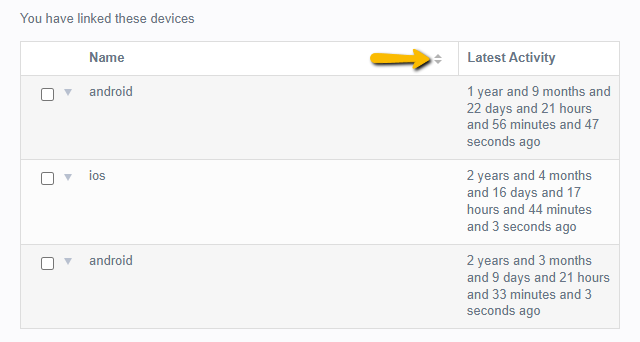
- Devices: Whenever the user accesses Fusion from a mobile device, whether mobile phone or tablet, the device name and the date of the last access will be recorded in this session. There is no limit on devices, it is possible to access as many times as necessary and from the device you want. To view the logs of connected devices, simply expand the Devices item, the name of the devices and the time of last access will appear as shown in the image below:
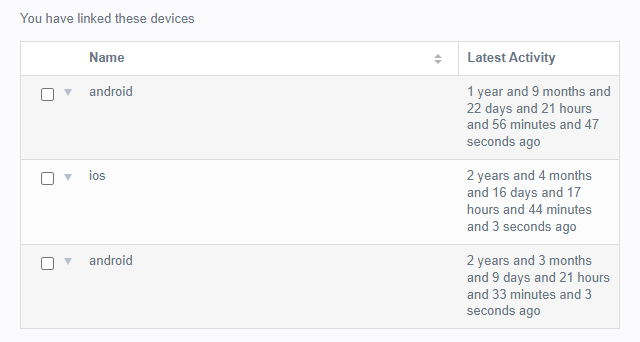
Linked devices can be reordered in either ascending or descending format, and then for devices with the same name, it takes into account the oldest activity to the latest.
The devices can be removed. To remove a device, click on its action menu:
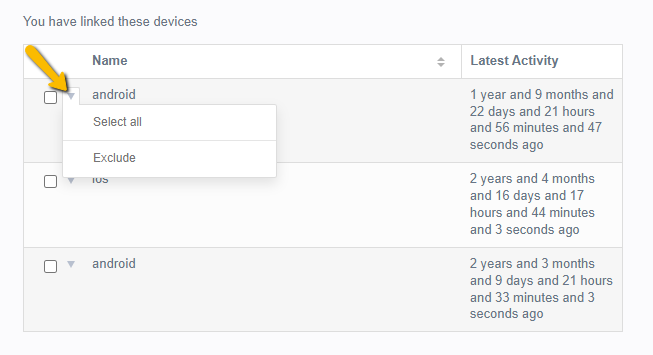
- Select All: Select everyone to perform the batch deletion.
- Exclude: Select to delete the device from the linked list, thus ending your session on it.
When complete, click Save to make the data for all tabs effective. If you want to make more edits, you can do this and save all the changes at the end.
Permissions
The Permissions tab contains Settings for user permissions, users under management, and temporary absent.
Attention: The change of permissions, management and temporary absent can only be performed by the user with an administrator profile, other users will only be able to view their settings. In the Permissions tab, there are the Access Profile, Management, and Temporary Absent items.
- Access Profile: You can view what activities the logged in user has access to. When you click to expand the “Access Profile” item, the permissions for that user will be displayed.
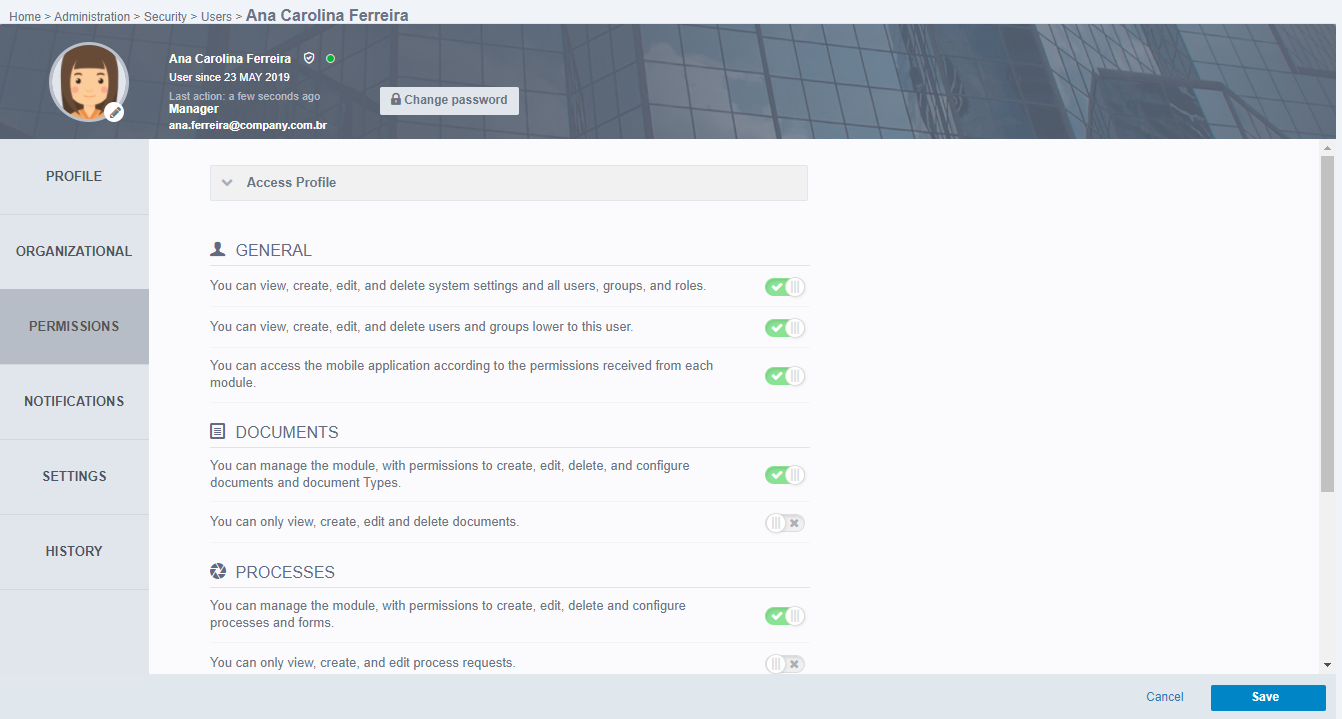
Note: Permissions can only be changed by a system administrator user. If you need to change your permissions, simply contact your administrator. Other users will not be able to change their permissions even if they are in edit mode, so they can only view them.
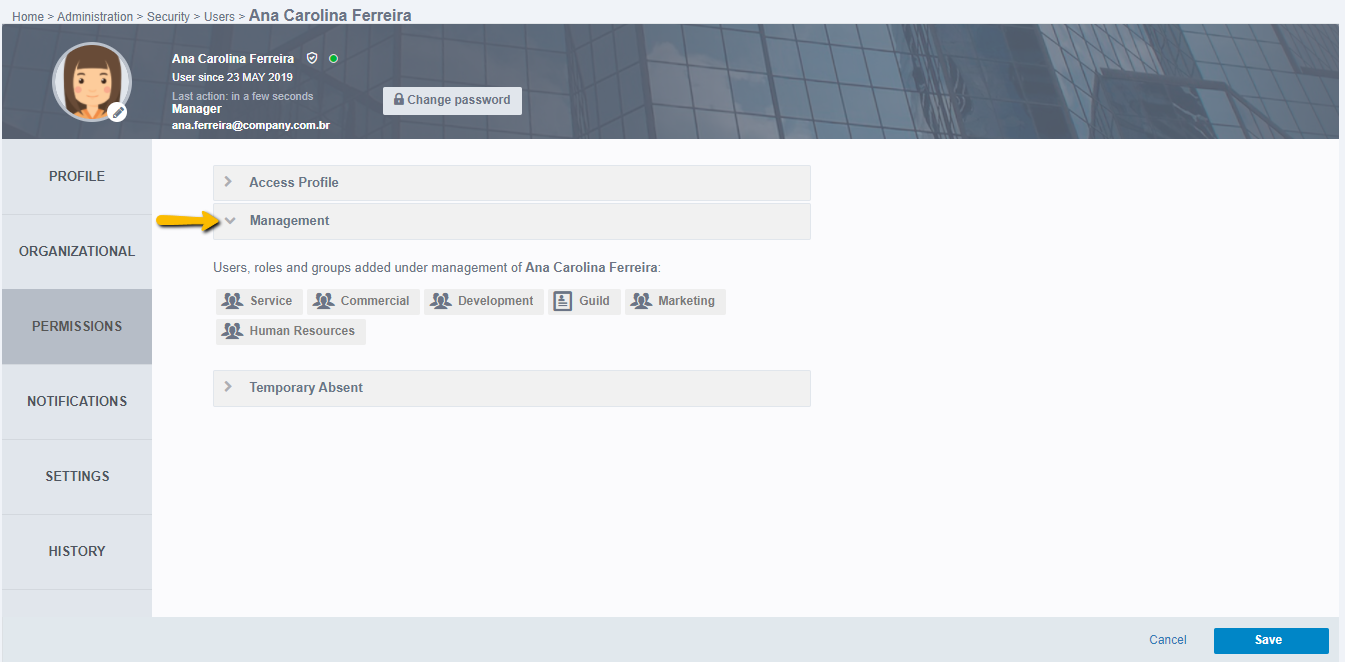
- Management: When the user has collaborators below him, that is, he plays a role of leader, coordinator, manager, etc., Fusion allows him to view the Task Center of his subordinates and also allows the user to perform tasks as manager on behalf of the user who is under his management. For this to be possible, it is necessary to link other users, roles, or groups to this. After registering the users, roles or groups under management, by clicking to expand the Management item, it is possible to see which users, roles, or groups are under management, according to the image:
- Temporary Absent: In situations where the user needs to be absent from the company, such as: Leaving Vacation or Medical Certificate, the Temporary Absent Register can be used, where a date or period of absence is entered, a user to assign the functions of that task center absent user and the reason for the absence. After registering, simply click to expand the item Temporary Absent, according to the following image of another user's profile:
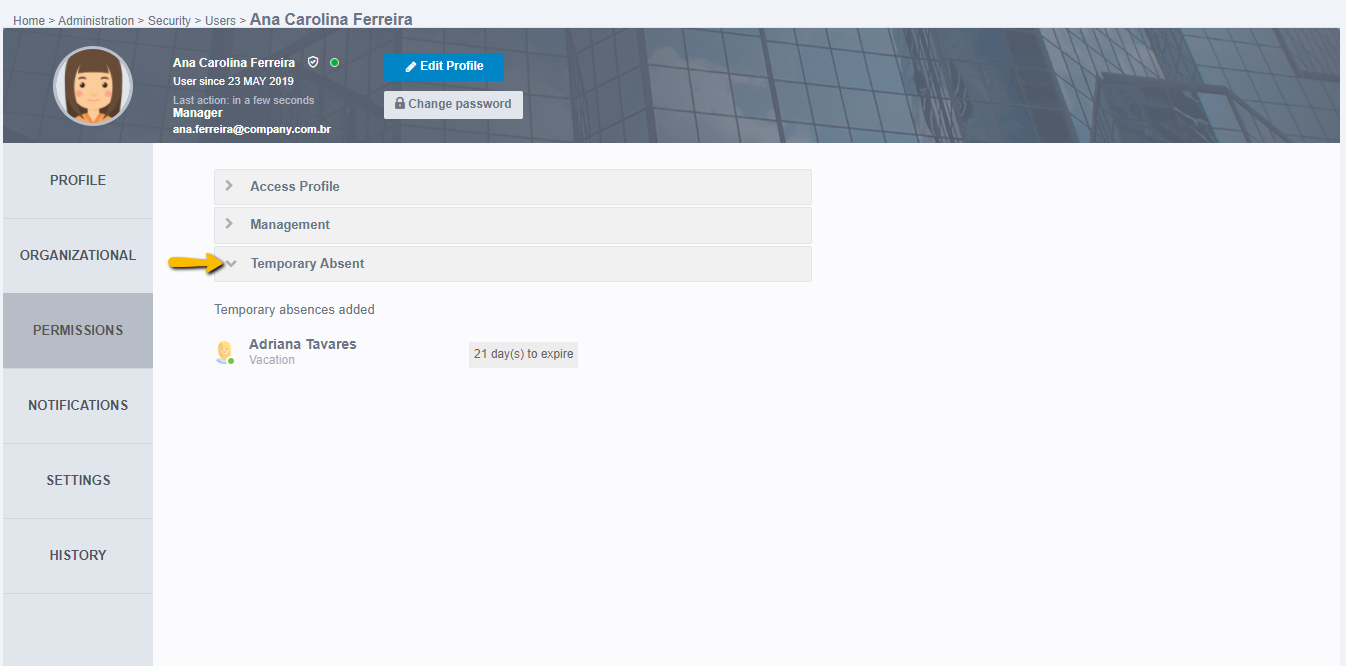
In added temporary absents, the user name for which the user's task center will be available will appear, underneath the reason for the absence and next to the time it will take to complete the absence.
Attention: It is possible to add future temporary absents, but they will appear in the receiver's task center only on the day of absence or on the start date of the absence period. When this is finished, it will be automatically deleted from the receiver's task center, but in the temporary absent registration of the absent user, it will be marked as “expired”.
When complete, click Save to make the data for all tabs effective. If you want to make more edits, you can do this and save all the changes at the end.
Notifications
In the Notifications tab it is possible for the user to configure which notifications they want to be alerted to. Notifications are displayed on the bell icon, located in the top right menu.
Attention: By default all notifications will be enabled to be issued.
Notification settings are divided into three items:
- Processes: By expanding the Processes item, you can view, check, or deselect which notifications you want to receive. Based on the items in the image below:

- Pending Tasks: “Notices of new pending tasks for you”.
- Available Tasks: “Notices of new assignments to take over, available in a pool that you are a participant”.
- Deadline: “Warnings about task situations. Example: Delayed or warning tasks (when less than 24 hours to expire)”.
- Warnings: “Notices related to processes or tasks that you are involved. Example: consensus of approvals, cancellation of processes, etc.”.
- Documents: When you expand the Documents item, you can view, check, or deselect which notifications you want to receive. Based on the items in the image below:
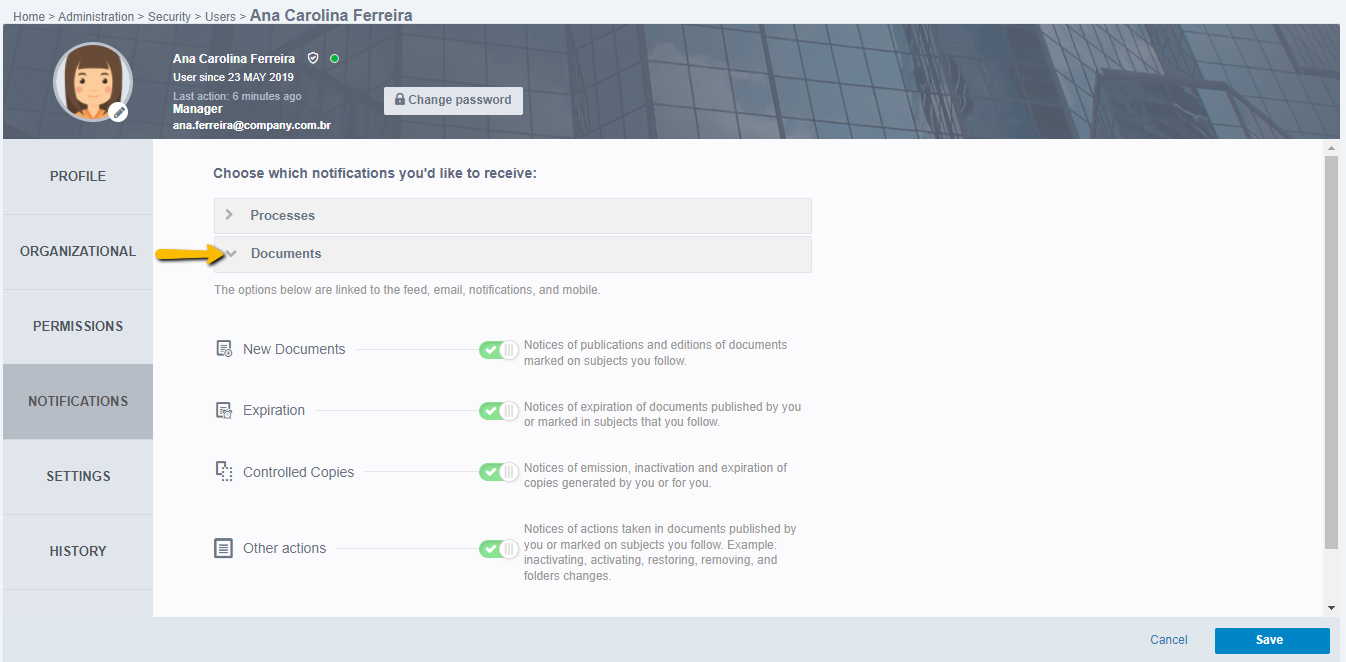
- New Documents: “Notices of publications and editions of documents marked on subjects you follow”.
- Expiration: “Notices of expiration of documents published by you or marked in subjects that you follow”.
- Controlled Copies: “Notices of emission, inactivation, and expiration of copies generated by you or for you”.
- Other Actions: “Notices of actions taken in documents published by you or marked in subjects you follow. Example: Inactivating, Activating, Restoring, Removing, and Folders Changes.”
- Social: When you expand the Social item, you can view, check, or deselect which notifications you want to receive. Based on the items in the image below:
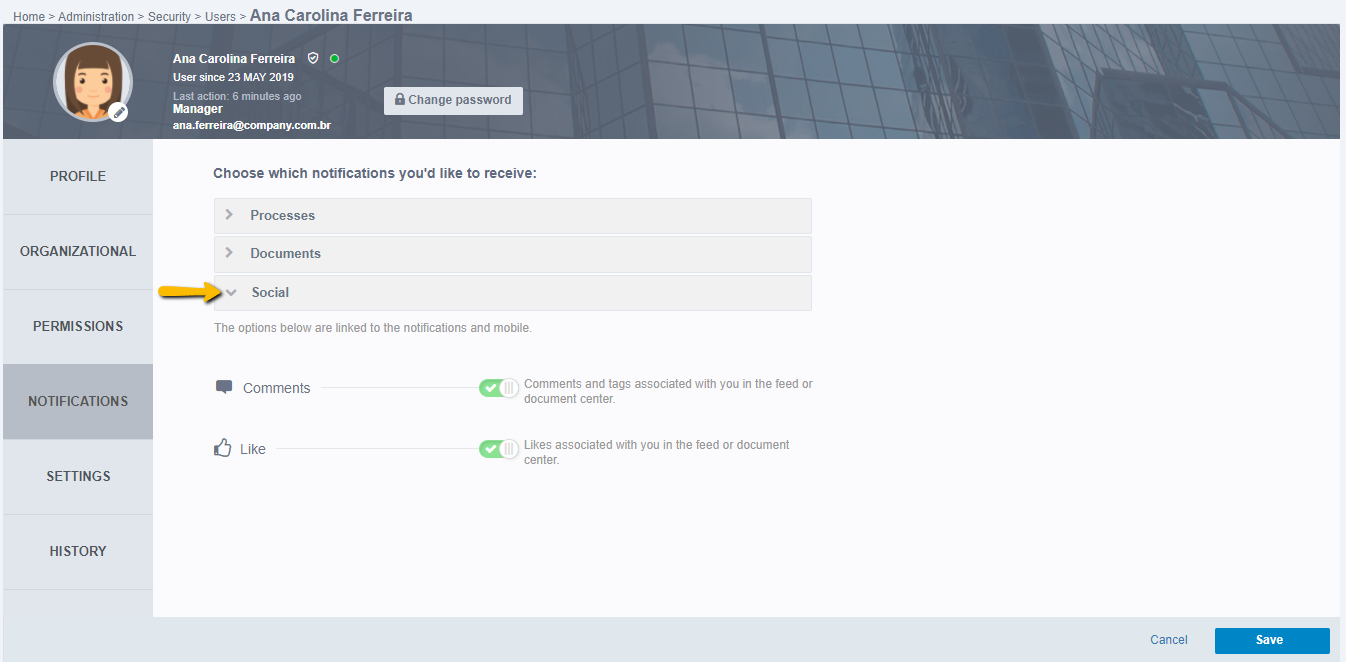
- Comments: Comments and tags associated with you in the feed or document center.
- Likes: Likes associated with you in the feed or document center.
When complete, click Save to make the data for all tabs effective. If you want to make more edits, you can do this and save all the changes at the end.
Settings
In this section, general user interface settings are made. When accessing the settings tab, the following screen appears:
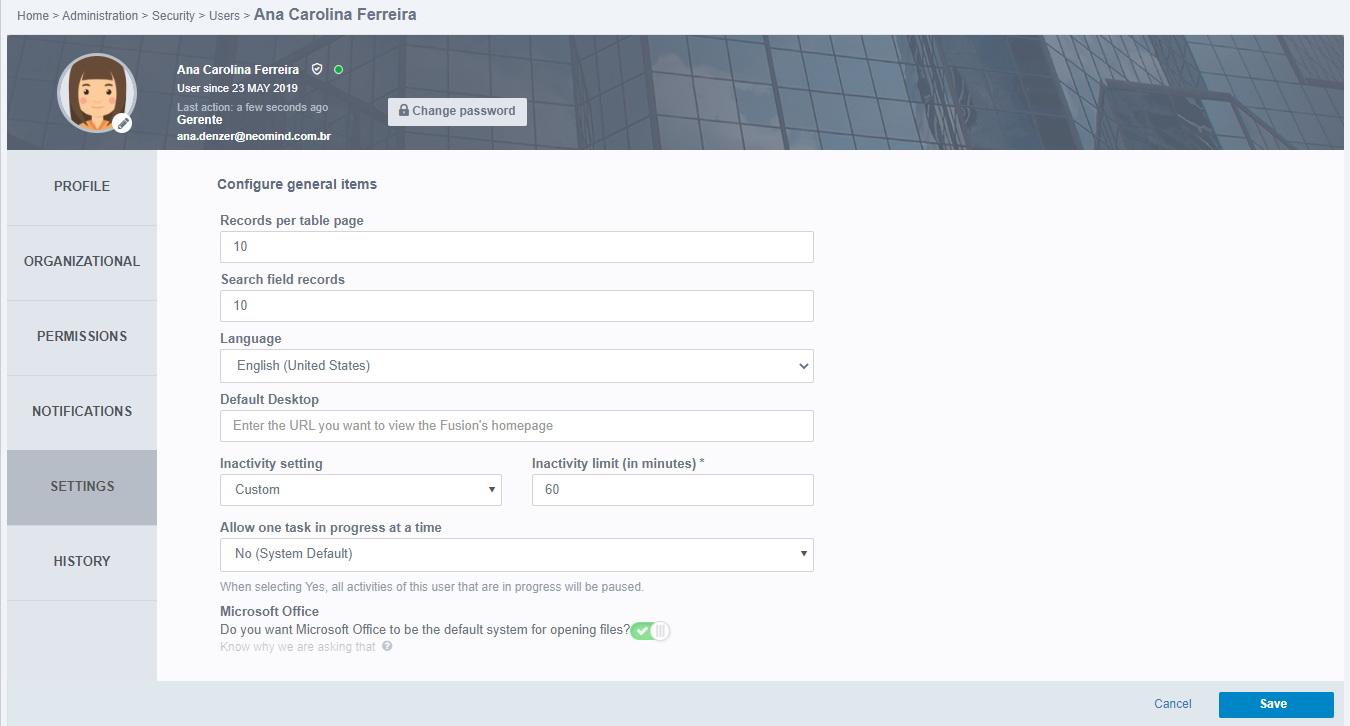
- Tables: Enter a maximum number of search items that will be displayed to the user on the same page. For example: When querying or searching, the results will be displayed on the screen. If 100 results appear, the user can choose to view 10 results per page. This field is not mandatory, but if it is empty, the value 10 will be automatically assigned.
- Search Fields: Enter a maximum number of records that will be displayed when a search is made. For example, when performing a user search with the letter “A”, the first 10 names with the letter “A” will appear. This field is not mandatory, but if it is empty it will be automatically assigned a value of 10.
- Language: Set the language that Fusion should display. The available languages are: Portuguese, English or Spanish.
- Default Desktop: Enter the Fusion URL that should be displayed each time the workspace is accessed. With that, when accessing Fusion, you will be directed directly to the page inserted in this field. For example, entering the Tasks Center URL (http://server:port/fusion/bpm/task/central/), when accessing the system or clicking start, will be forwarded directly to the Tasks Center.
Note
It is not recommended that external sites be entered. This functionality should be used for redirecting Fusion screens.
- Inactivity setting: Define whether inactivity will be "Custom", "System Default" or "No Limit". When the configured time passes, the user is automatically logged out of Fusion.
Selecting **Custom** means that users will be able to edit the **inactivity limit** of the profile as they already can in previous versions of Fusion.
Selecting **System Default** means that the inactivity limit should be the same as the one set in the system settings, being updated whenever it is changed there and not being able to make the setting of this time in the user's profile.
Selecting **No limit** means that the user will never be logged out for inactivity on web Fusion and furthermore, the **Inactivity limit** field will be hidden. - Inactivity Limit (in minutes): determine the user's inactivity timeout in minutes.
Important
If the administrator chooses not to allow users to change the limit in the system settings, the above fields will be locked for editing and will only be displayed as view mode
- Allow one task in progress at a time: Inform whether the user can execute only one task at a time in your task center.
- Microsoft Office: Checking this option indicates that Fusion should open documents using Office from the user's machine and when it is not checked, indicates that the documents will be downloaded automatically.
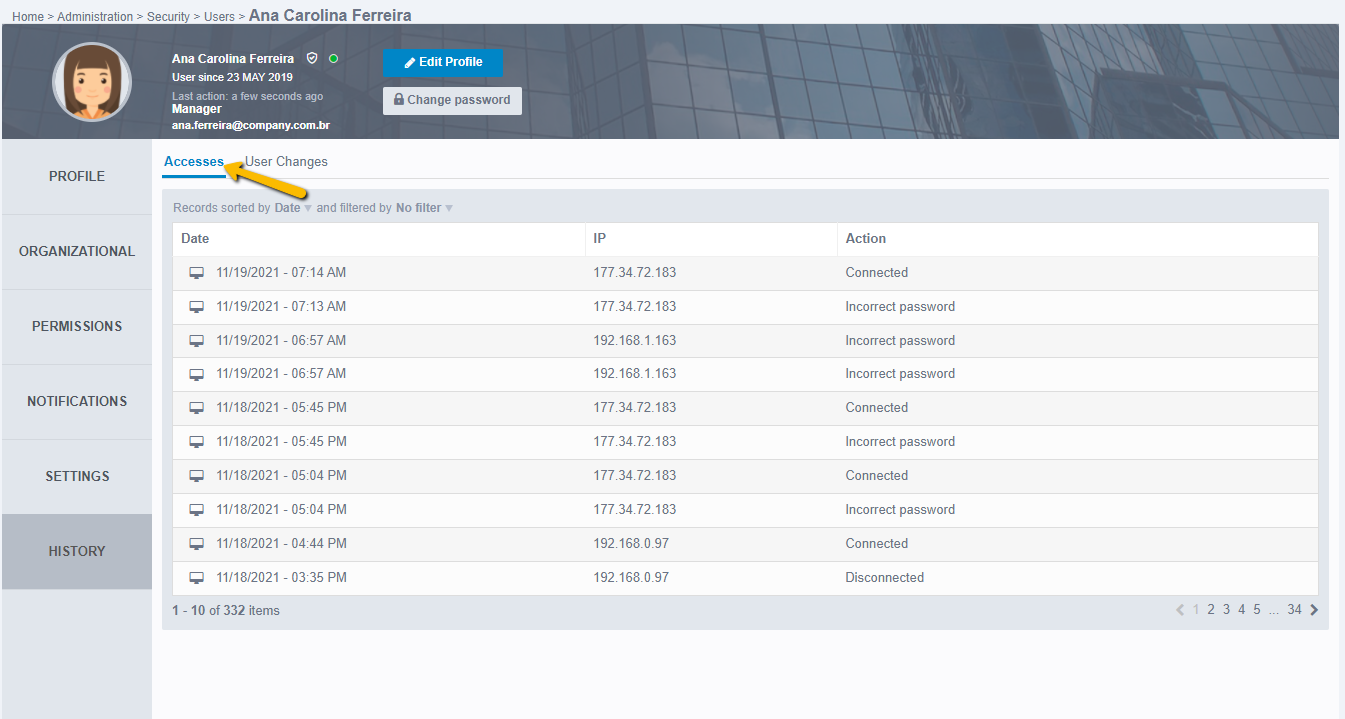
History
In the History tab it is possible to see the user's access history, in addition to the changes made by the user. To view the access list, click on accesses. These are displayed with the parameters of: Date (date of access), IP (access machine address), and Action (whether connected or disconnected):
The changes made by the user can be viewed in User Changes, they are listed with the parameters of:
- User (will display the name of the user who made the change).
- Date (will display the change date in a reduced format along with the time).
- IP (will display the IP of the machine used to make the change).
- Field (refers to the field that has been changed or enabled).
- Previous Value (this will display the old values after being edited, that is, if the field changes from disabled to enabled, this column will be without value).
- New Value (will display the current value of the field, or if it is disabled or removed there will be information about it).

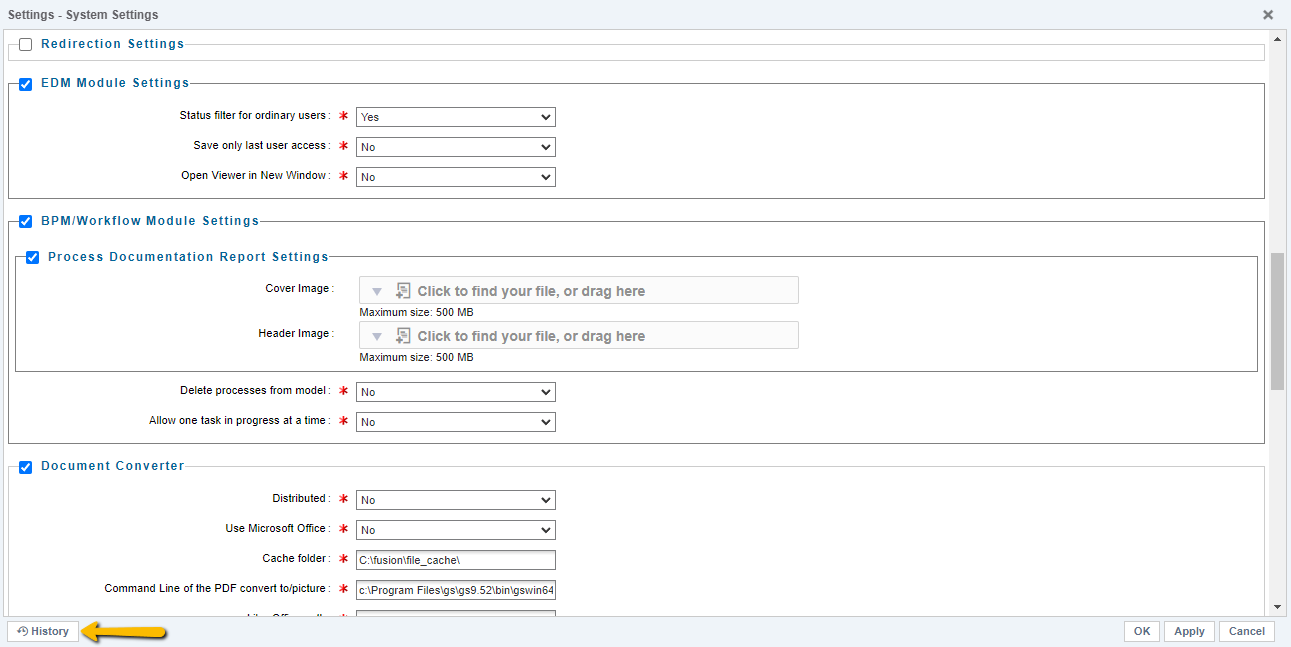
Note: For an administrator user to view changes made to the system, you can access Administration > System Settings. On the System settings screen there is a History button that displays the edits made to the system settings:
 The edit history of the system settings is displayed with the parameters of:
- User (will display the name of the user who made the change).
- Date (will display the change date in a reduced format along with the time).
- IP (will display the IP of the machine used to make the change).
- Field (refers to the field that has been changed or enabled).
- Previous Value (this will display the old values after being edited, that is, if the field changes from disabled to enabled, this column will be without value).
- New Value (will display the current value of the field, or if it is disabled or removed there will be information about it).

When you complete the profile, click Save to make the data for all tabs effective. If you want to make more edits, you can do this and save all the changes at the end.