Document Central
The Electronic Document Management (EDM) has the function of managing unstructured information, such as text documents, spreadsheets, presentations, social media, and any type of file. Other Fusion users can interact with the document, and depending on their permissions, they can also customize it.
EDM makes it possible to create an access policy for documents, insert digital signatures, view documents through a universal viewer, print and distribute documents, simplify and streamline information retrieval processes, control the cycle of each document, such as its publication, approval and also expiry. The Document Management also enables users to provide faster responses and allows the company to reduce paper costs.
To access the document navigation screen, go to Documents > Document Central, as shown in the following image:
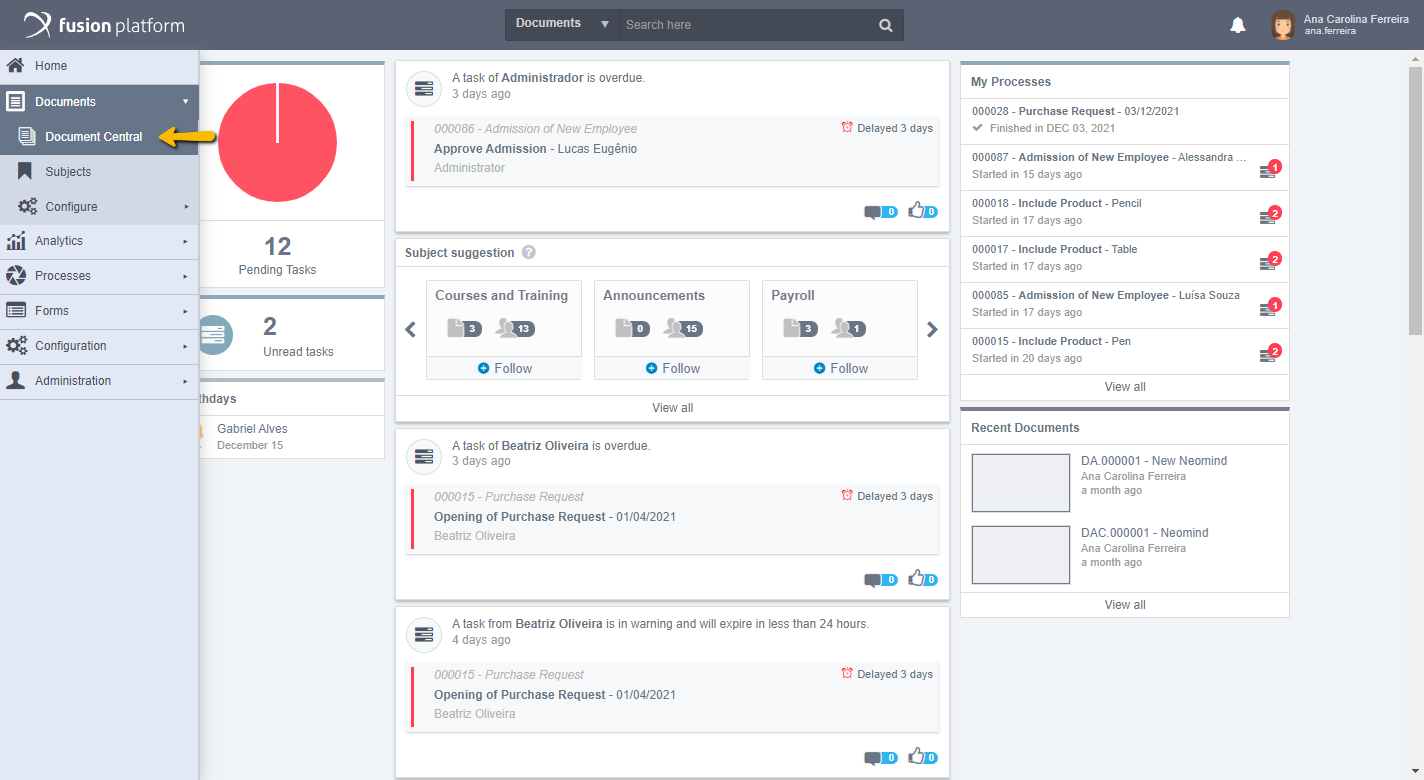
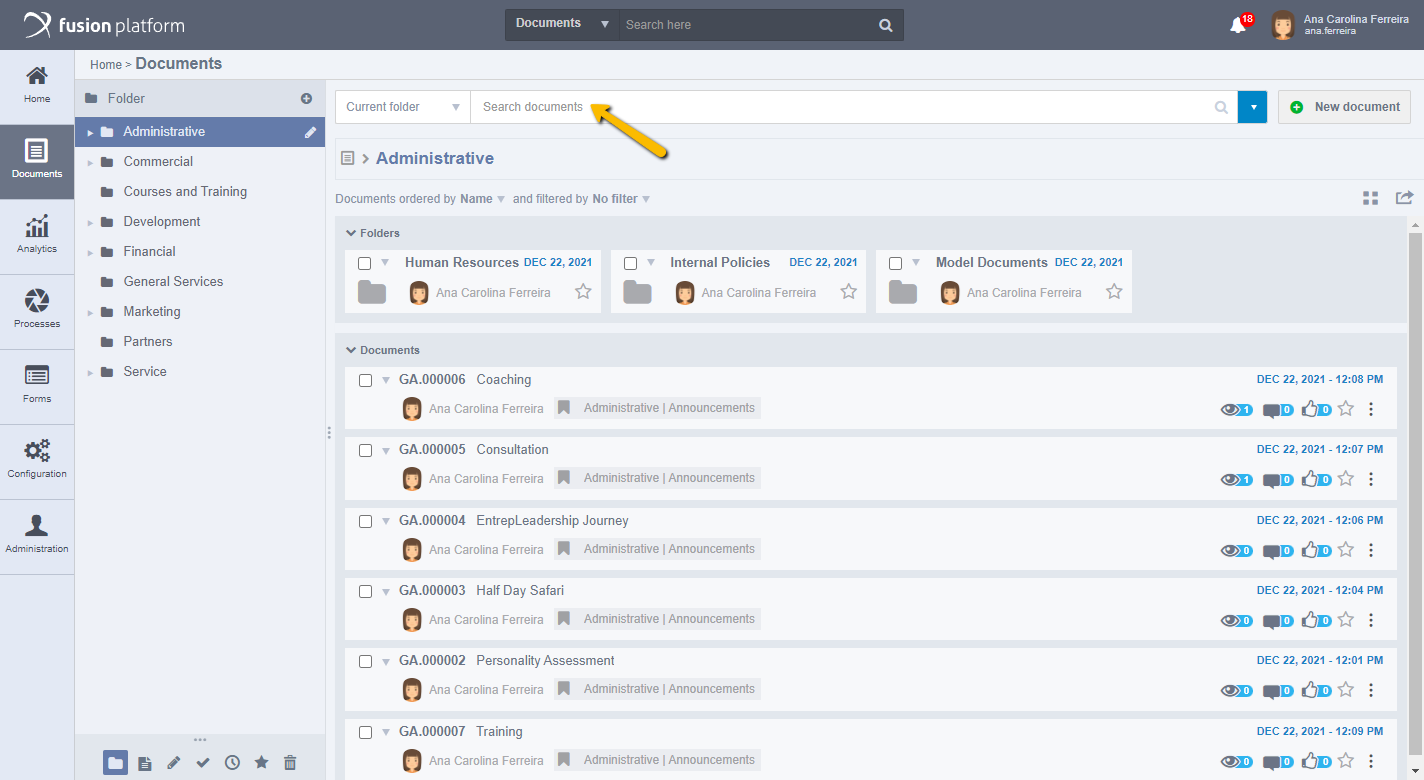
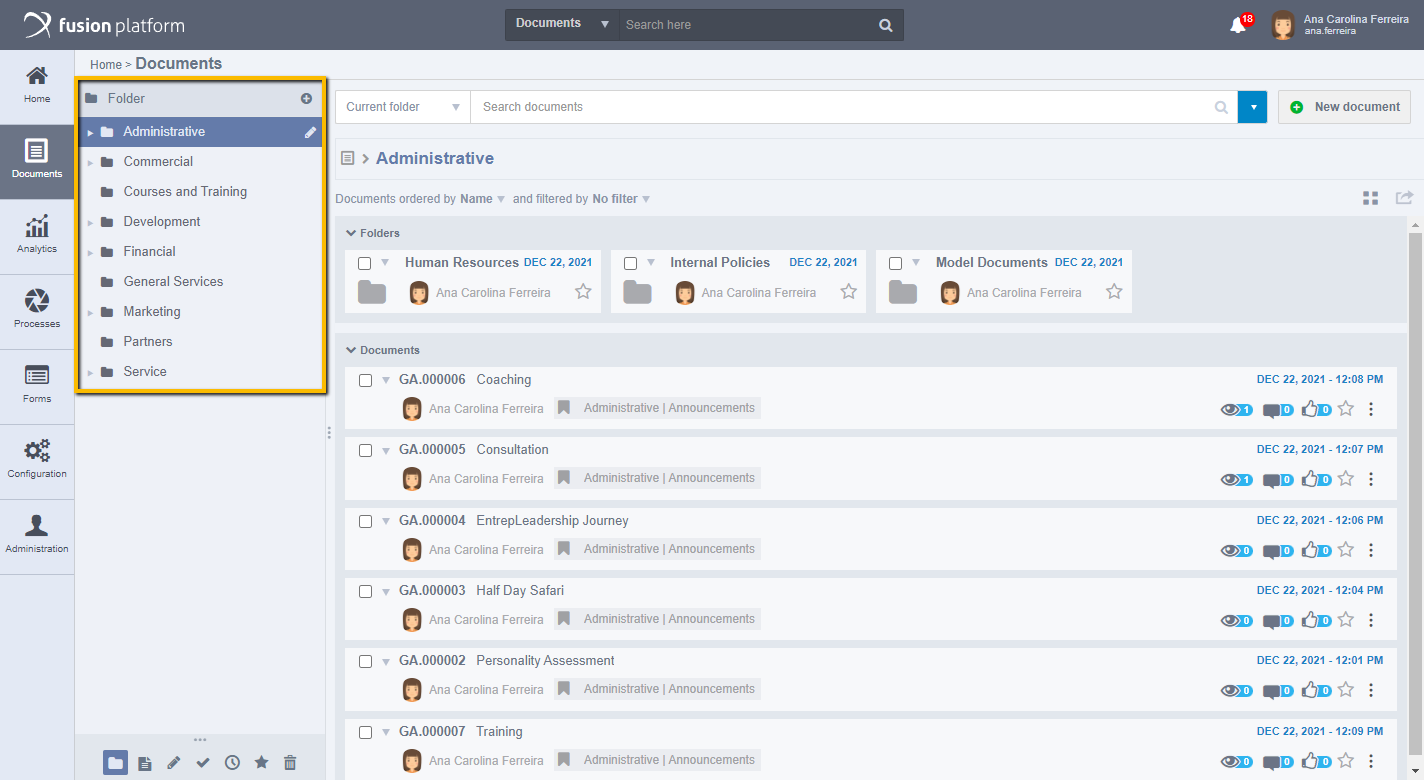
Clicking Document Central displays the following screen:

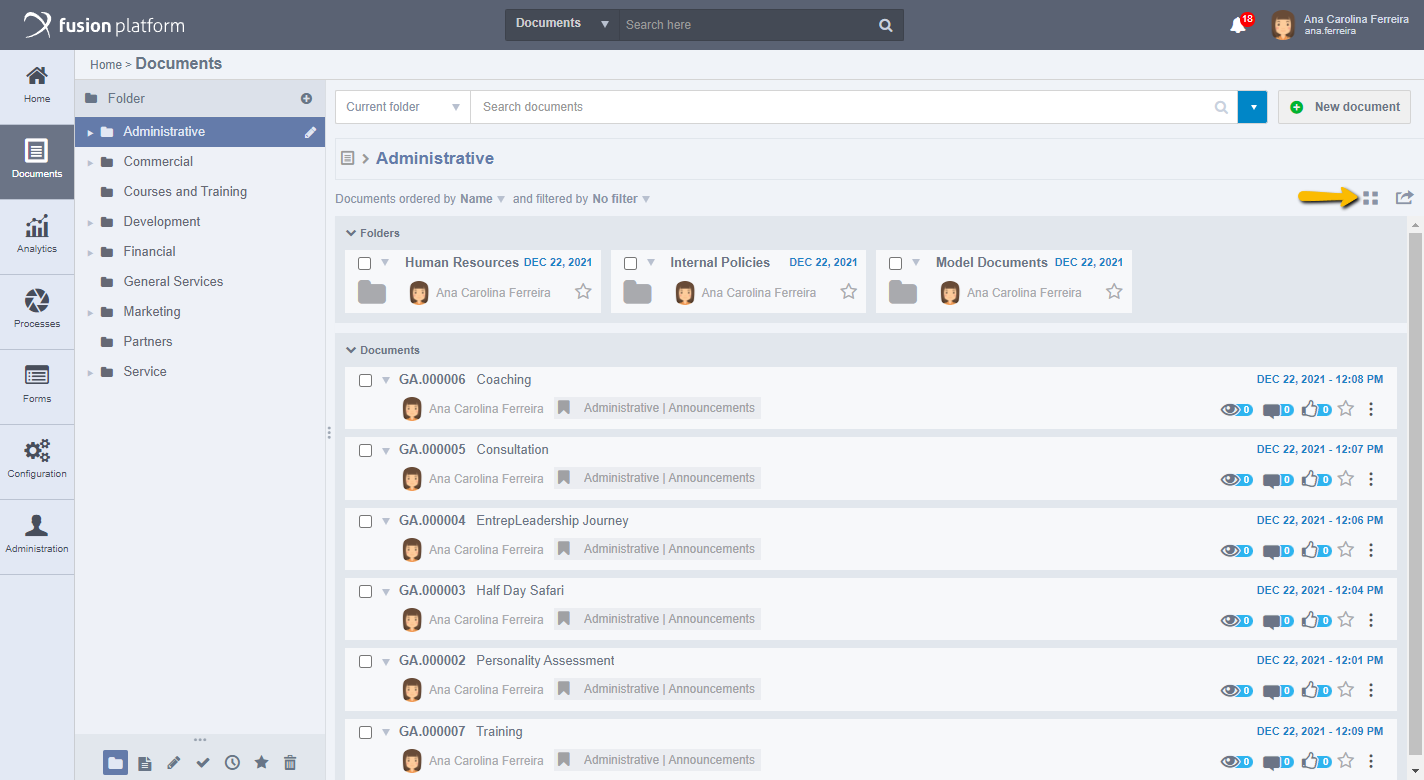
It displays all the folders that exist on the system, allowing you to navigate between them and view the published documents. It is possible to change the way documents are viewed through the document central, by default, the view in List mode is selected, and it can be changed to Thumbnail mode by clicking on the button as shown in the following screen:
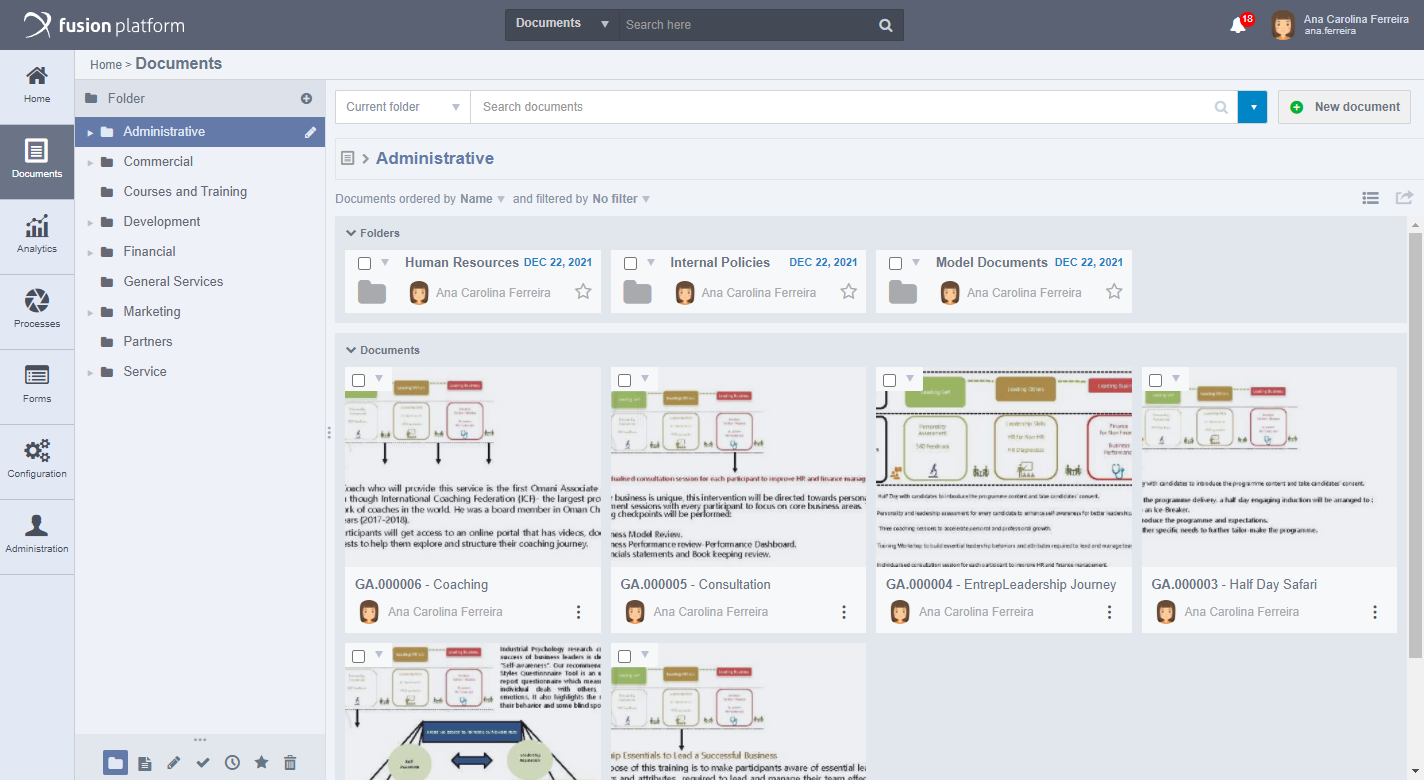
Clicking should display the documents as follows:
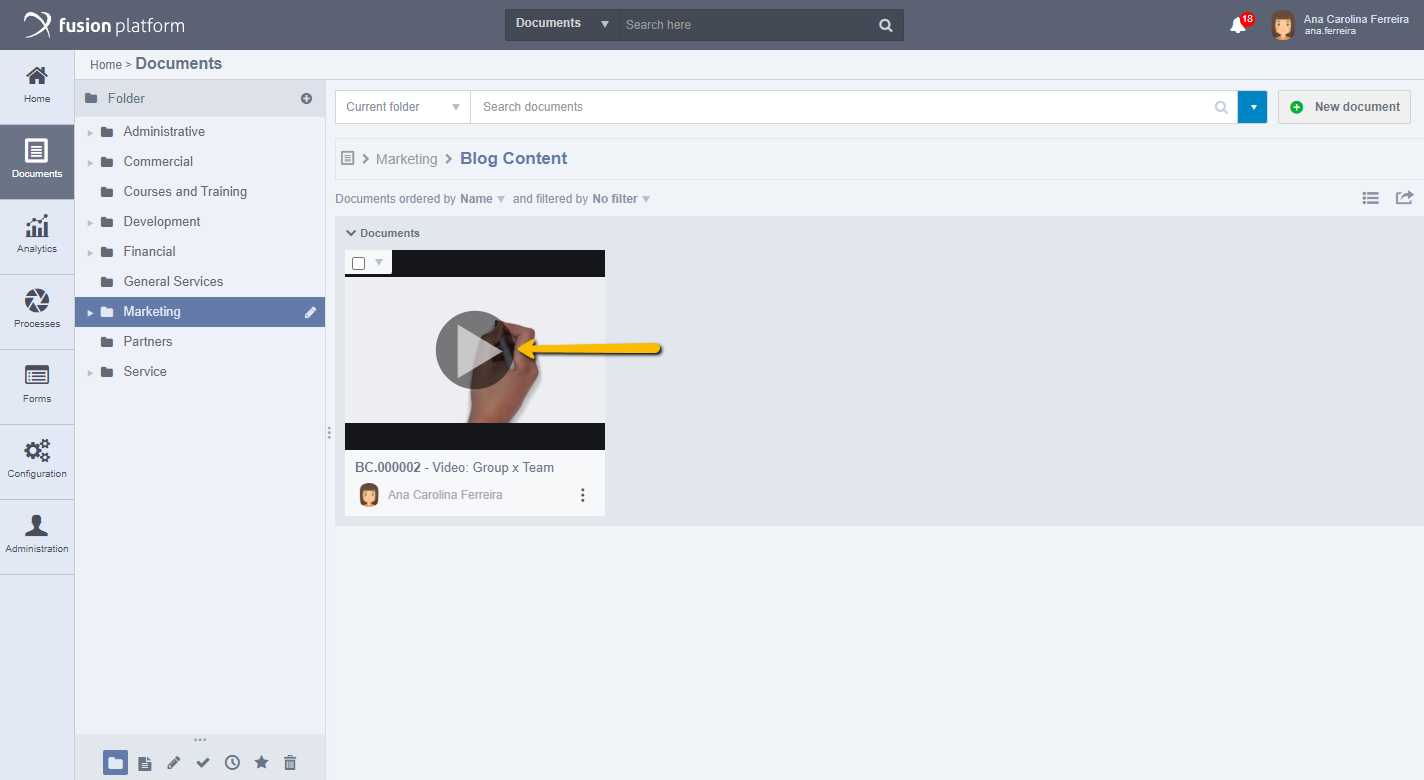
Attention: You can view videos and listen to audios through the thumbnail, to do so click on the start icon:
Searching for Documents
The document central also allows the user to perform searches for documents, it is possible to perform a simple search by filtering by the current folder or by all folders.
Enter your search in Search Documents:
The search can be done in three different locations, these are Current Folder, Subfolders, and All:
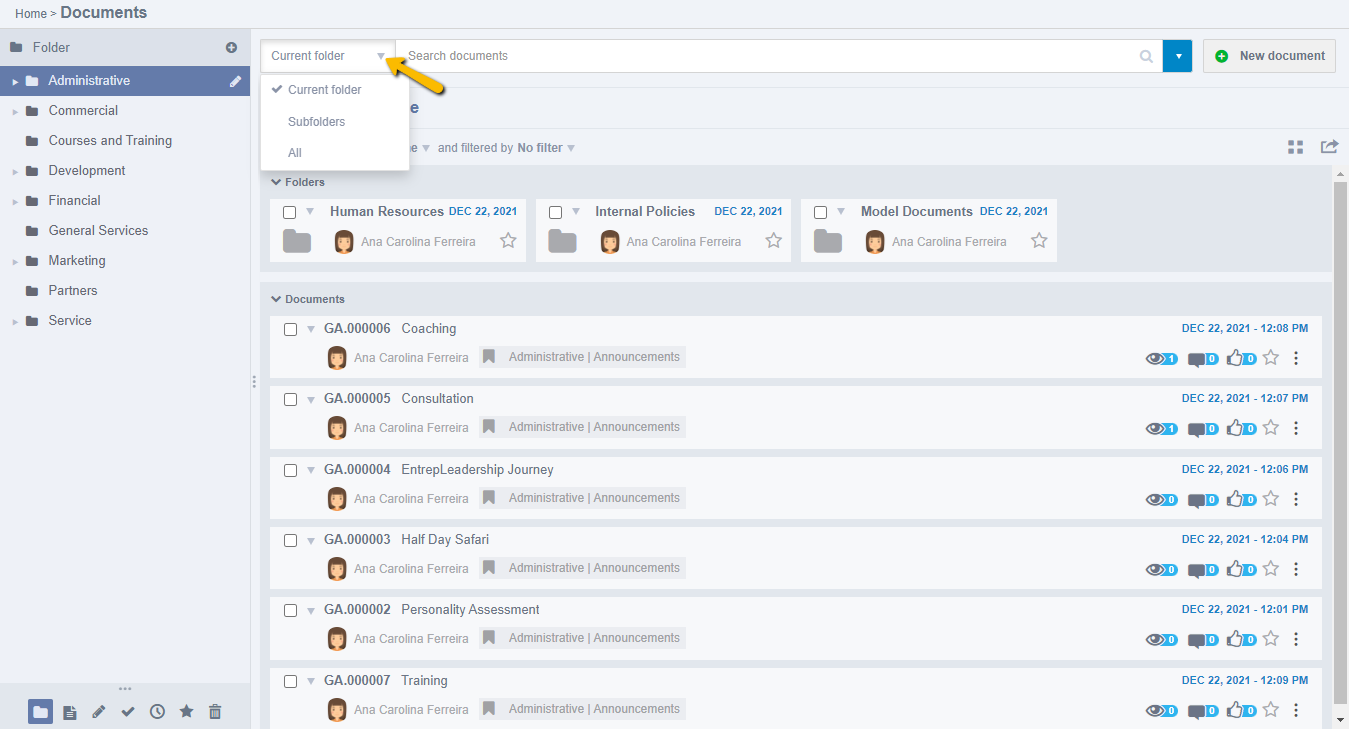
Select the desired location and after entering a search click on the magnifying glass or press Enter to perform the search.
Attention: Only documents that the user is allowed to access are displayed in the result of the query.
Attention: To perform searches using more than one term, this can be performed by entering the words in quotation marks, as follows: “Search with more than one word”, thus returning documents containing exactly this information.
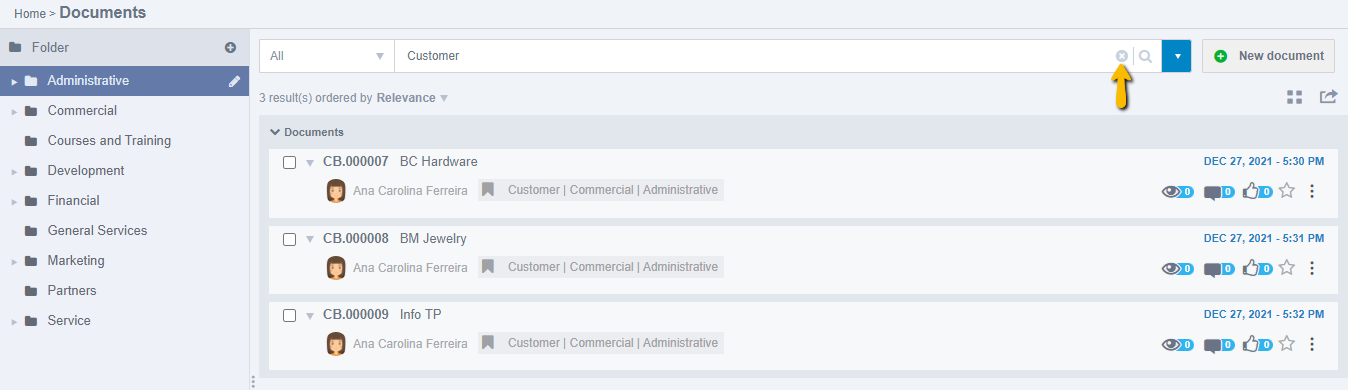
To undo a search, click on the x that is in the search field:
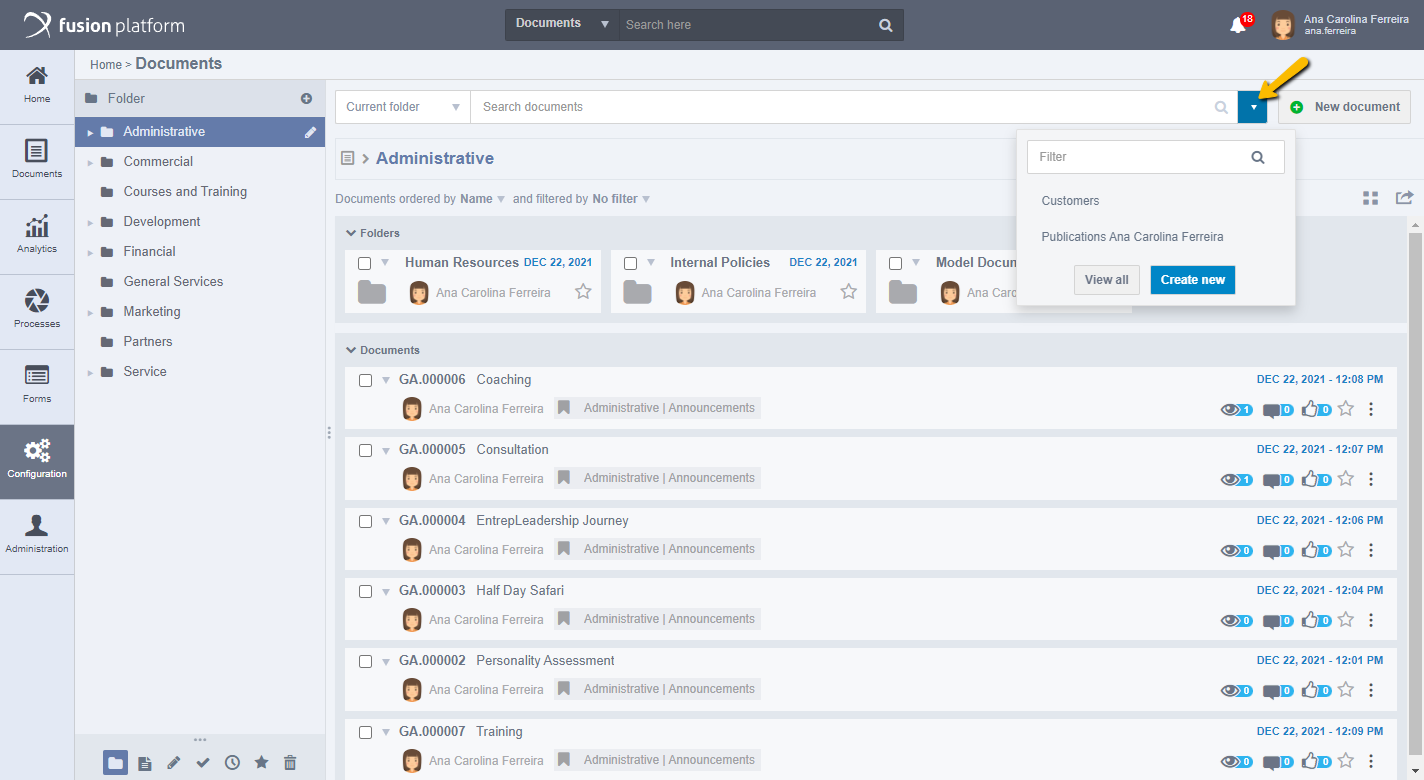
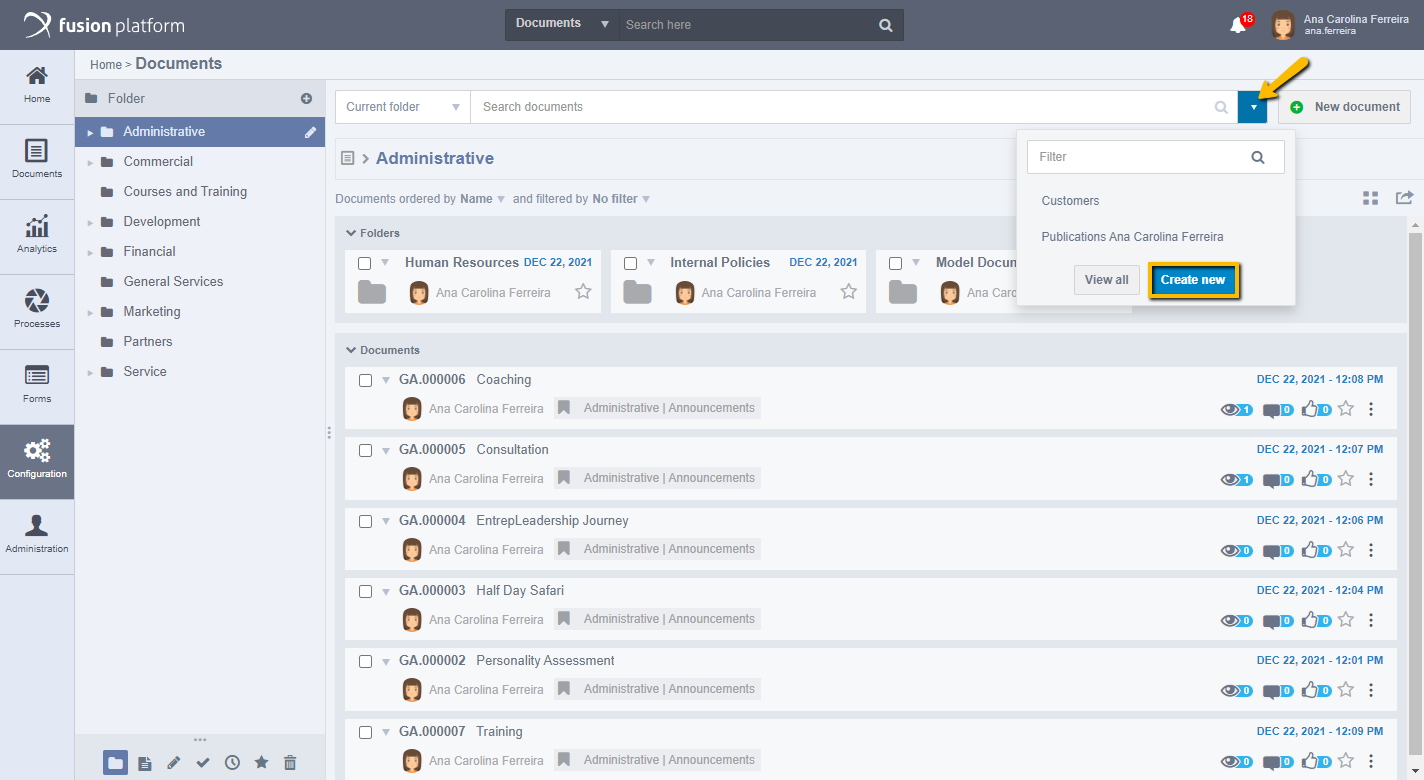
You can also perform more assertive searches using the advanced query, as shown in the following image:
Note: Indexed (common) search and advanced search return in their results inactive and expired documents as well, in addition to active published documents.
Advanced Query of a Document
Advanced Query allows you to search for documents more precisely, limiting only documents with the desired information to be displayed in the result. It is possible to filter documents in the Advanced Query by category, by version, participants, requestors, among several other available filters.
To access the advanced query area, click Documents > Document Central, attached to the search bar displays an arrow that gives access to Advanced Document Query, and select the Create New option, as shown in the following screen:
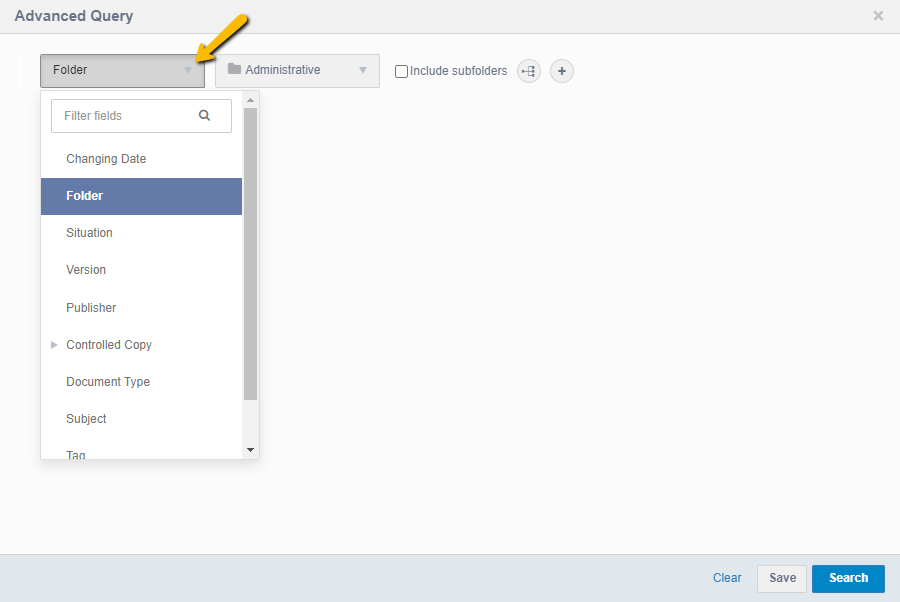
When you click Create New, you should display the Advanced Query screen, by default the query is already filled with the folder in which user is currently selected, as shown in the following image:

When you click on the first query filter, the Folder option, displays the other filters available in the system for selection:
- Changing Date: Selecting this option should enable the field to choose the date.
- Folder: Selecting this option should enable fields to choose the folder in which you want to filter.
- Situation: Select this option to filter only documents in the desired situation, for example: Approval, Done, Editing, Expired, Inactive.
- Version: Selecting this option allows the user to choose whether they want the results with all versions of the document or with only the current version.
- Publisher: Selecting this option releases the Users field to select the publisher.
- Controlled Copy: Selecting this option will expand five more options, Expiration Date, Destiny, Remitter, Situation and Type of Issue, selecting one of these options will release their respective fields.
- Document Type: Selecting this option will enable the user to choose the type of document responsible for the documents they need to search for.
- Subject: By selecting this option, it is possible to filter documents that have certain related subjects.
- Tag: The same situation occurs with TAG, it is possible to filter by TAGS that were related to documents.
Attention: Only options appear where the user is allowed to access.
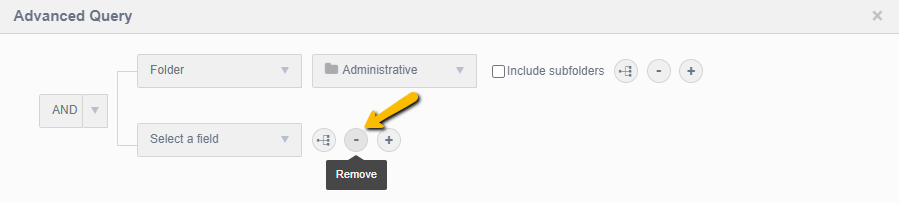
You can create more than one filter by clicking the Add Filter icon, as shown in the following screen:

Delete filters by clicking the Remove Filter icon, as shown in the following screen:
The Add Subgroup option allows the creation of different conditions only for some filters. To create a subgroup, click the Add Subgroup icon, as shown in the following screen:

The conditional operators make it possible to differentiate the way in which the survey will be performed. After adding more than one filter or using subgroups, click the arrow next to AND, as shown in the following screen:
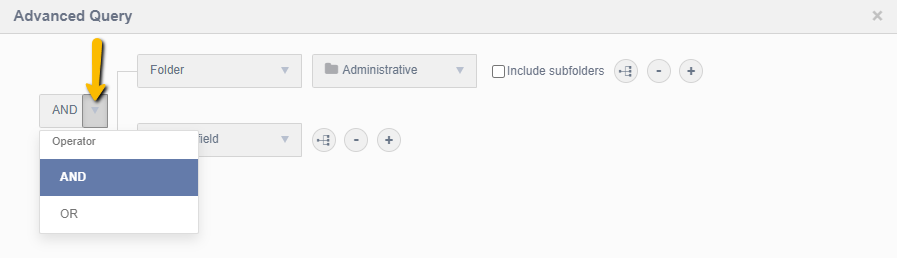
Use Conditional AND to filter out the data you have across all filters within the same condition. That is, if the process does not obtain data in only one of the filters, even though it has data from others, it will not be displayed in the search result.
Use the Conditional OR so that the data is filtered in at least one of the filters in the same condition. That is, if the process obtains data from only one of the filters, it will already be displayed in the query result.
After selecting the filters, click Search. It should then display the results of the query that was performed.
Managing Saved Queries
In addition to performing advanced queries, you can save them for later searches.
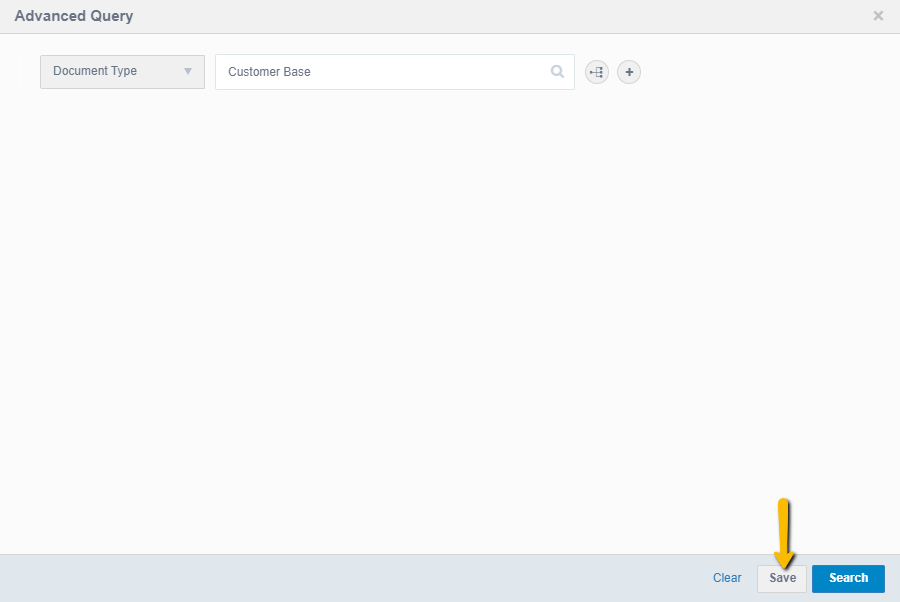
On the screen to save the advanced query, where the user must fill in the Name field and, if necessary, the Description field. After completion, click Save.

To access the saved query, click the arrow next to the search bar, then you should display the saved query, as shown in the following screen:
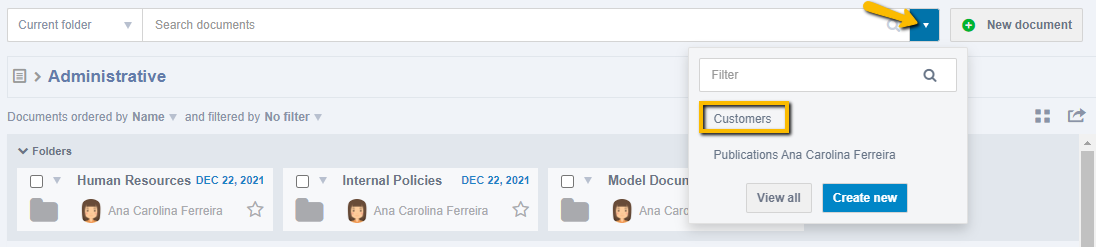
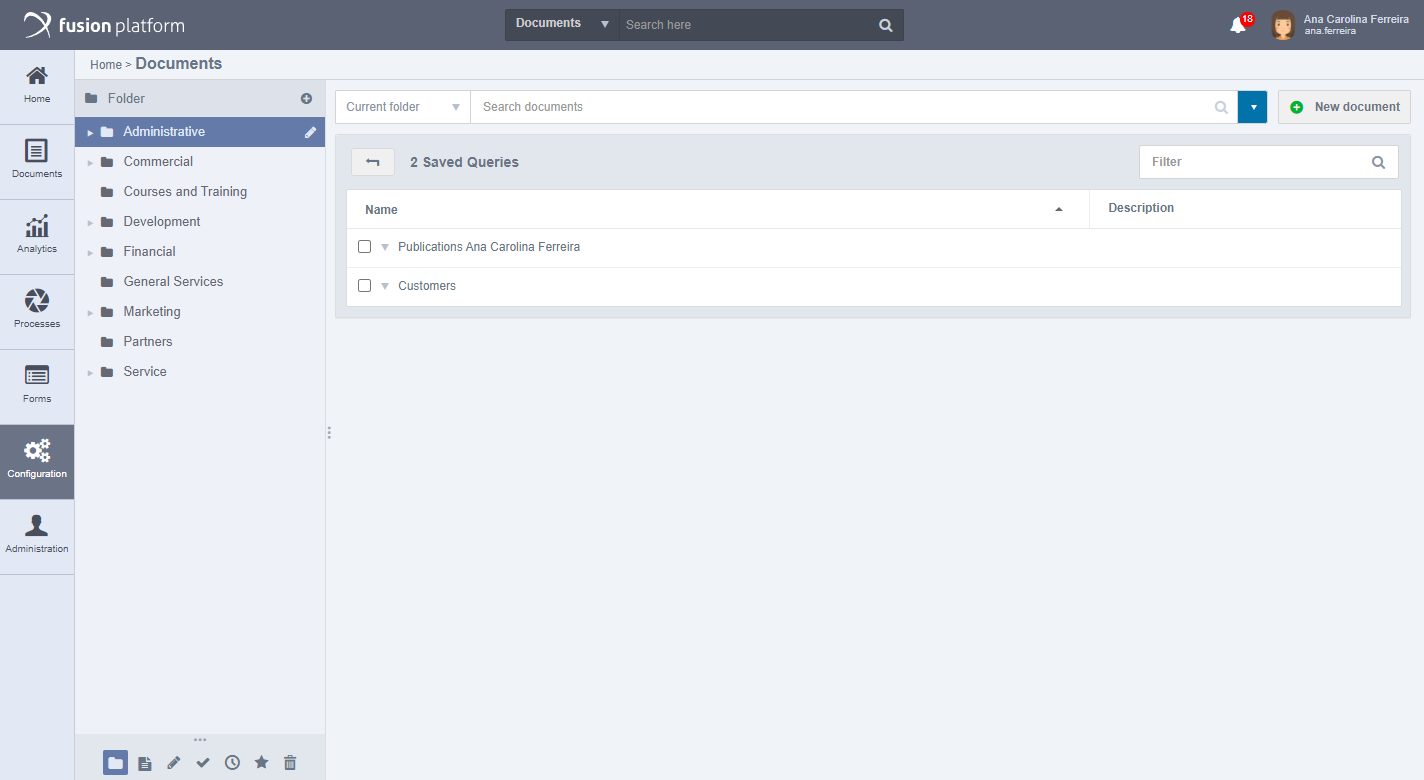
To access query management, click the View All option. It should display the following screen:
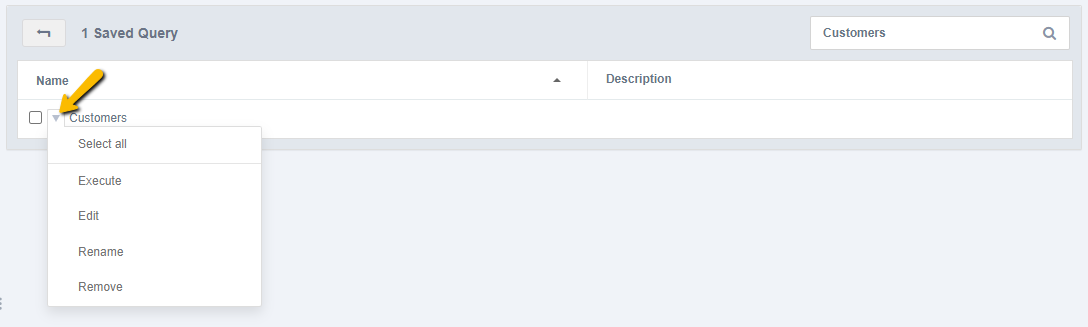
On this screen, you can filter so that only the query that the user wants is displayed, in the Filter field, type the name of the query you want to search and click on the magnifying glass, then you should display only the queries searched:

Clicking on the action arrow of saved queries allows some actions to be performed, as well as Execute, Edit, Rename, and Remove. As shown in the following screen:
Note: Saved queries are individual, meaning queries saved with a user are not displayed to other users of the system.
Document Details
Through the Document Central, the user can view the details of each document without opening them, click on the three dots next to the favorite icon and then display the following screen:
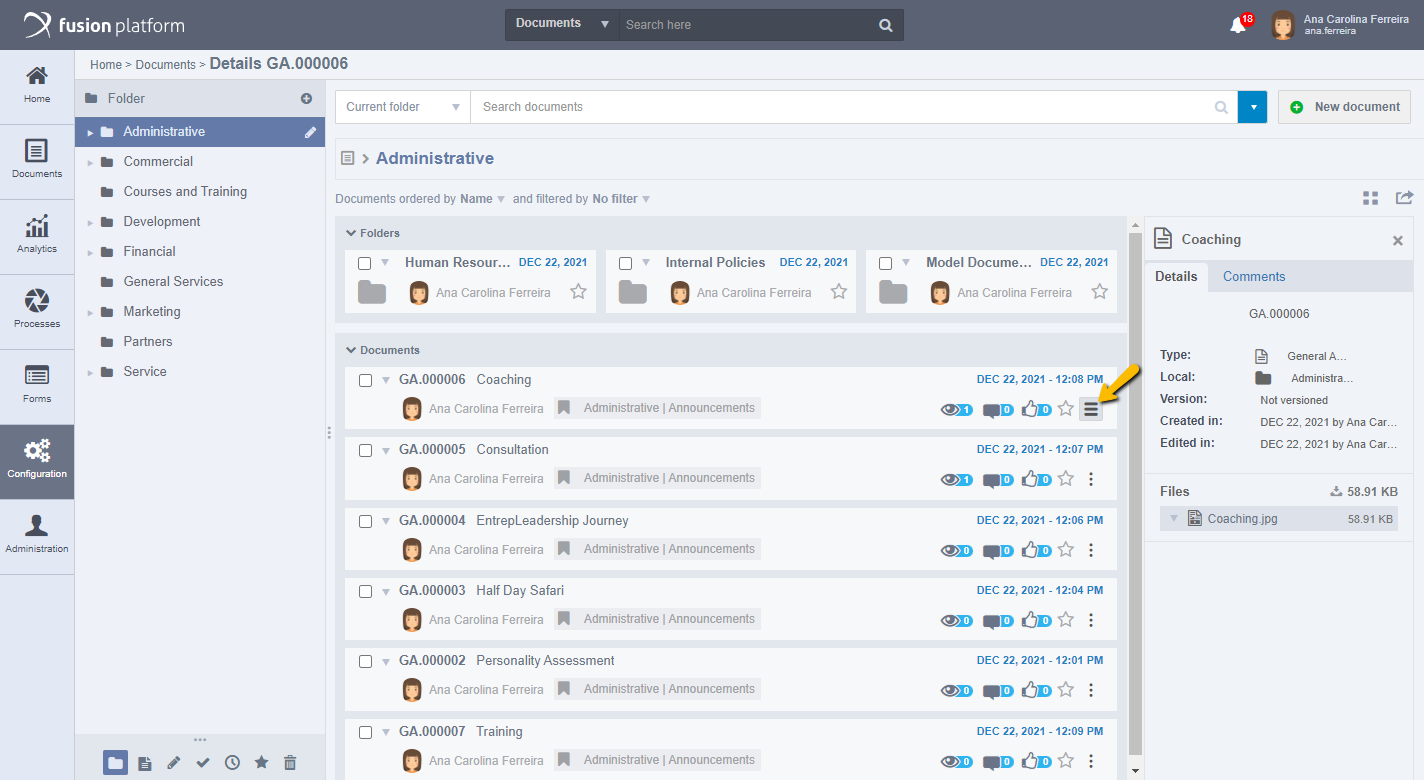
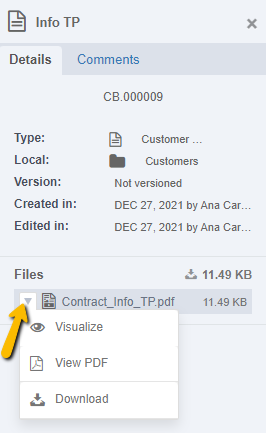
The document details tab displays various information, such as the code, type, local, version, creation date, and user who created it, as well as the date and name of the user who made the last edition. It also displays the files attached to the document, giving you the possibility to download it by clicking on top of the file size, or even by clicking on the file actions arrow to Visualize in Fusion Viewer, View in PDF or Download:
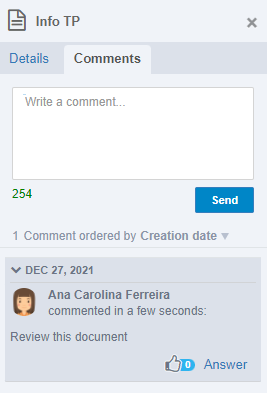
By selecting the Comments tab, you can see comments added about the document:
Ordering and Filtering Documents
In the document central it is possible to order and filter the documents so that they are displayed according to what the user needs, to order click on the Name option below the search bar, which is the preselected one, then it should display according to the following screen:

- Name: Select to order the documents by name.
- Code: Select to order the documents by code.
- Version: Select to order the documents by version.
- Editor: Select to order the documents by editor.
- Edition date: Select to order the documents by editing date.
- Expiration deadline: Select to order documents by expiration date.
- Document type: Select to order documents by document type.
- Ascending: Select to have documents organized ascending from A to Z.
- Descending: Select to have the documents organized descending from Z to A.
To filter the documents, click No filter:
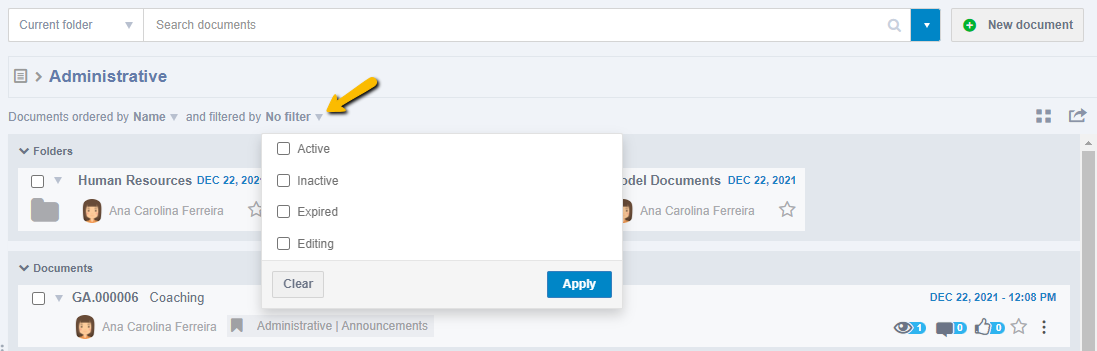
- Active: Filter the active documents in the system.
- Inactive: Filter inactive documents on the system.
- Expired: Filter documents with expired deadlines in the system.
- Edition: Filter the documents that are in editing.
After choosing the desired filter options, click Apply, then you should display the documents as the filter.
Attention: When accessing the document central, only folders and documents that the user has access to should be displayed.
Folder Management
Folder Root is displayed on the left side of the screen, where you can view folders and their options. Folder root allows you to access documents from folders, create new folders, edit them, and also delete them:
To navigate between folders, you need to expand them to view their subfolders:
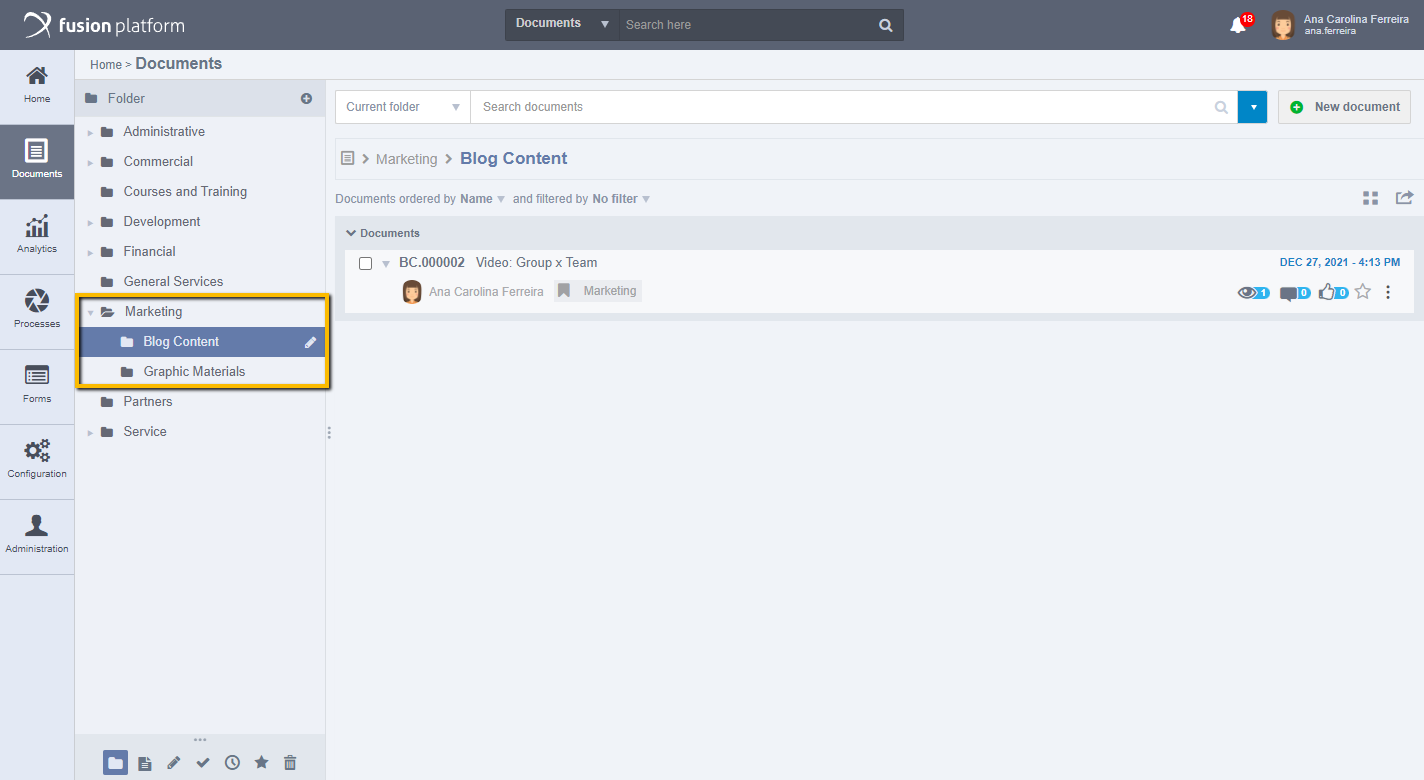
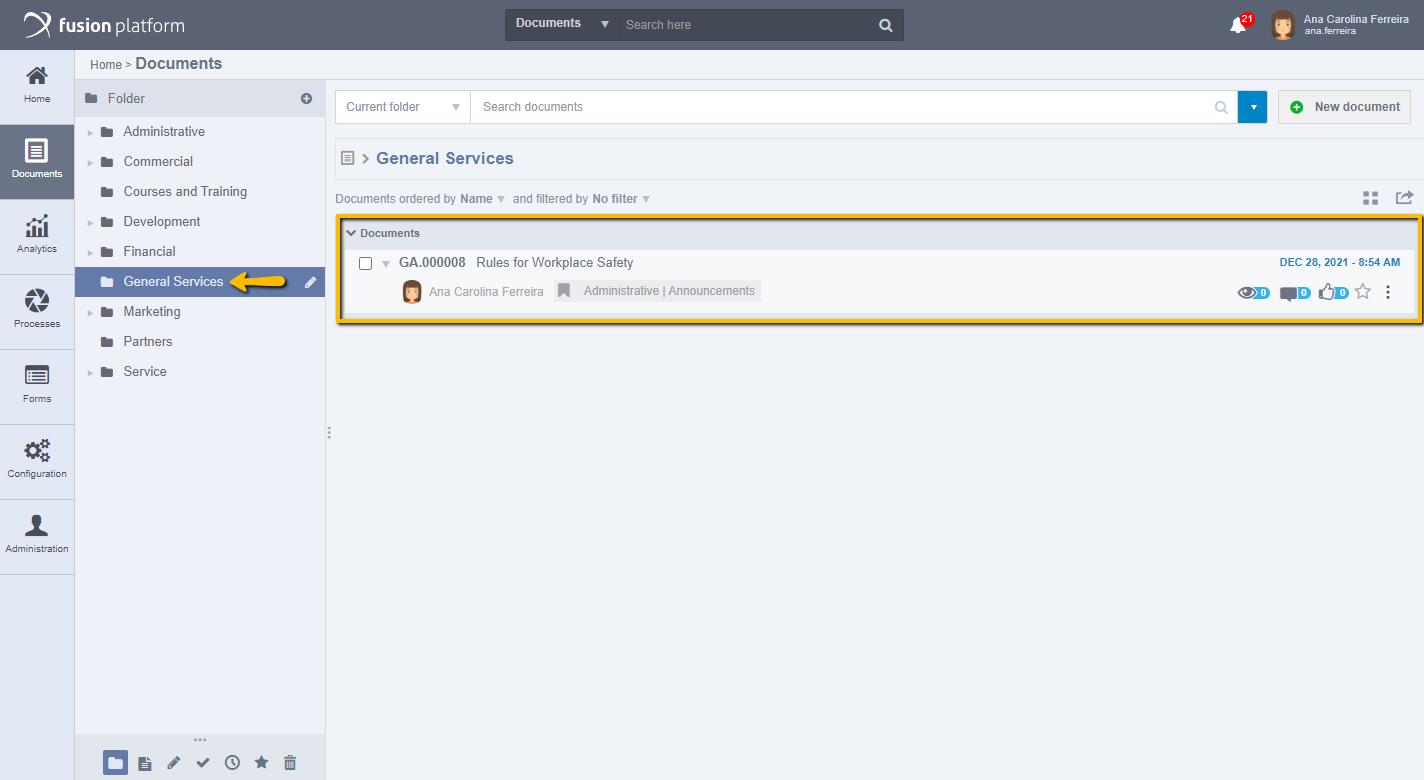
When you access a folder, the documents published in it are displayed:
Creating Folders
Folders have the function of organizing the documents present in Fusion. In them, you can define what types of documents can be included and also set user permissions.
Click the (+) icon to add a new folder:

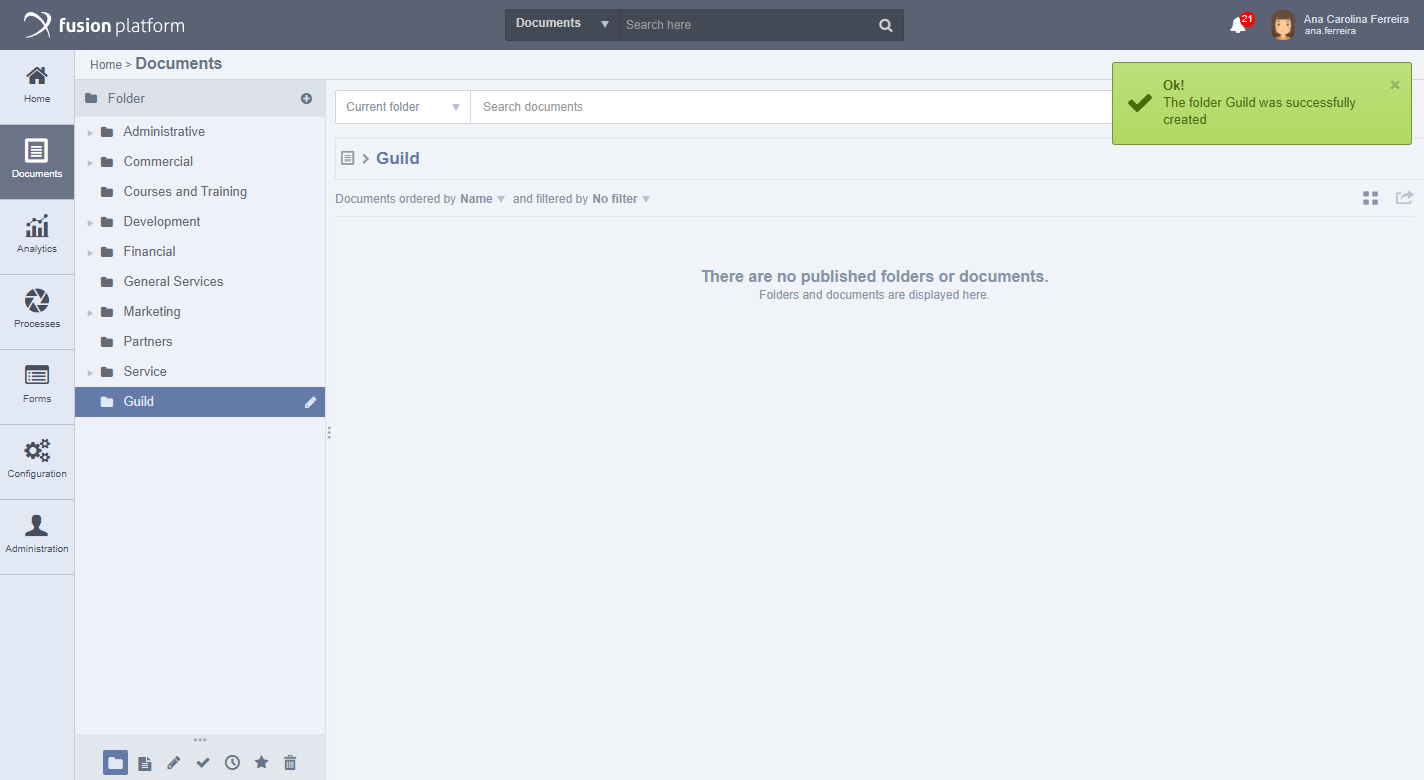
It will then display the folder in edit mode to fill in the Name, as shown in the following image:
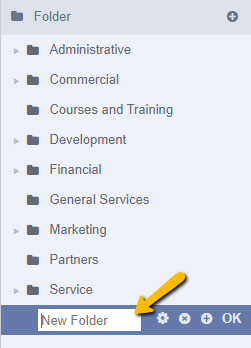
After filling in the folder name, click OK, then you should display feedback message stating that the folder was created successfully:
Attention: The owner of the folder is first the user who created it (and he has full access to it), but if another user edits that same folder, he will automatically become the new owner of the folder (having full access to it), causing the previous owner to lose all his/her permissions on the folder.
Creating Subfolders
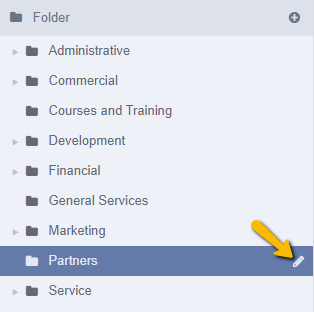
To create subfolders, click the edit icon for the desired folder:
Then click the add icon (+) to create a subfolder, as shown in the following image:

After adding, the subfolder will be below the main folder, with the name in edit, to be filled in:

After filling in the subfolder name, click OK to save it and display inside the selected folder:

Note: If there are a large number of folders and subfolders, fusion will display only 12 folders at a time. You can click “View more folders/subfolders” and then 12 more will be loaded at a time.
Note: Folders remain with the thumbnail preview format. When you click the icon to change the display format, only the documents switch between thumbnail and list.
Removing Folders
To delete a folder, click the edit icon and then click the x icon:

Note: If the folder contains documents published in it or its subfolders, you won't be able to delete it.
Setting Folder Properties
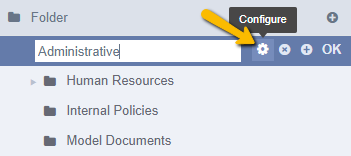
There are settings on a folder, to access these settings, click on the edit icon and later on the configure icon:

It will then display the following screen:
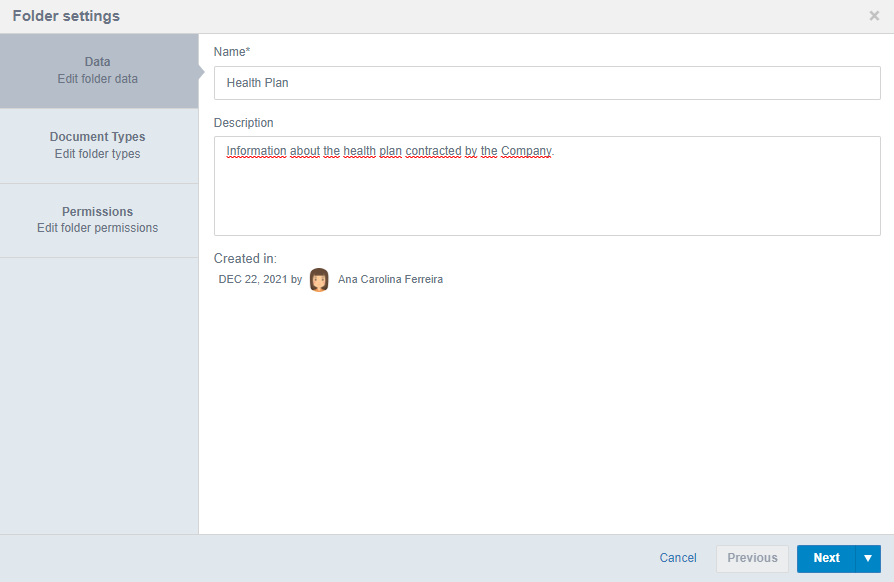
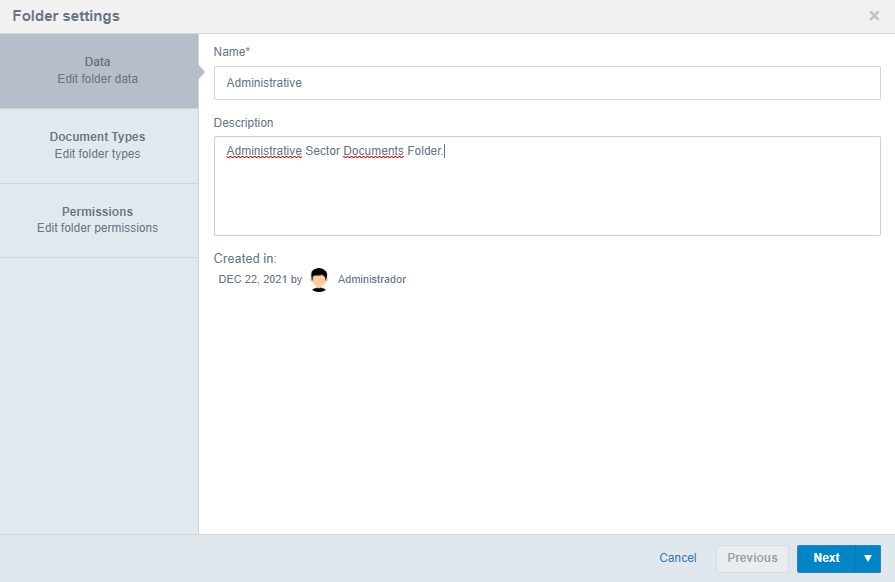
Data Tab
The first Data Tab contains general information such as the registered name for the folder, and gives the possibility to enter a description. In addition to her creation information.
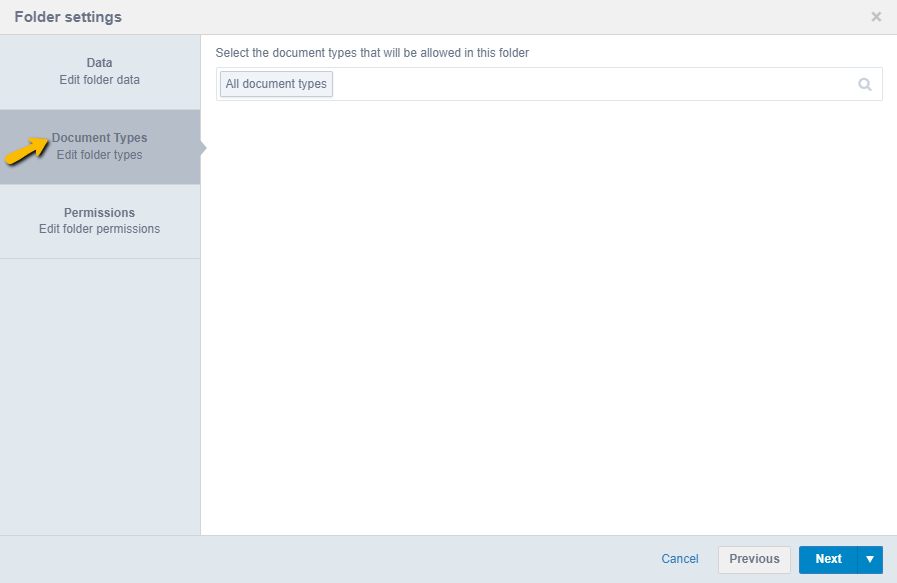
Document Types Tab
In the second Tab, Document Types, you can list the documents types that will be published in each Document Central folder.
You can define the types of documents that can be published to the folder by clicking on the edit icon of the folder where you want to perform the configuration and click the settings icon:
Then it should display the following screen:
Click on the Document Types section so that you can configure the document types that will be accepted in the folder, by default it is selected that all document types will be accepted:
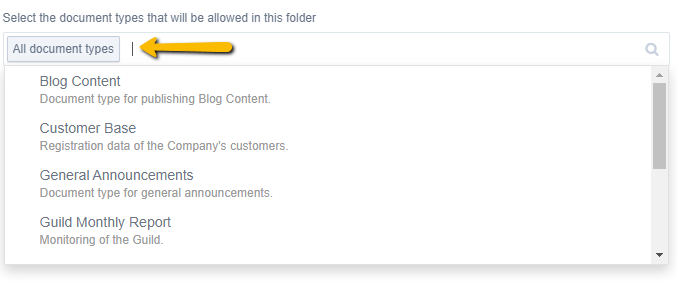
Clicking on the field where All Document Types is selected will list the types to select according to your business rule:
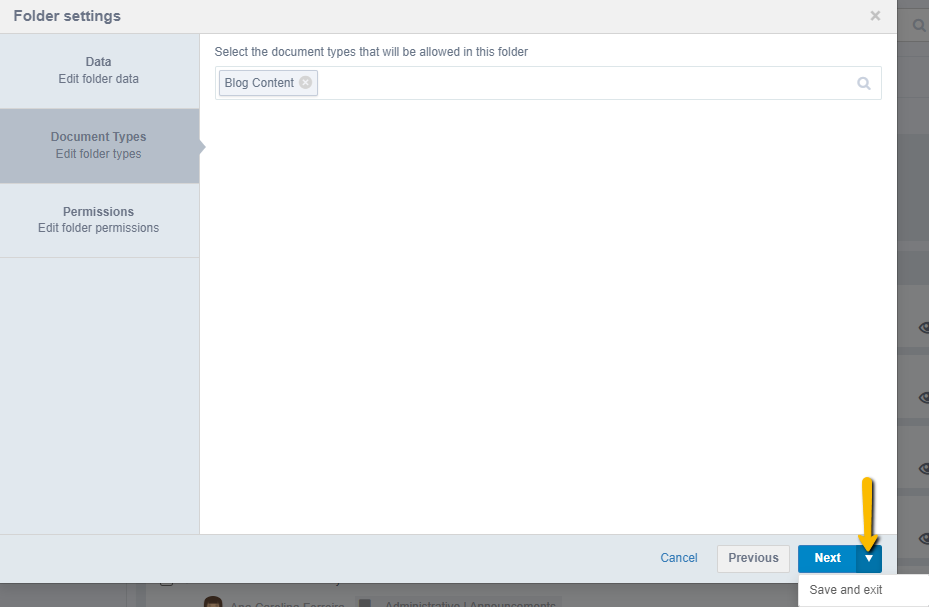
Select as many document types as you want, after selecting the desired types, click the action arrow next to the Next button and click the Save and Exit button.
Note: Only users with permissions to edit the folder will have access to these settings.
Permissions Tab
In the third tab, Permissions, you can configure folder access permissions.
Folder Permissions
During the creation of folders, you need to configure your access control. To change On-access permission settings, create or edit the settings for a folder. Then it should display the following image:

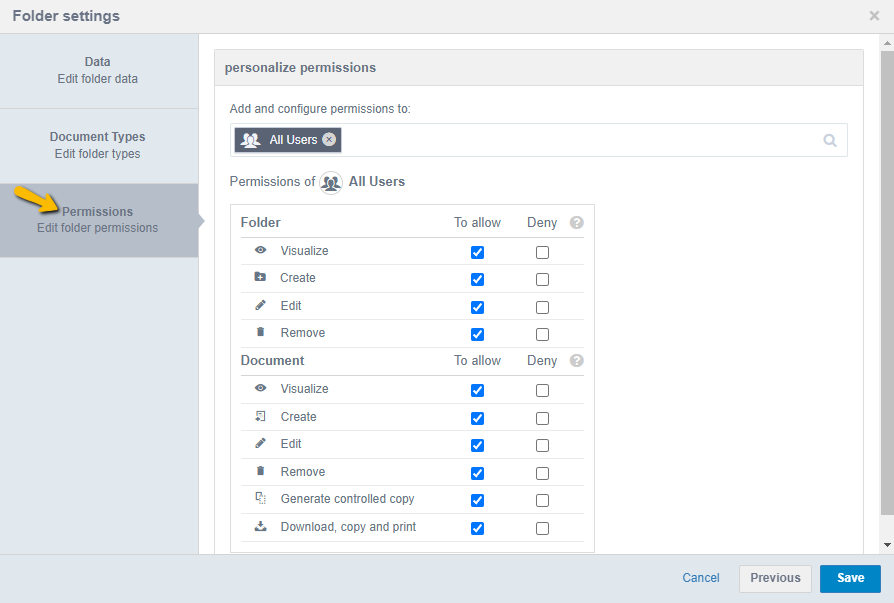
Access the Permissions session, by default it will display that you are allowing all options for all users, as shown in the following image:
To configure permissions for specific users, you must remove the permissions from the All Users group, select the user who will receive the specific permissions, and then configure them, as shown in the following screen:
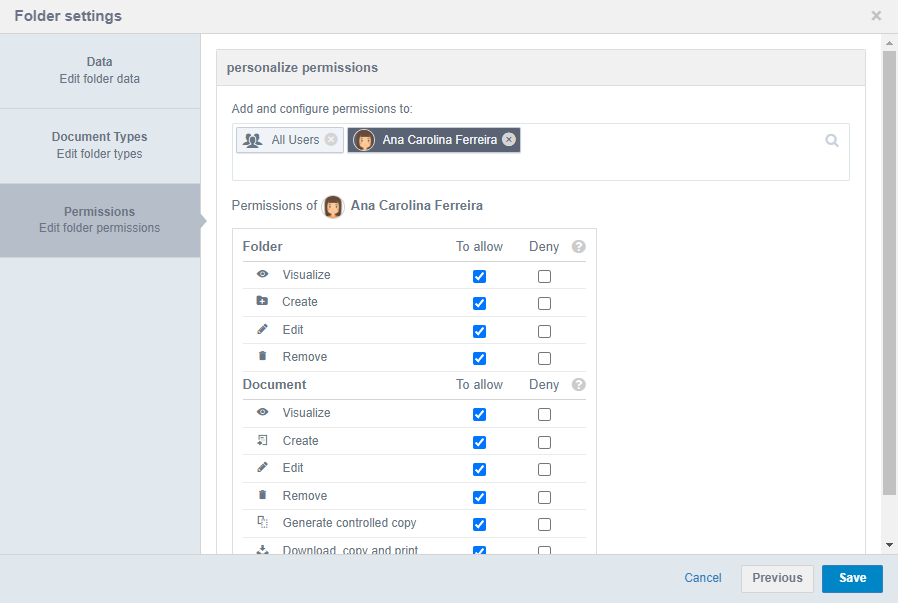
Attention: By default selecting a user will display with all options set in To Allow.
First, the settings for the permissions that the folder will accept are displayed:
- Select To Allow Visualize so that the user, group, or role has permission to access the folder.
- Select To Allow Create to allow you to create subfolders in the root folder.
- Select To Allow Edit to allow you to edit the folder settings.
- Select To Allow Remove so that the user can delete the folder.
After the folder settings, it is necessary to perform settings for the Document:
- Select To Allow Visualize so that the user, group, or role has permission to view the documents in the folder.
- Select To Allow Create to allow you to create documents in the folder.
- Select To Allow Edit to allow you to edit the documents in the folder.
- Select To Allow Remove to allow you to delete documents in the folder.
- Select To Allow Generate Controlled Copy so that it is allowed to create a controlled copy of the documents in the folder.
- Select To Allow Download, Copy and Print to allow downloading, printing and copying documents from the folder.
Attention: Deny settings stand out from release settings, for example, if the folder has the option to Deny Visualize is checked, even if it has published documents to which the user has access, it will not be possible to visualize the folder.
Attention: It is important to remember that the hierarchical order of permissions is first those defined in Document Type, Folder and finally those defined directly on Documents.
When you've completed the permissions, click Save.
Subfolder Permissions
Click the edit icon for the desired subfolder and click the Permissions session, where you should display the following screen:
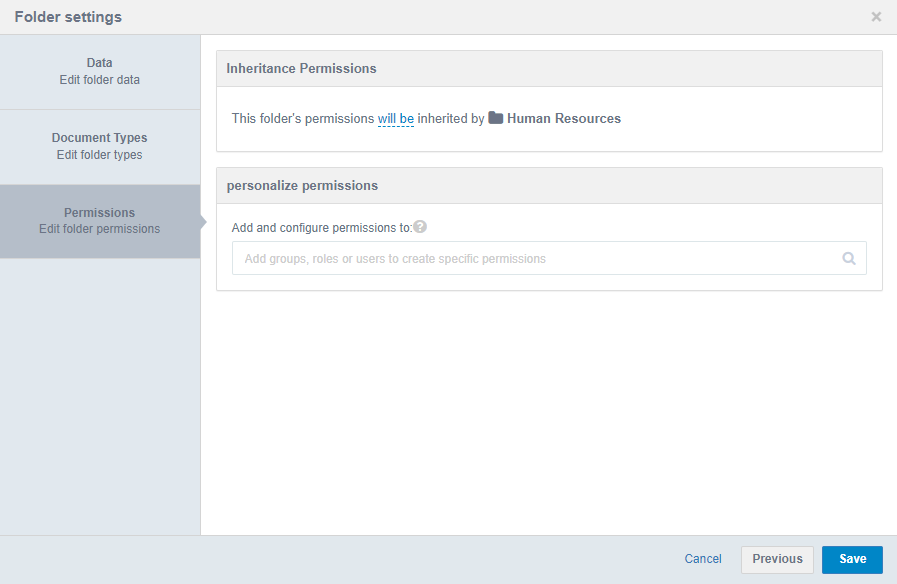
Attention: By default subfolders inherit settings from the parent folder:

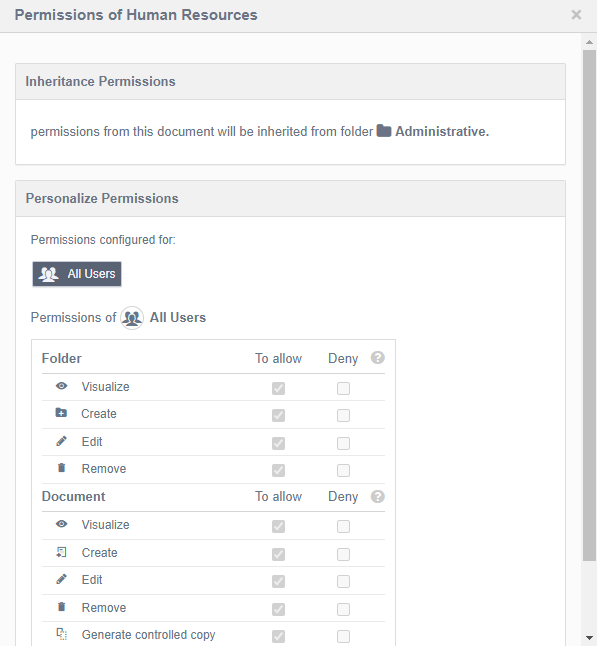
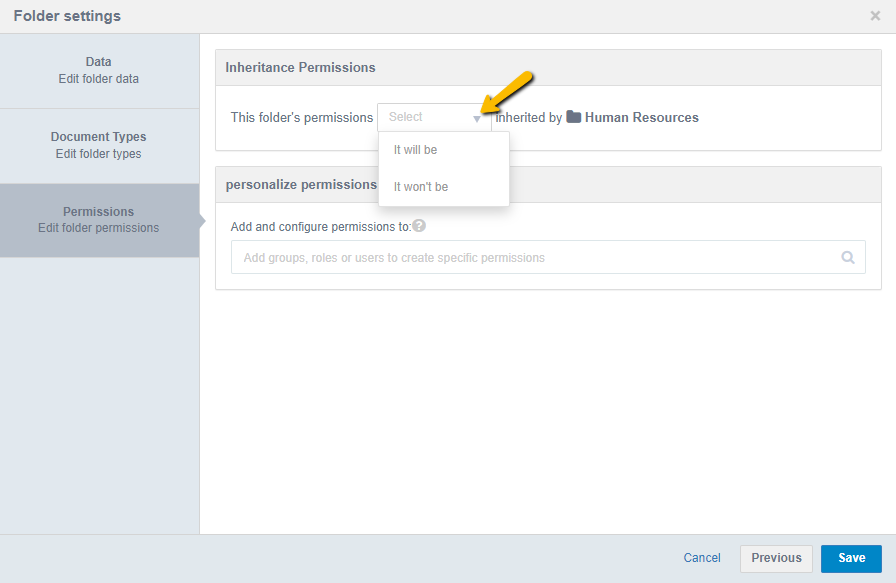
To know what permissions are set on the folder from which the subfolder is inheriting the settings, simply click on the name of the parent folder, then it will open the following screen:
To change the settings of a subfolder by setting specific permissions click on the It will be option and select the It won't be option as shown in the following screen:
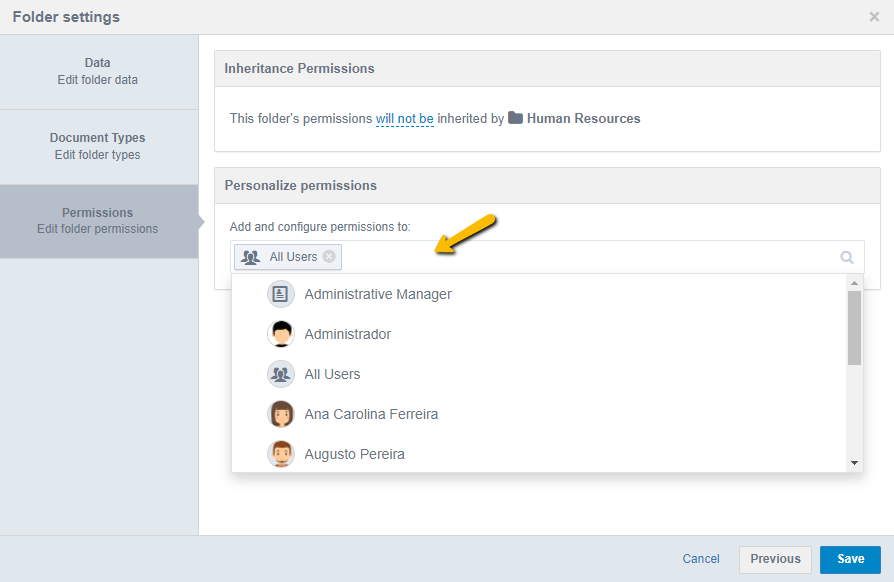
After selecting the It won't be option, under Customize Permissions click to add a user next to the All Users option, with this you can select a desired user and customize their permissions.
When selecting a user, the permission settings are below:
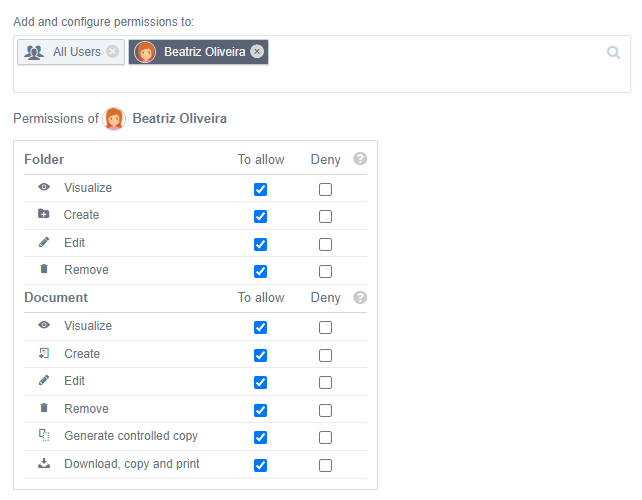
Permissions and denials for folder or document are the same as for folders.
At the end, click Save.
Moving Folders and Subfolders
While browsing EDM, it is possible to move the folder location. To move folders, you need to select the folder and drag it to the desired location, as shown in the following screen:
Attention
It is not possible to move the folder into the same level.
Attention
If more than one folder or subfolder is selected, batch movement is not allowed and the option will be disabled.
Note
Remember that in order to carry out these movements, the user must have the necessary permissions to edit the folder/subfolder in question.
When you select the option, a second screen will become available:
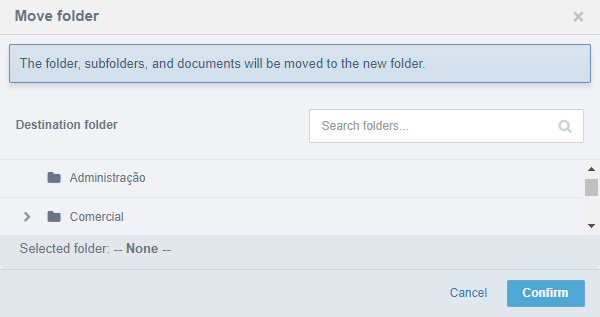
In the list structure will be the folders that the user has permission to create subfolders. It is worth noting that the folder hierarchy rules remain the same, this means you cannot place a folder below the hierarchy it belongs to.
Also on this same screen, in the upper right corner, you can search for a specific folder.
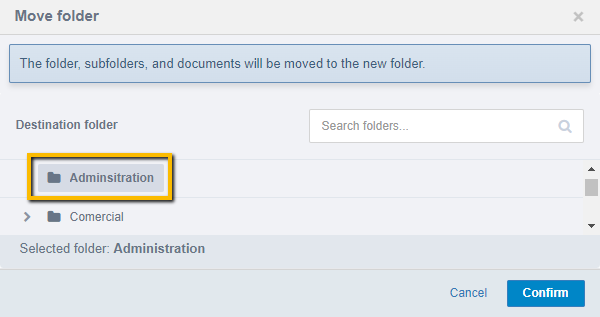
Then, simply select the destination to which you want to move the folder in question and click Confirm for the move to occur.
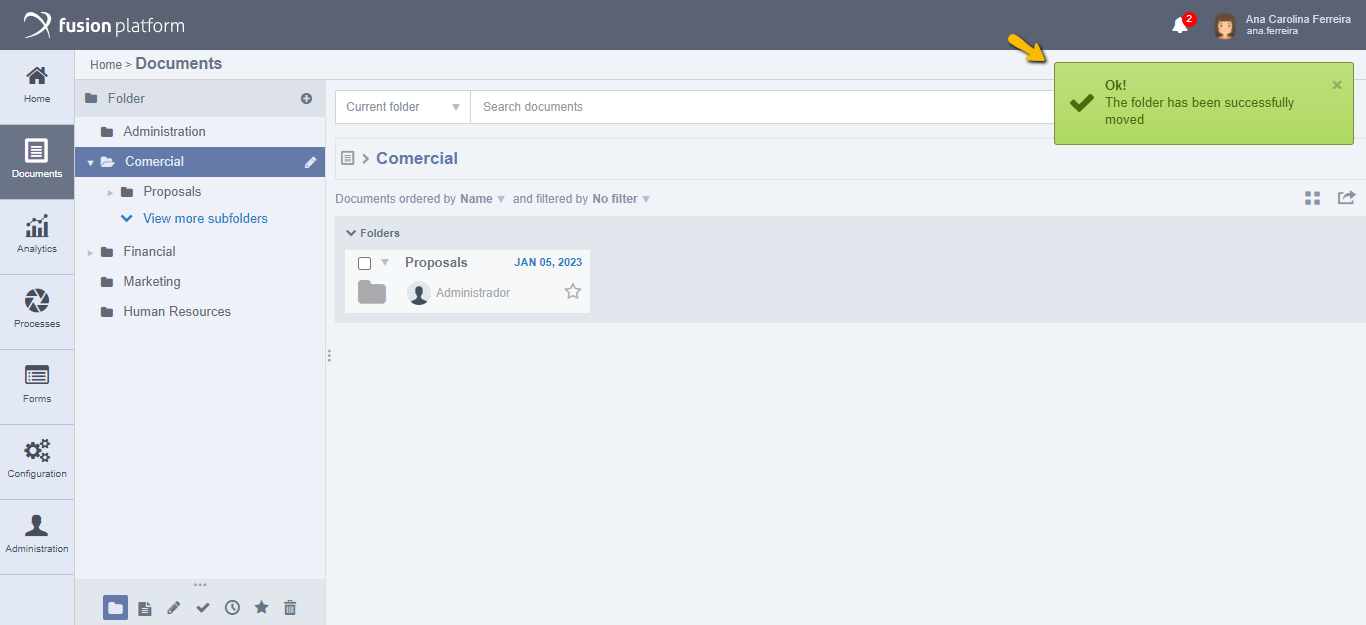
After confirmation, a message in the upper right corner of the screen will show that the action was successful:
There are some scenarios that can invalidate the movement of folders:
- When the hierarchy of folders is disrespected, that is, it will not be allowed to move a subfolder into another lower subfolder, being necessary to respect the hierarchy imposed;
- When a folder is moved to the same level and has the same name as an existing folder.
Note
In case the user is logged off the system by Time Out during folder or subfolder movement configurations, he will be automatically directed to the Fusion login screen, and it will be necessary to log on again.
Duplicate Folders and Subfolders
You can duplicate folders and subfolders via an option on the action arrow.
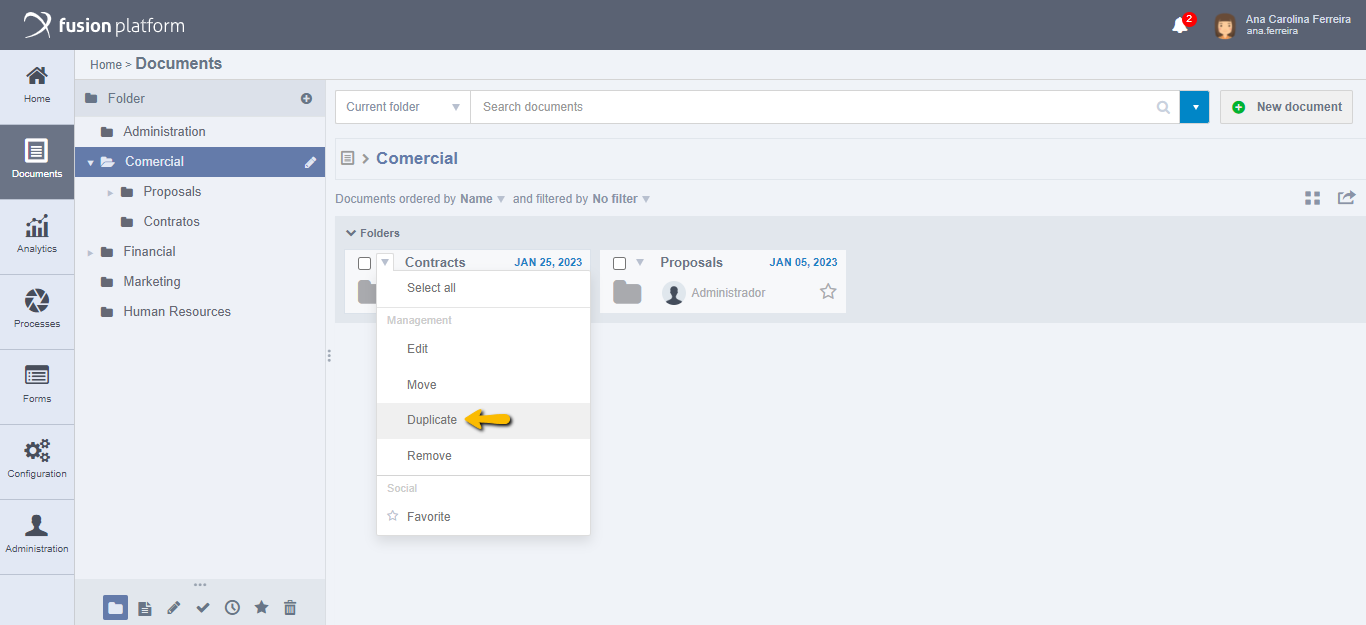
Note
This option is only available in the folders and documents listing of the Documents module (as indicated in the image below), not available in folders that are in the hierarchy view on the left side of the screen.
This feature allows the user to copy only the structure and configuration of folders and subfolders. The documents within them will not be duplicated.
The folders and subfolders selected for duplication will have the same Document Type and Permissions settings as the original folders, and the user can manually make changes after duplicating them.
In addition, they can only be destined for folders where the user has edit permission, as they will be inserting new subfolders within this destination folder.
Attention
When duplicating a folder, the entire folder hierarchy will be duplicated, with all subfolders, which the user has viewing permission.
Also, if the folder being duplicated is configured to inherit permissions from the root folder and has specific settings in the custom permissions part, the new duplicated folder will have these same permissions.
The same behavior occurs if it does not inherit from the root folder and/or has no specific permissions.
Note
Batch duplication is not allowed, so if more than one is selected, the duplicate option will not be available.
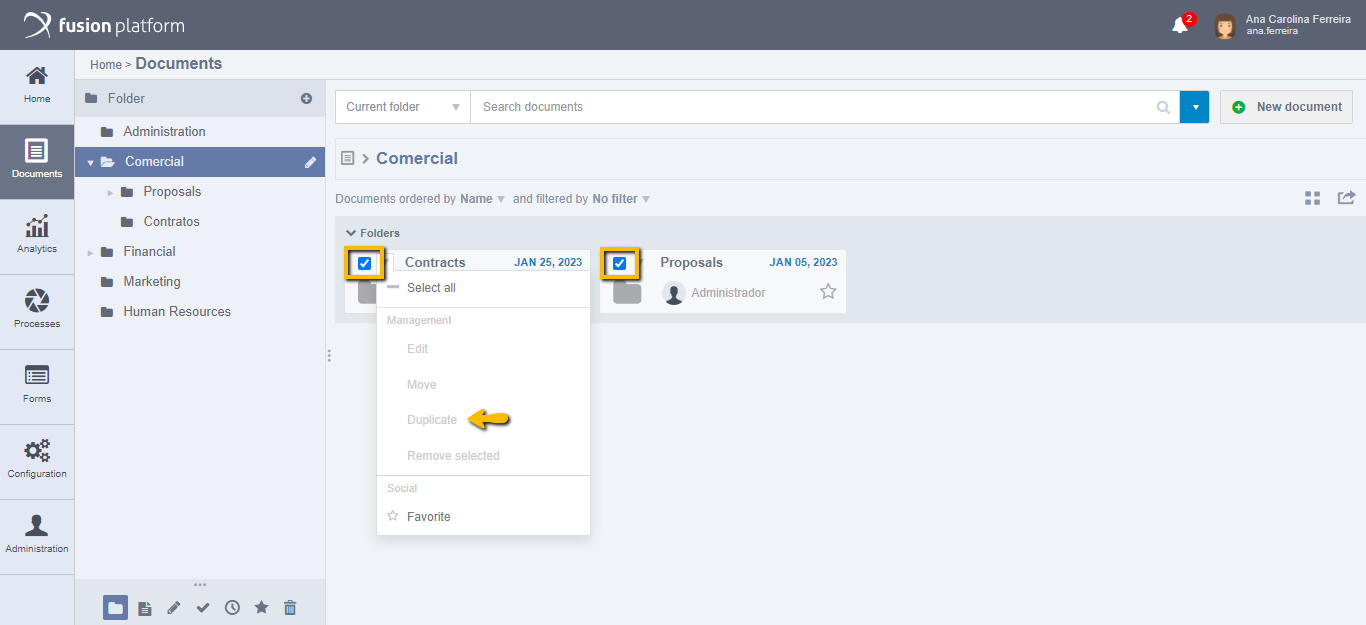
When you select the Duplicate option, a second screen will become available.
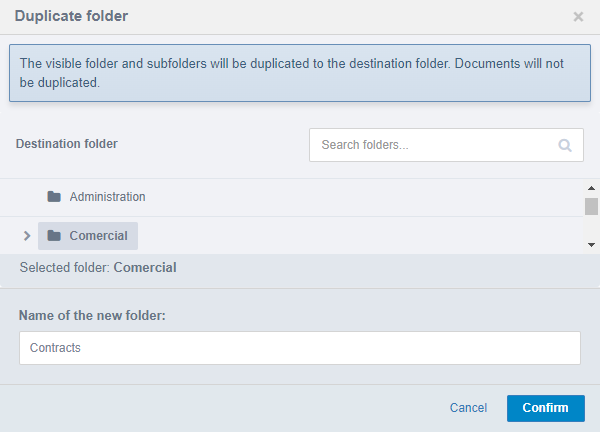
At the top of this second screen, it is reinforced that the folders will be duplicated to the selected destination below and that the documents will not be duplicated.
The list of destination folders below, will be displayed according to the permission of each user, being available only those folders which the user in question has permission to create subfolders.
By default, the parent folder will be selected, the one where the folder to be duplicated is at that moment, however, you can also search for a specific folder, in the space provided for this in the upper right corner of this same screen.
After viewing the folders, at the bottom, you can see an editable field for naming the folder at the time of duplication. This field will always be filled with a suggested name, which is the same as the original folder being duplicated by the user.
It is not possible to proceed with the duplication of the folder without filling a name, this field is mandatory.
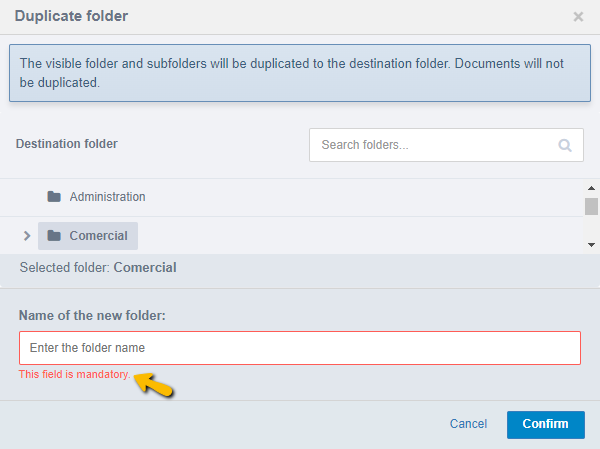
Note
This field does not accept some special characters, such as: \ / : * ? " < > |
After confirmation, a message in the upper right corner of the screen will show that the action was successful:
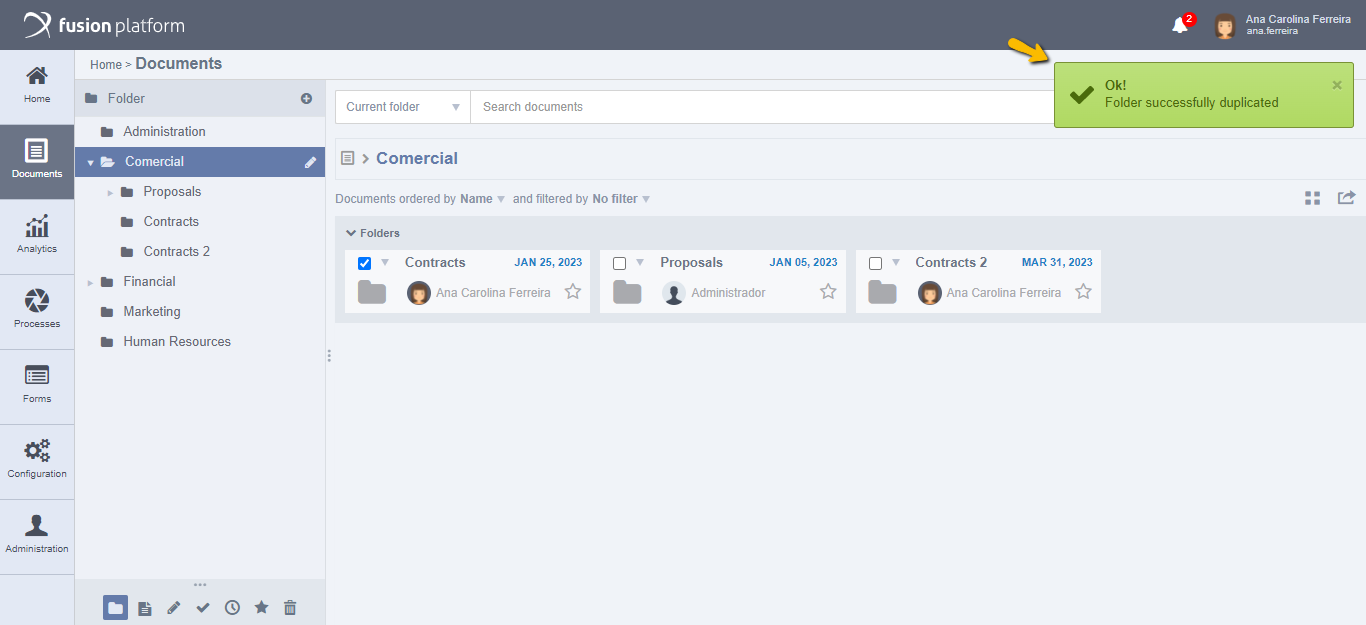
If any error occurs during the duplication of the folder, it will be pointed out on the screen that the duplication of the folder or subfolder was not performed.
Note
If during the folder or subfolder duplication settings the user is logged off the system by Time Out, he will be automatically redirected to the Fusion login screen, and it will be necessary to log on again.
Document View Types
While browsing the document central, it is possible to verify that it has sessions that assist in accessing documents, they are displayed below the folder root, click on the three-dot icon:
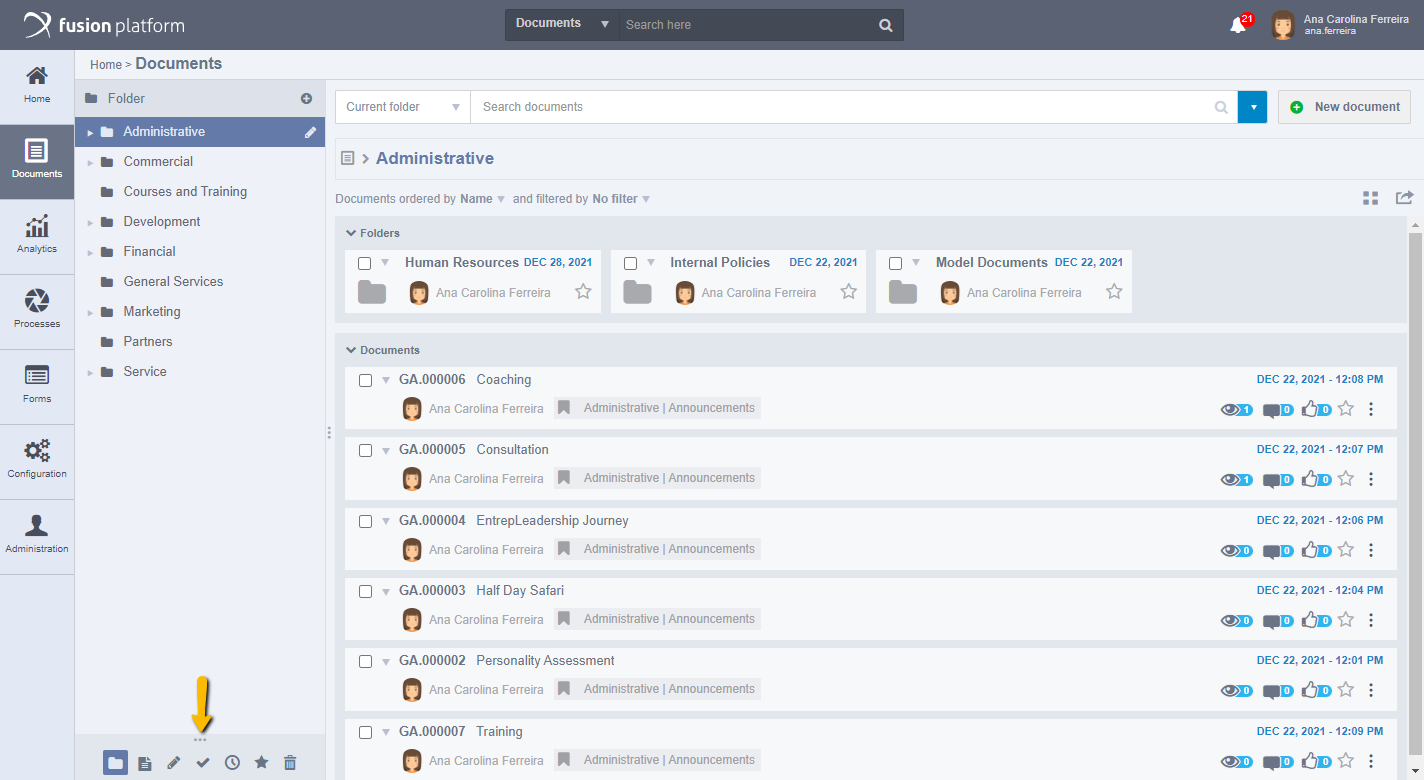
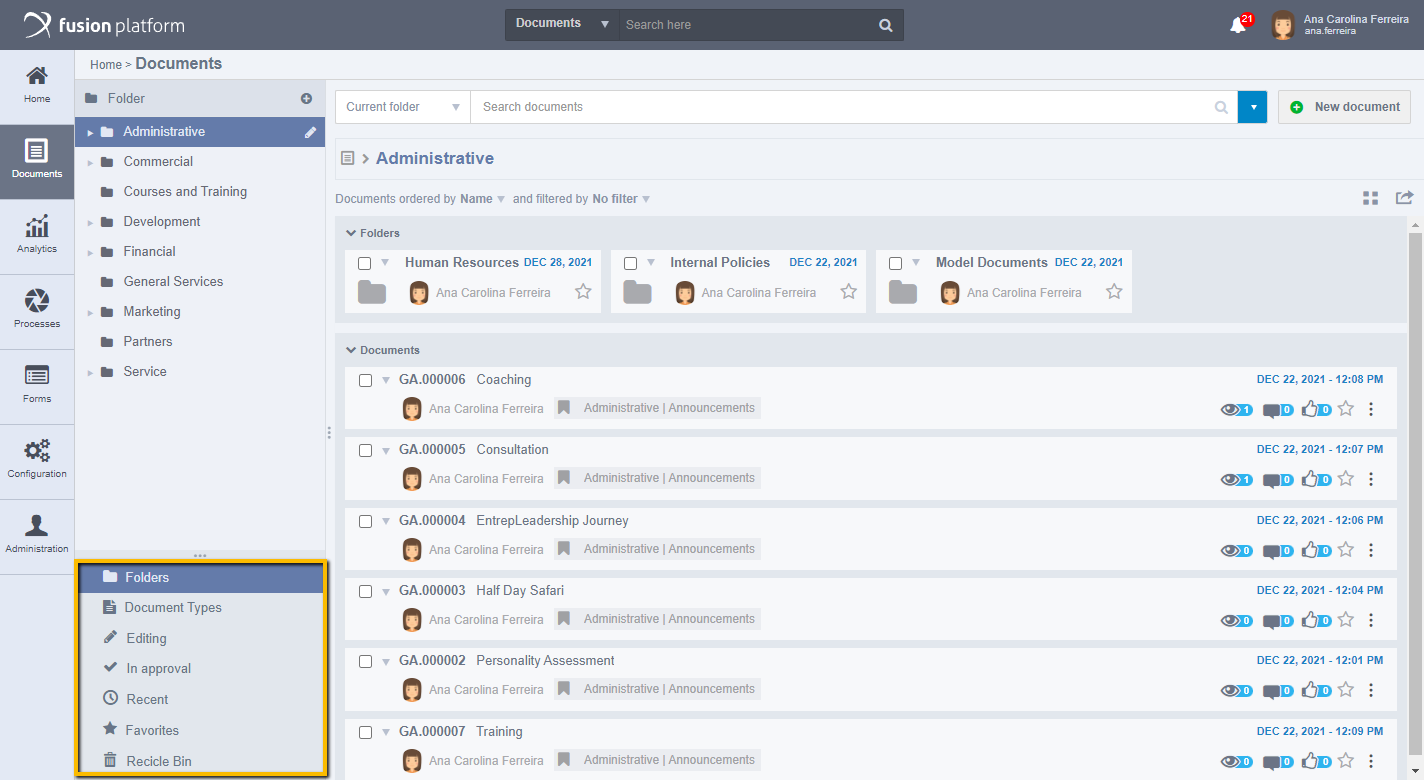
Clicking will expand the tools for assistance, as shown in the following screen:
View by Document Type
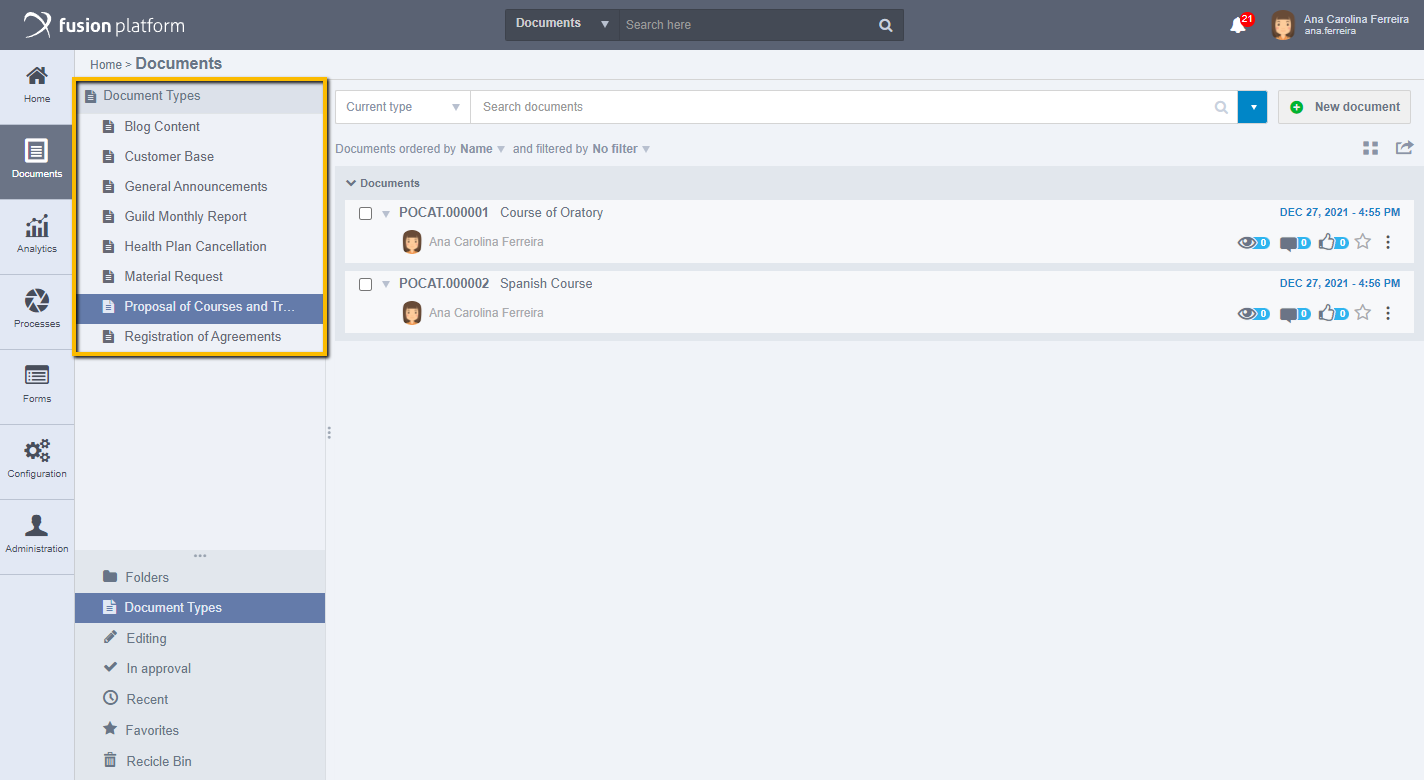
Users are allowed to choose the way they want to view the documents, by default the folder session is selected, but it is possible to change the view to Document Types, where selecting a type displays documents that were published with the selected type.
The document types are listed on the left side of the document central, to view the documents published in a specific type, simply click on the type that the documents published with it will be listed:
View by Editing Documents
Fusion has a session where it shows the documents that are being edited, without the need to perform a filter, facilitating access to information. Click the editing icon to access the documents in editing, as shown in the following image:
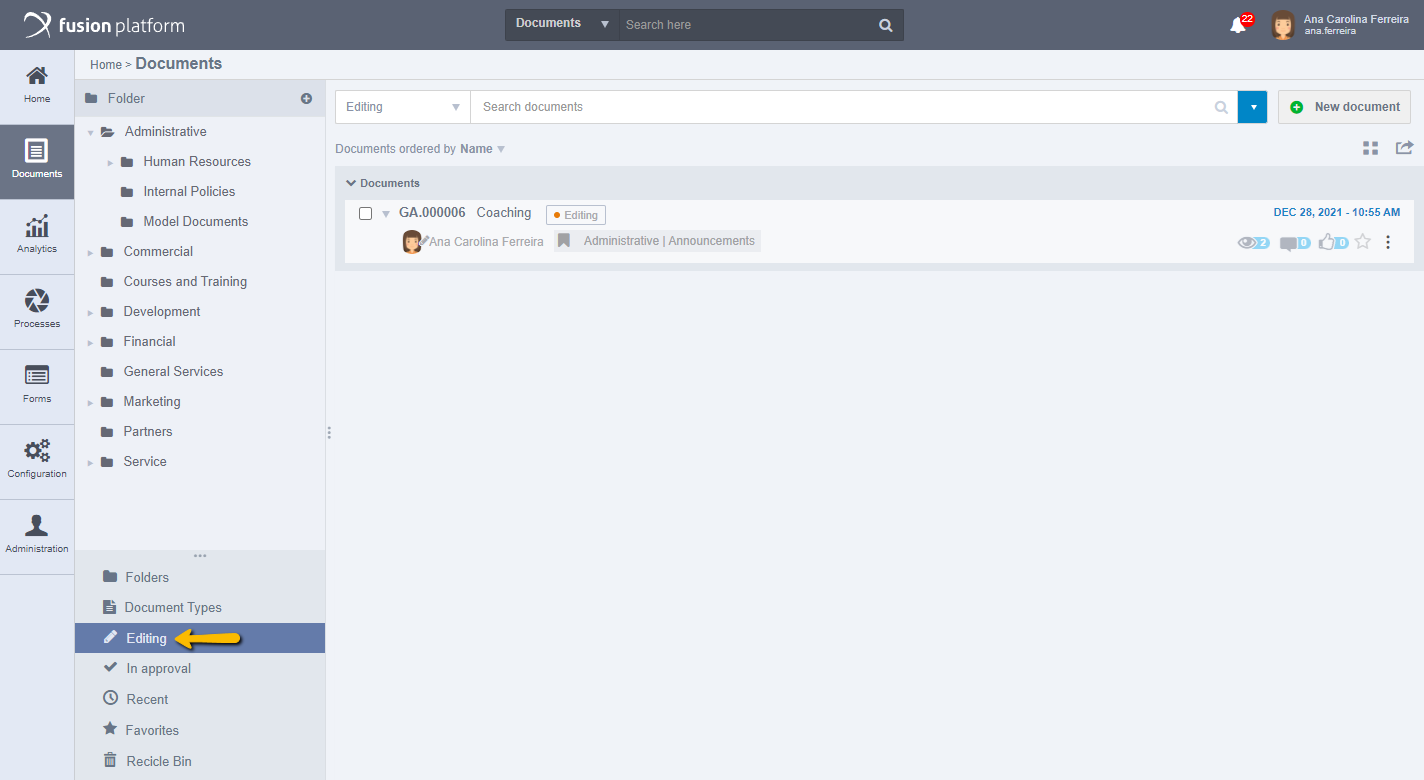
Documents that are in edition remain with the editing tag next to the title:

Attention: Only documents that the user has saved in editing are displayed.
View by Documents in Approval
There is also a document in approval session, when you click the approval icon, the documents are displayed, as shown in the following image:
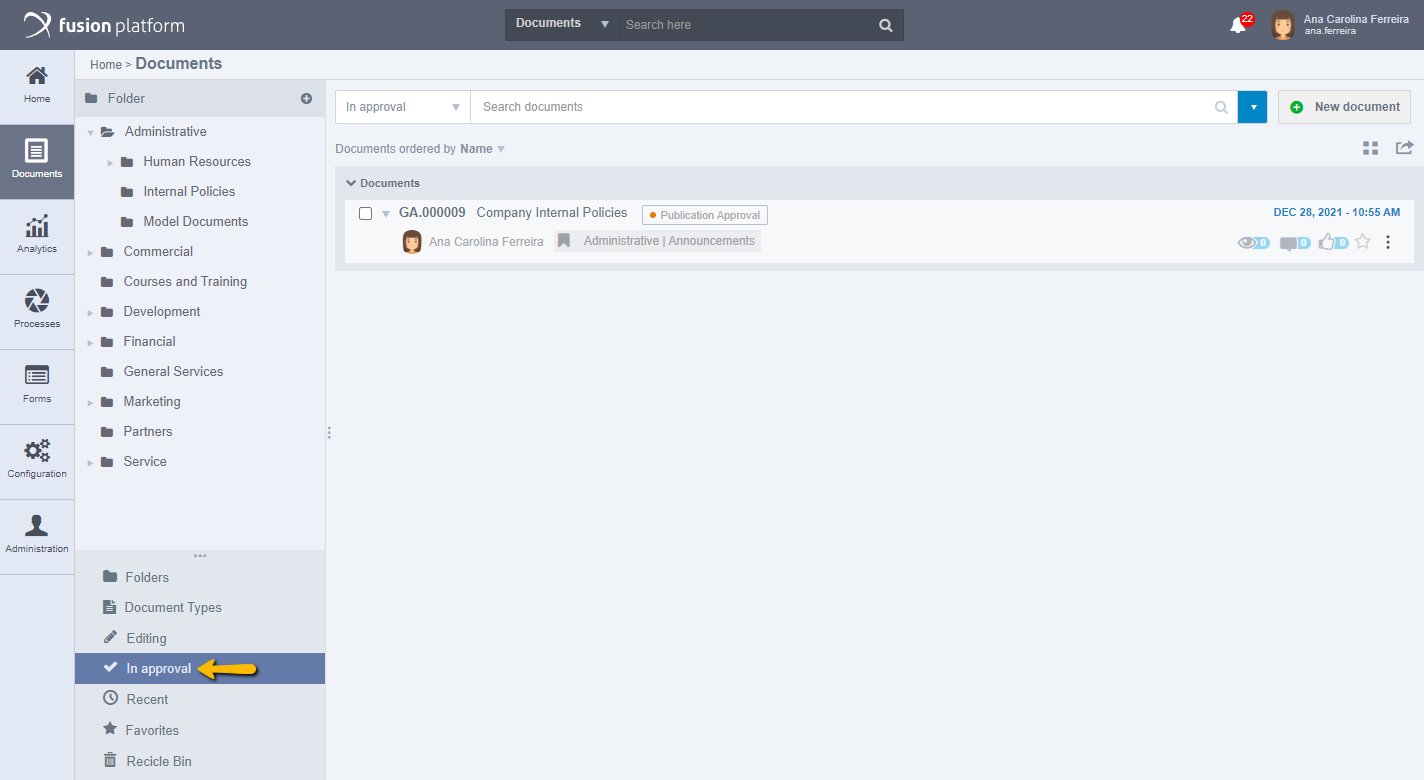
Documents that are in approval remain with the approval mark next to the title:

Attention: Only documents that the user has published and are in approval are displayed.
View by Recent Documents
Fusion provides the user with access to documents that were recently published on the system, by clicking on recent then it should display recent documents as shown in the following image:
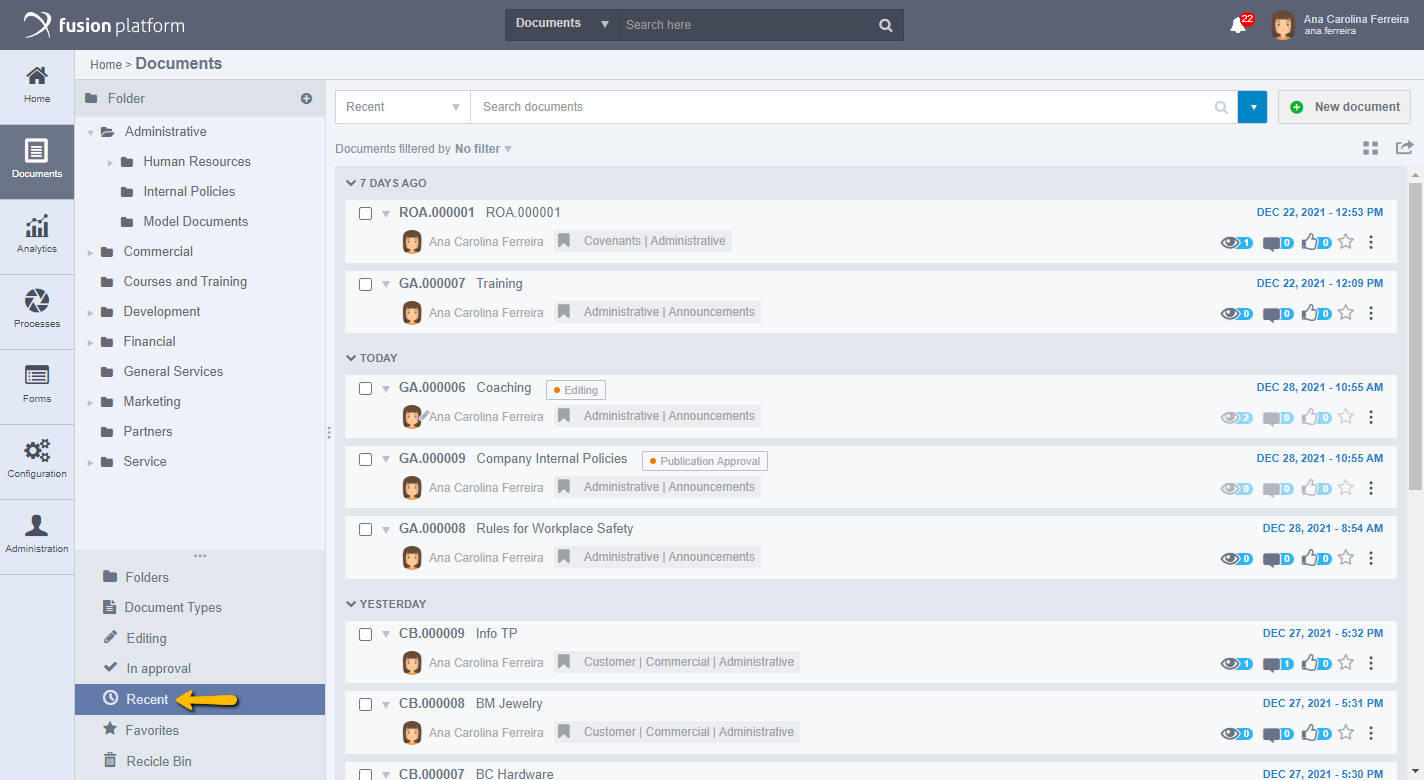
Recent documents are separated by those published on the current date, seven days ago and thirty days ago. Showing who published it and the situation in which the document is.
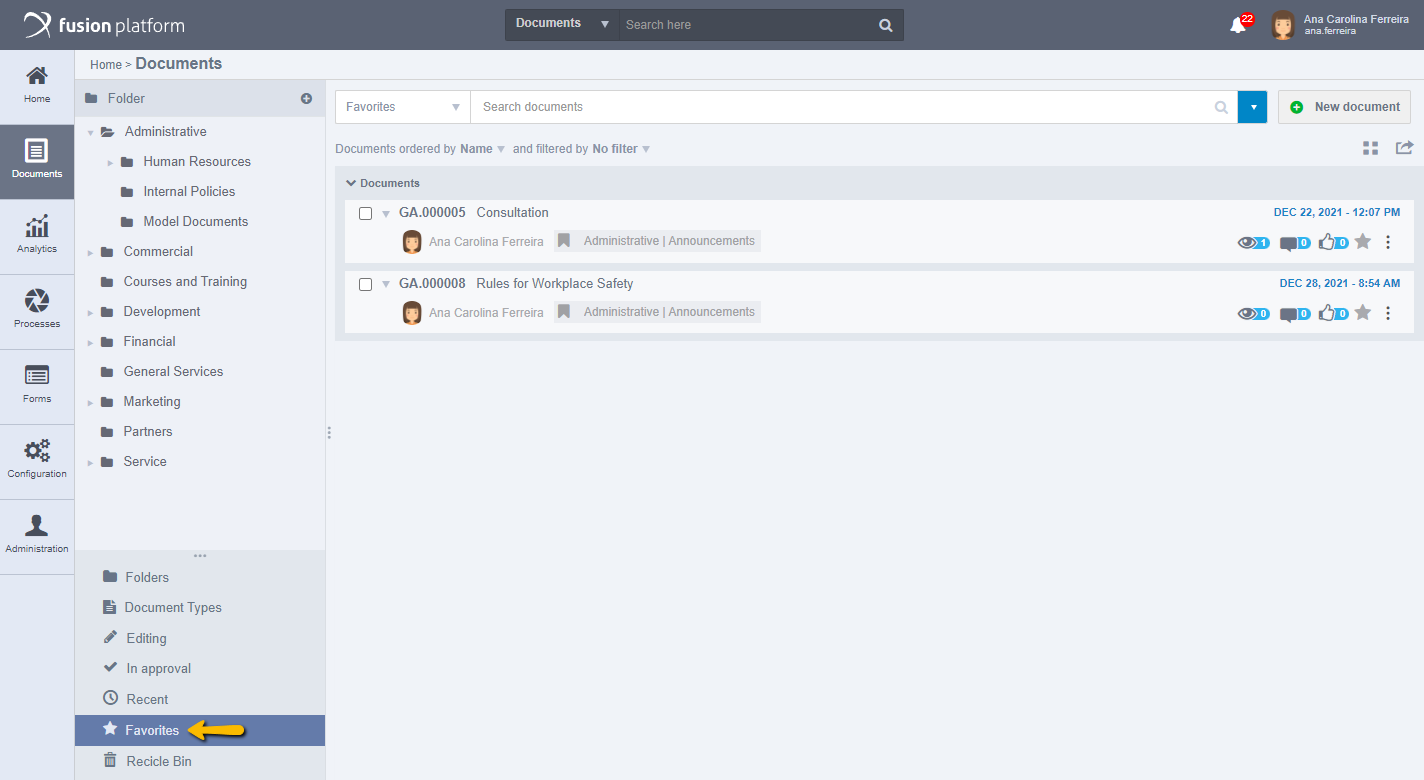
View by Favorite Documents
To view the documents that have been marked as favorites, simply click on favorites and you should display your favorite documents as shown in the following image:
To favorite a document, there is an icon that allows this action in an easy way. In Document Central, check the document you want to favorite and click the star icon that appears in the document or subfolder still in the listing, then those folders and documents should be displayed in the favorite session. The following image demonstrates how to favorite a document:

The star represents the favorite action. When only the outline of the star is displayed, it indicates that the document is not included in your favorite documents (as in the previous image). When a document is favorite, it appears as shown in the following image:

Attention: Only released documents and subfolders can be favorite.
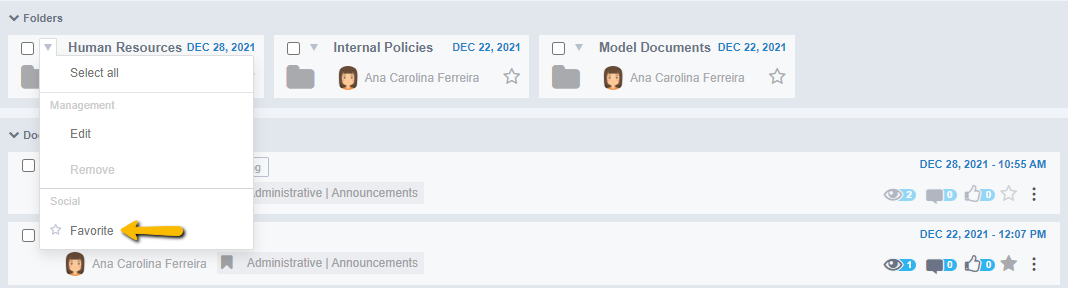
Another way to favorite folders and documents is to click on their actions arrow and then click the Favorite option, as shown in the following screen, in a document's actions menu:
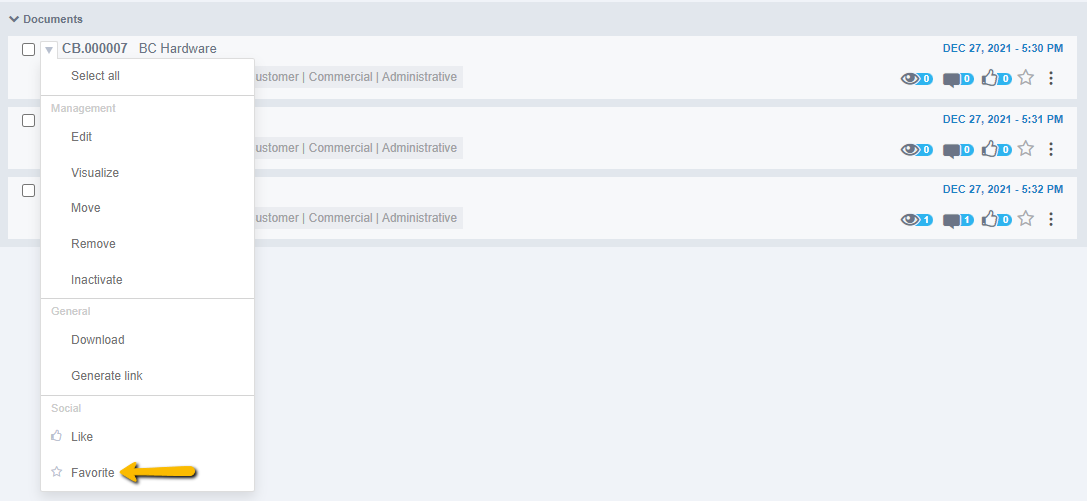
In the subfolder actions menu:
Attention: To remove an option from your favorites, click the star icon again and the documents and/or folders will no longer be displayed in that session.
View Recicle Bin
When deleting a document within Fusion, it is not permanently deleted from the system but is stored in the recycle bin, and can be permanently restored or deleted. When accessing the Recycle Bin, the following screen will be available:
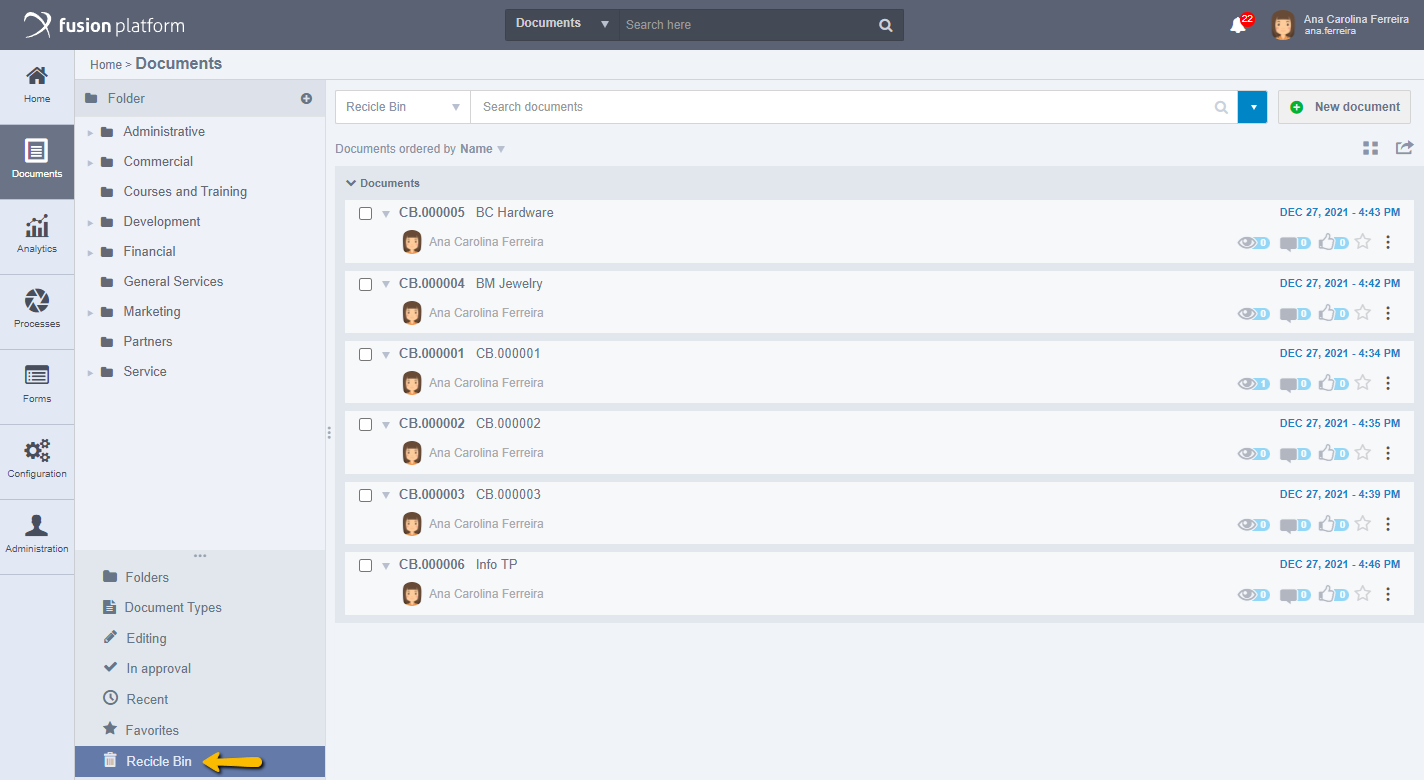
Attention: The recycle bin is individual for each user.
The action menu for each document that is in the recycle bin has the following options:

- Select All: Select to have all documents selected and you can perform batch actions, such as viewing or removing.
- Visualize: Select to visualize the document.
- Remove: Select to remove the item from the recycle bin. When you select this option, the following screen appears:
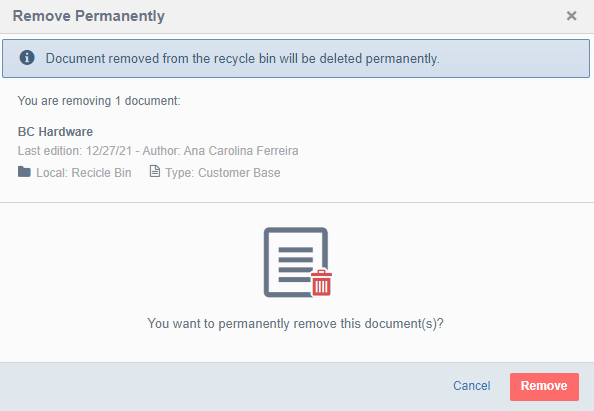
To effect the deletion, select Remove.
Attention: When deleting an item from the recycle bin, it cannot be recovered.
- To restore: Select to have the document restored and return to one of the Document Central folders. When you select this option, you should display feedback message stating that the document has been successfully restored. If the folder where the removed document was published no longer exists on the system, you should display the option to choose the folder in which the document should be restored, according to the following screen:
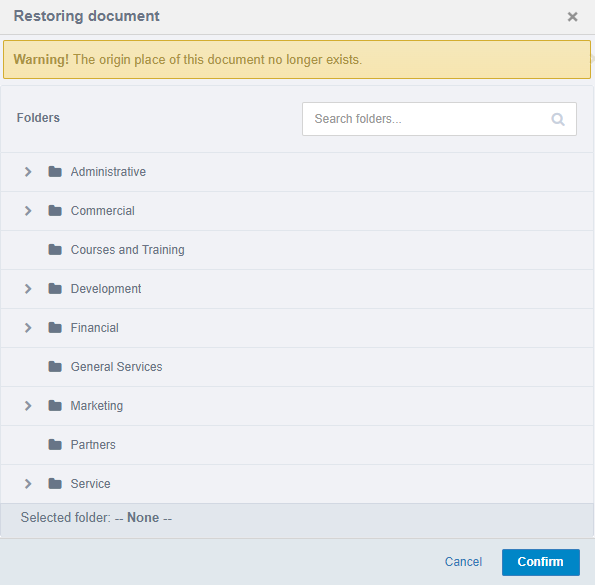
After selecting a folder for document destination, click Confirm and the document will be restored.
New Document
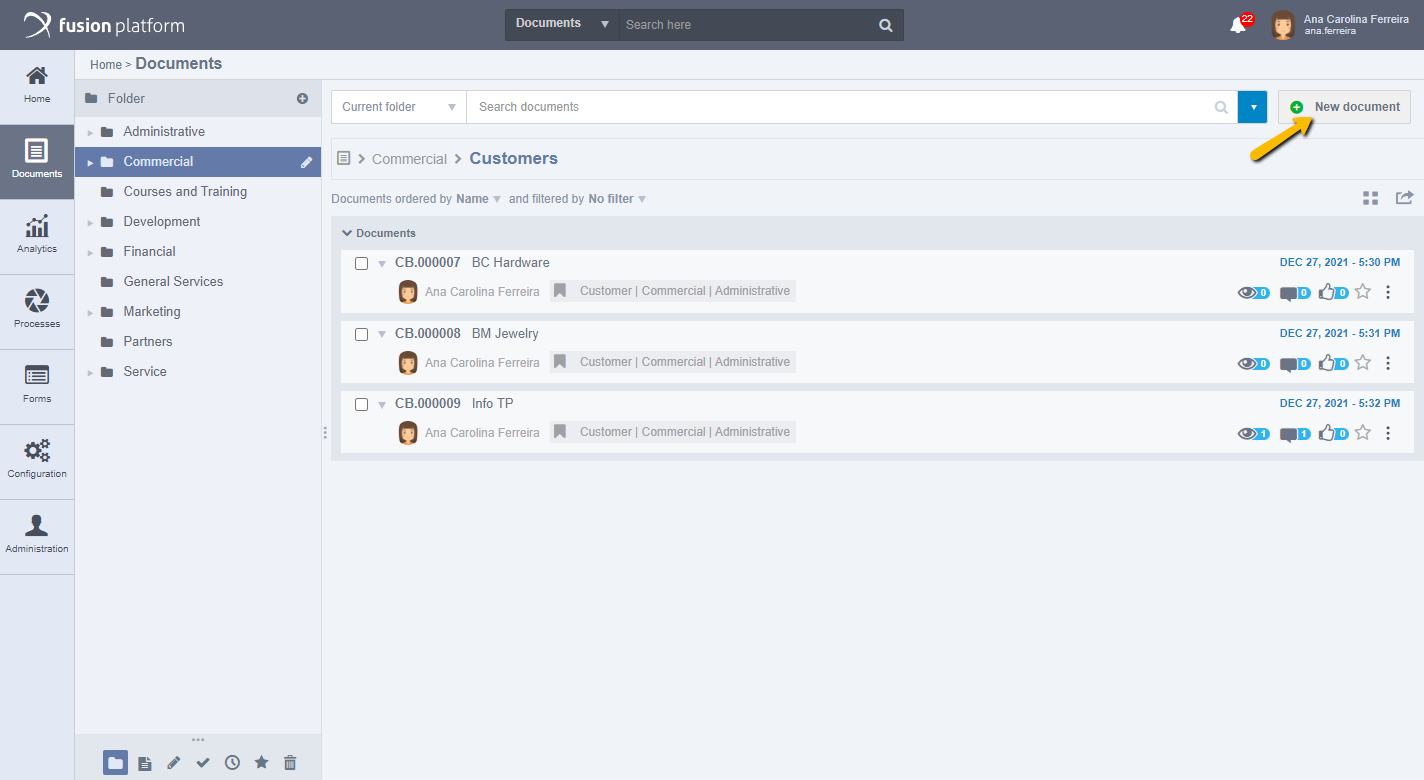
The publication of documents is one of the essential parts of EDM, as it is when the user can insert documents for various purposes. To publish a document, it is important to understand that it is not enough just to upload the file and fill in the fields, but to release it to other users.
In the document central, select the folder where you want the document to be published, once it is in the folder, click New Document:
Attention: The publisher of a document owns it (and they have full access to it), but if another user edits that document, they automatically become its new owner (having full access to it), causing the previous owner to lose all their permissions on the document.
The publication of documents takes place in four stages:
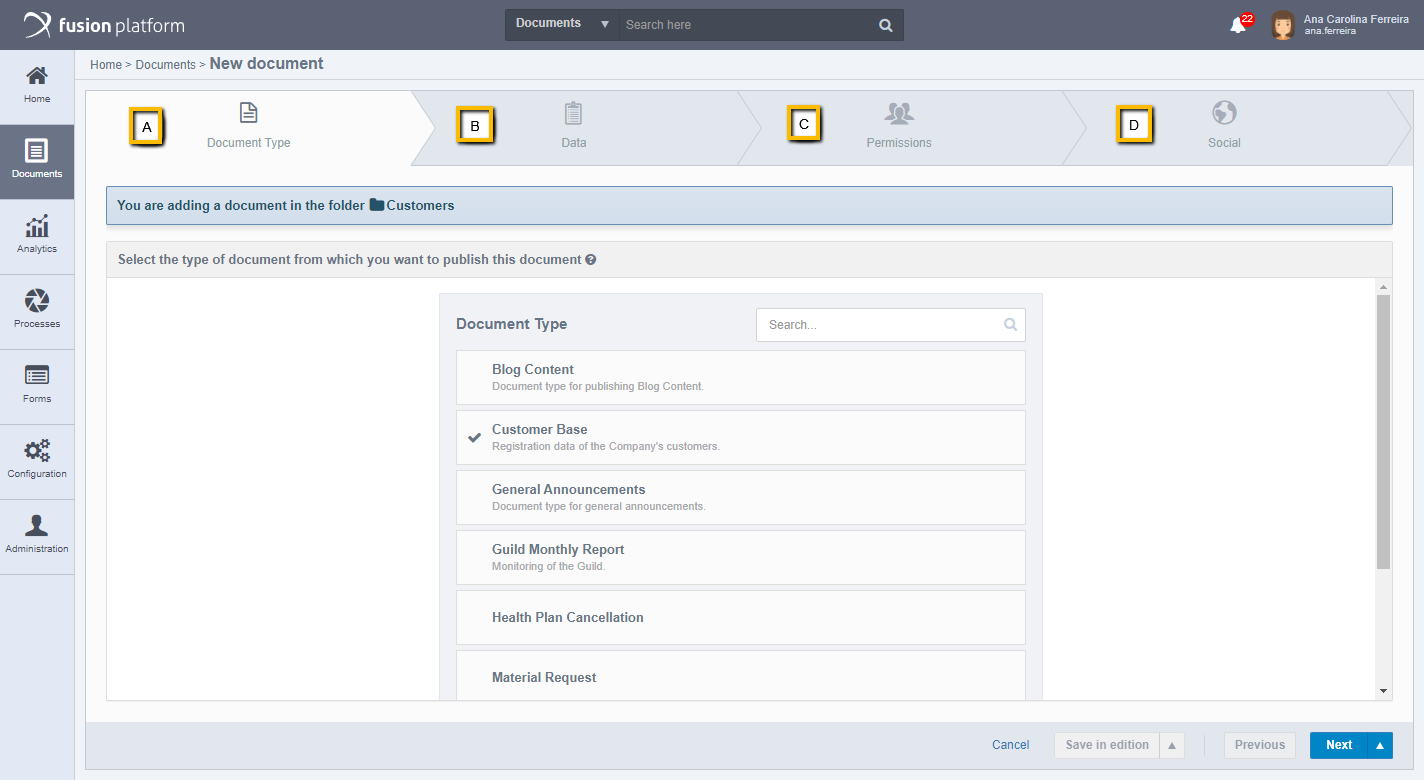
Document Type Step
By selecting the folder, you can choose the type of document to which the document will be published.
A — Document Type: Select the type as shown in the following image:
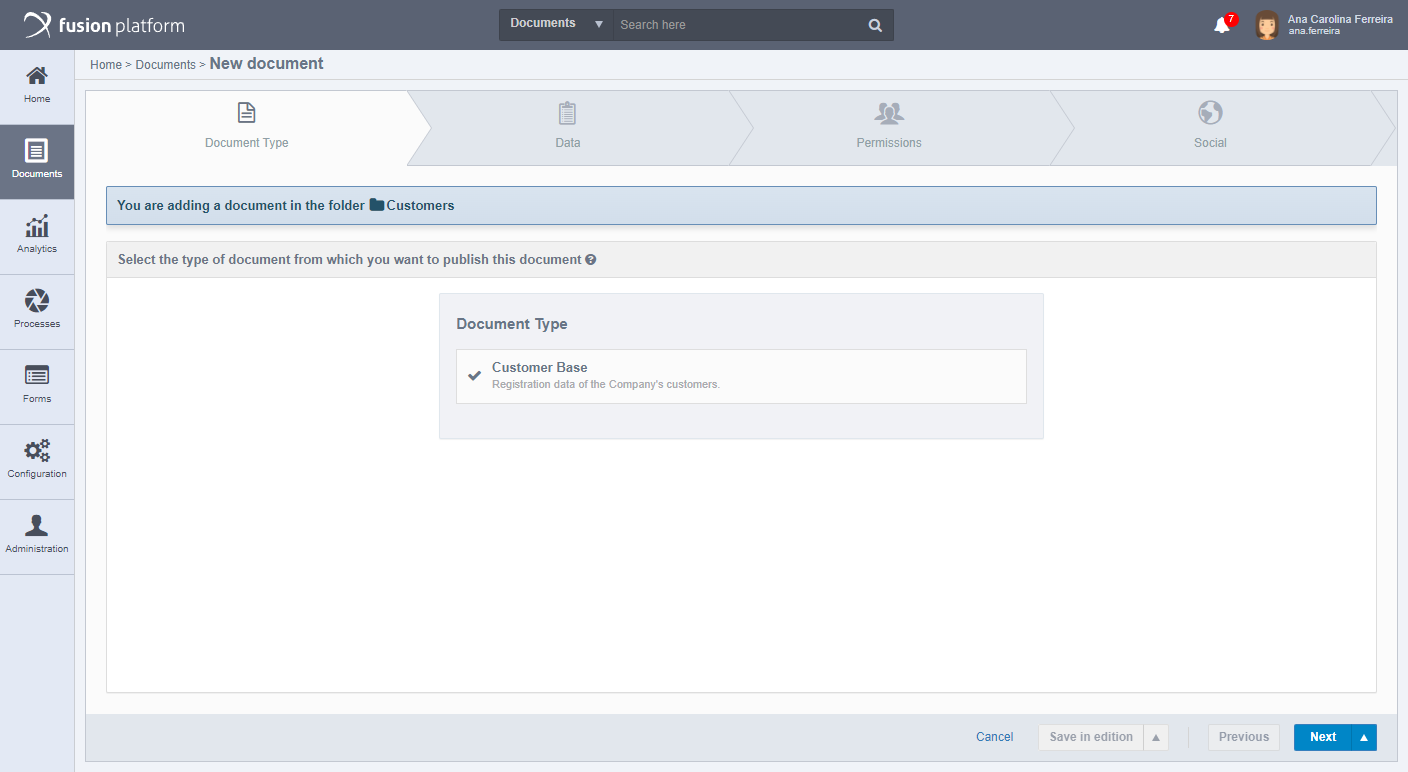
If there are document types configured to appear in the folder where the document will be published, then only those specific types will be visible on this screen, in which case the Customer Base document type is configured for the Customers folder.
Once the document type is selected, click Next and then it should display the Data tab.
Data Step
B — Data: Fields are displayed for document data to be entered.
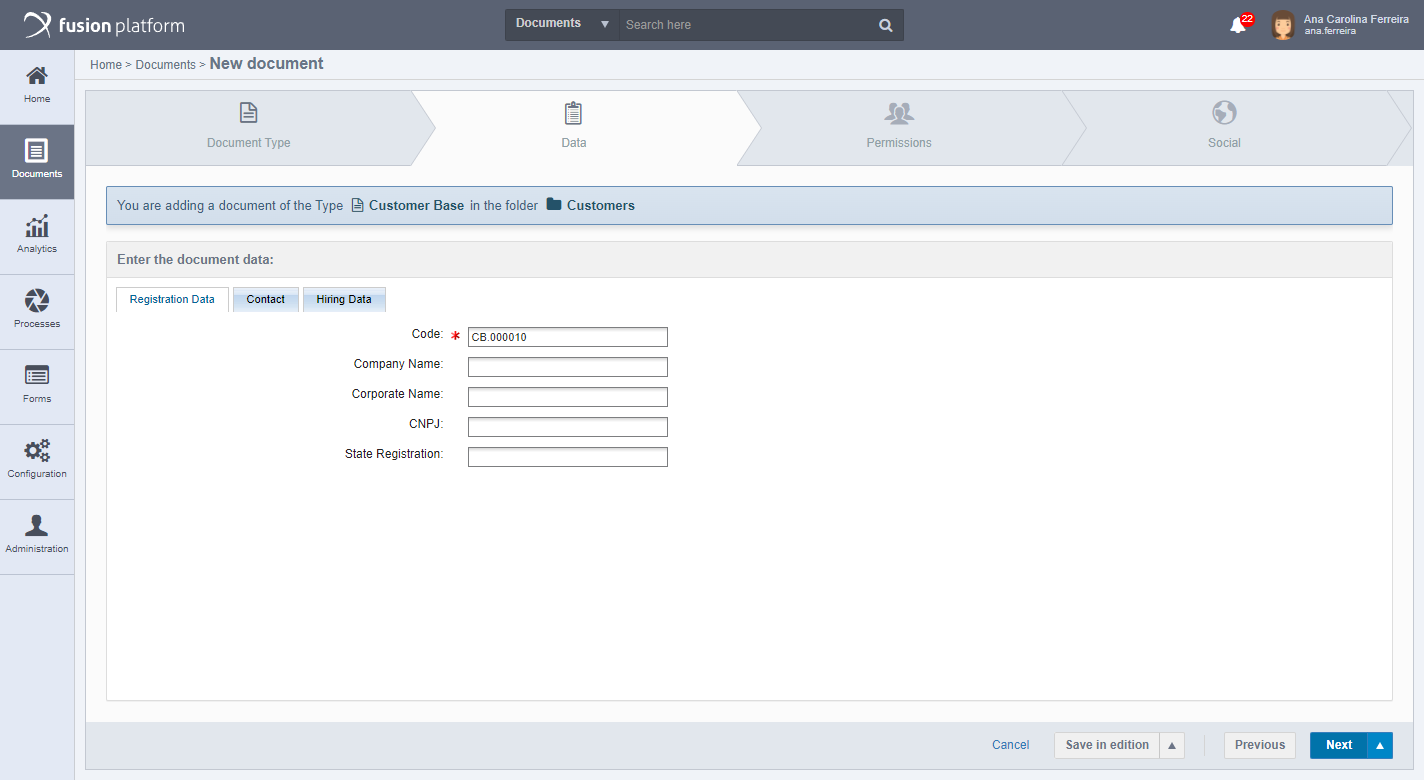
The code field is in every document. In the Code field, enter a code for the document being created. This field is already filled in, but can be modified. Its mandatory and unique completion, that is, in addition to not being able to be empty, there cannot be any other document with the same code.
Attention
The fields displayed vary according to the type of document.
It is necessary to fill in a File field, select the file containing the desired document, which will be the document itself.
Attention
The Fusion Platform has a universal viewer, a tool used to publish documents, whose function is to display files for the user. The viewer works with the conversion of the attached file at the time of publication of the document and then displayed to the user, but it has limited options of accepted extensions, namely:
Office Suite and Text Editors (.doc, .docx, .xls, .xlsx, .xlsm, .ppt, .pptx, .pps, .ppsx, .log, .odt);
PhostScripts (.pdf);
Images (.jpg, .jpeg, .png, .bmp, .gif, .tif, .tiff);
Videos (.mp4);
Audio (.mp3);
CAD files (.dwg, .dxf, .eprt, .edrw, .sldprt, .sldasm, .slddrw, .stl, .obj);
By attaching extension files compatible with the universal viewer, it will be possible to view/listen to the document normally.
After filling in the data for your document, click Next to set the permissions for the document being published.
File Scanning
In Fusion, in File type fields, it is possible to scan them to be attached if they are in printed format. For this, it is necessary that the user's machine that will perform this action has communication with the printer that will be used for this scanning through the Internet network or by USB. For the system to find this printer it will also be necessary to install the specific printer driver, according to its model and specification. In addition, FusionBox must also be installed on the user's machine.
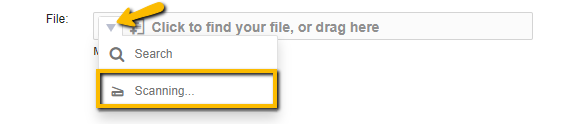
To do this when inserting a file, just click on the action arrow of the file field and click on the Scanning option as shown in the following image:
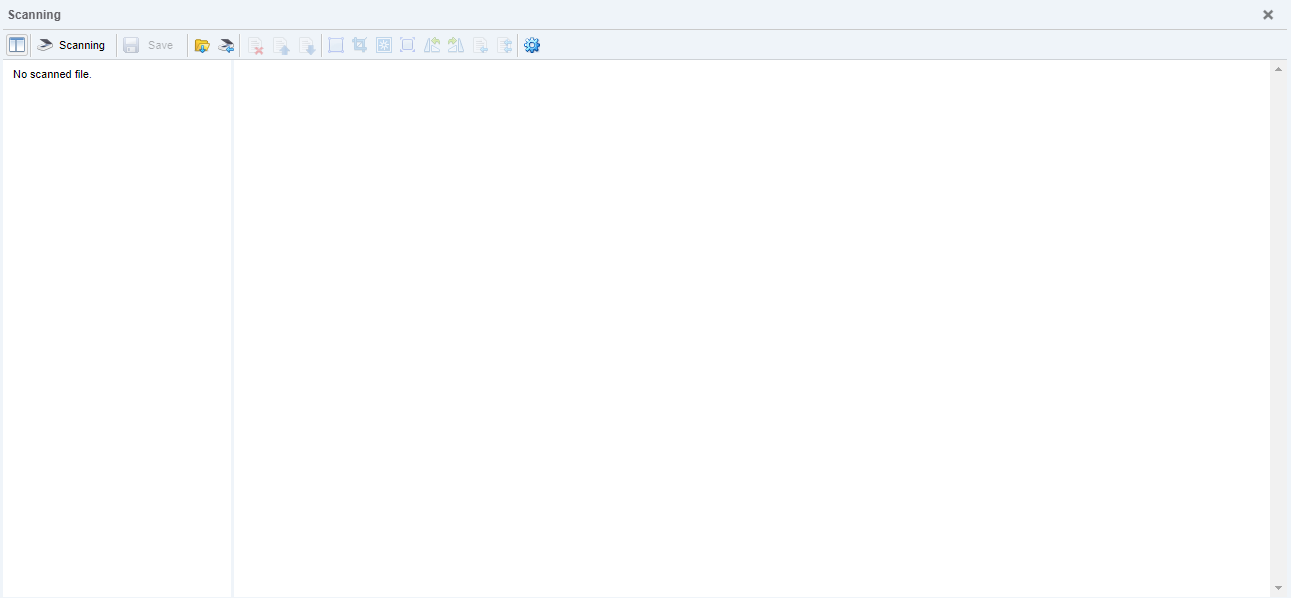
Next you will be prompted to install FusionBox (you can see how to do the installation in Installation of FusionBOX) to run the file scanning. Then the following screen will be available for viewing:
You will need to make the scan settings. The image below has the necessary settings:
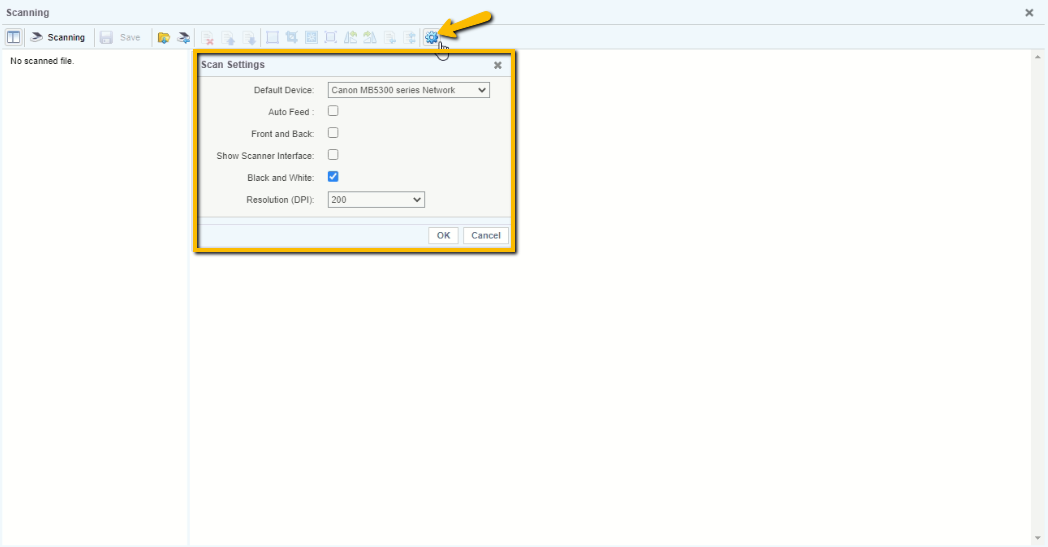
In the scan settings you can set the following parameters: Default Device: Enter the name of the printer that will be used for your scan. Auto Feed: Select this option to enable the printer to automatically pull sheets for scanning. If the option no is chosen you will need to manually feed the sheets. Front and Back: Select Yes to scan double-sided. Show Scanner Interface: The Fusion Scanner interface has tools to customize scanning. Select Yes to display the Scanner interface. When selecting No, the interface is not displayed. Black and White: Select Yes to scan black and white files and photos only. Resolution (DPI): Set the maximum size in pixels per inch. Then press Ok and then press Scanning.
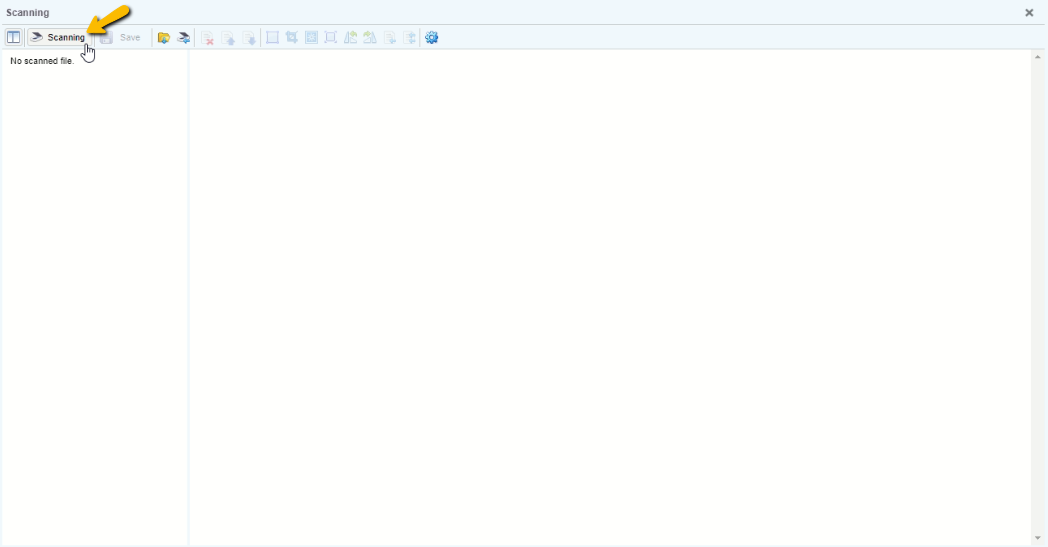
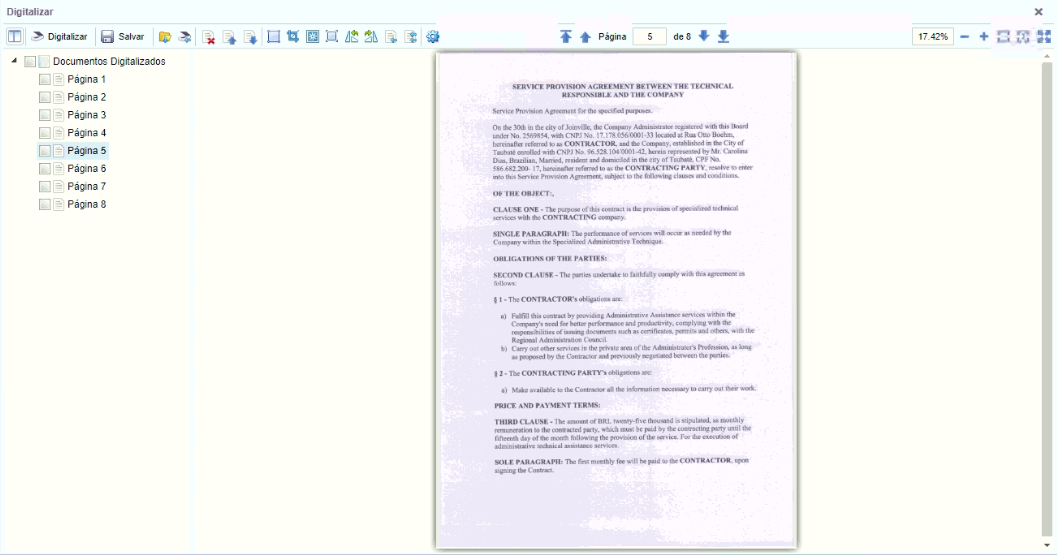
Then the file will be scanned as shown in the image below:
Note
Parallel file editing works by giving priority to the first editor of that file.
For more information about this feature, click here
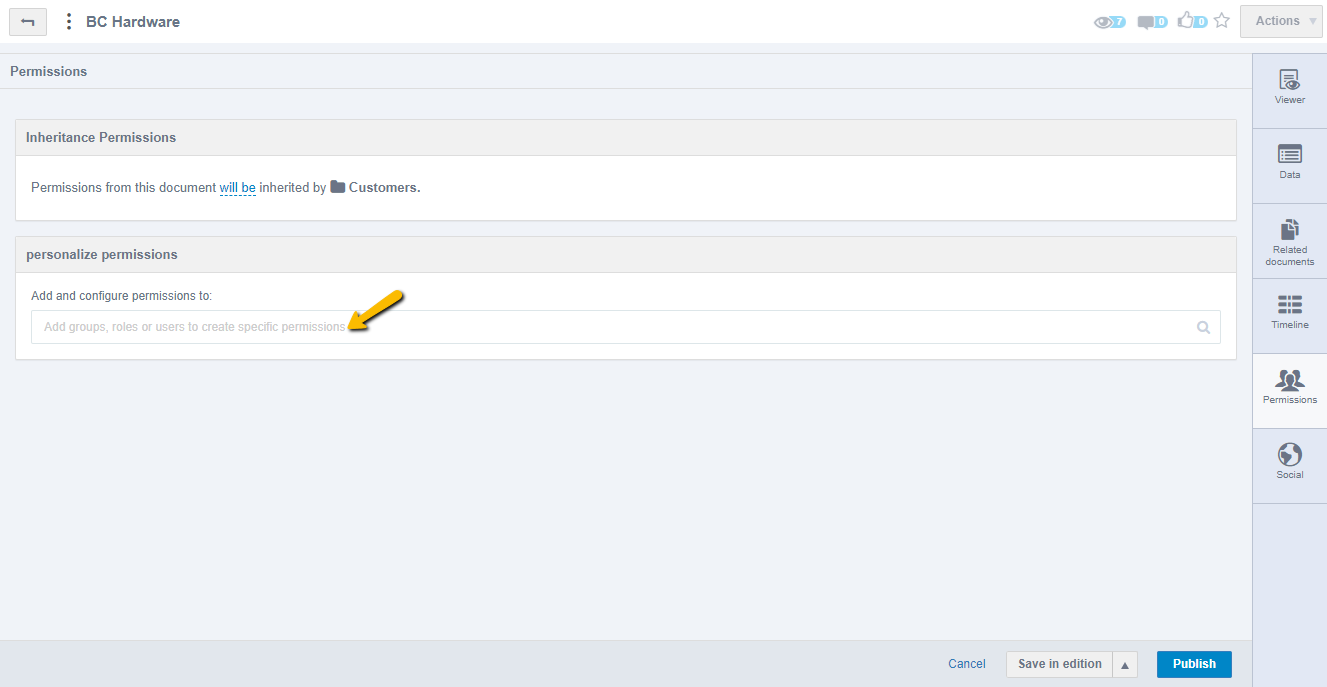
Permissions Step
D - Permissions:
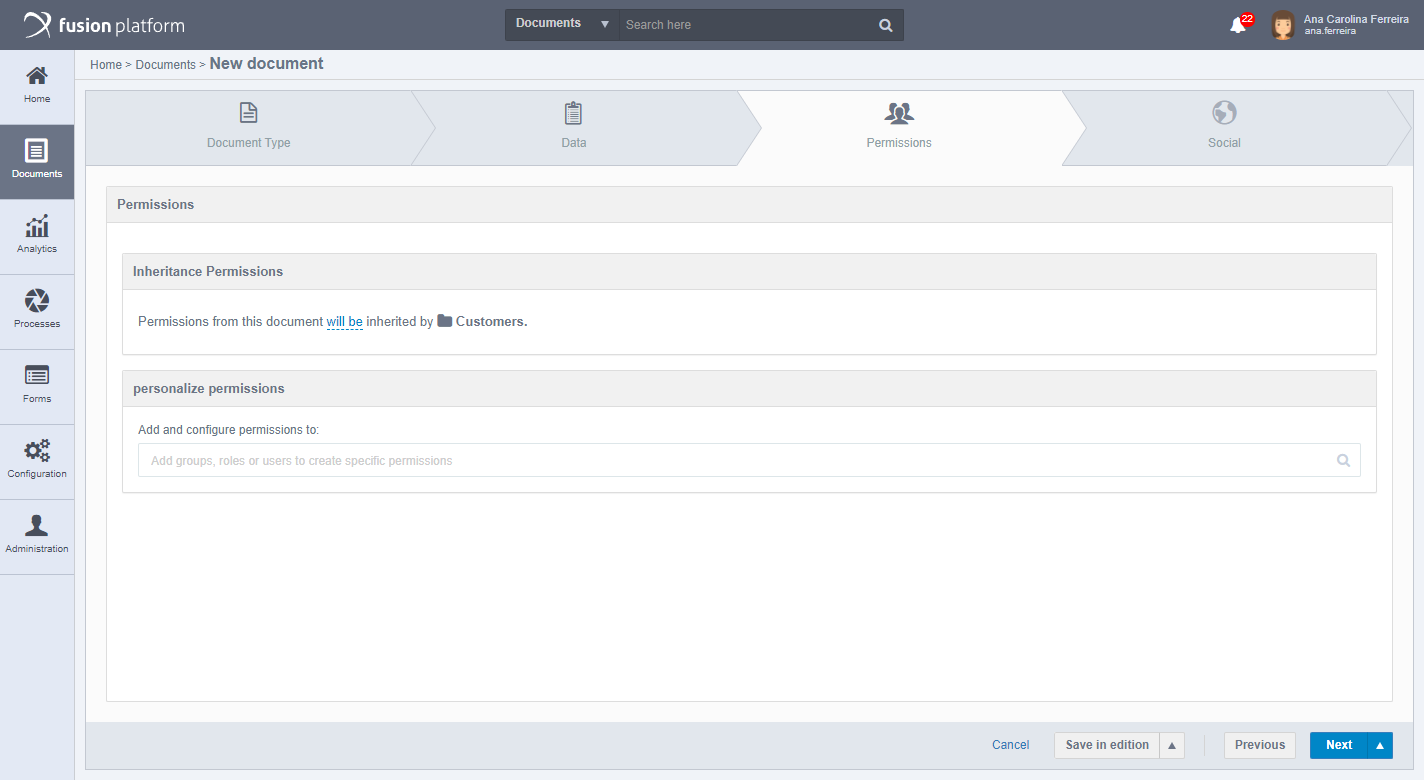
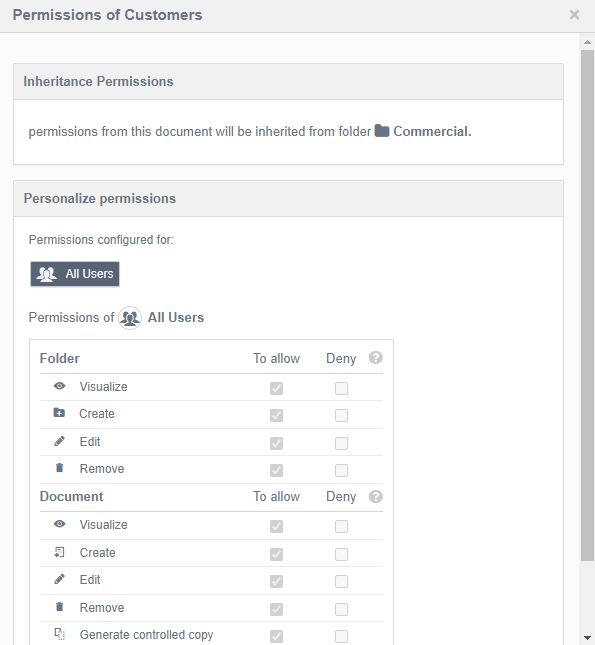
Note that by default it tells you that permissions are being inherited from the Customers folder, to know what are the permissions of the Customers folder, just click on the folder name and the following screen will be available:
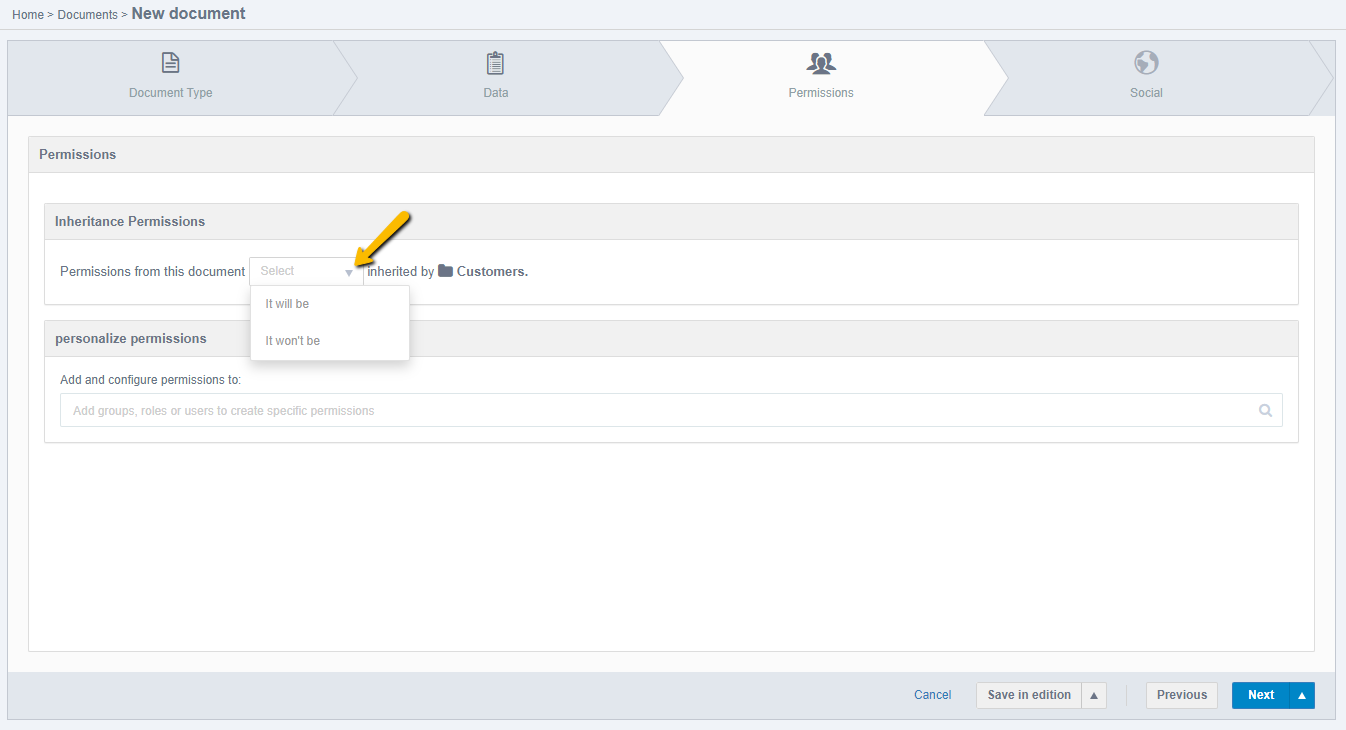
However, if necessary, the user can configure the permissions so that the permissions are not inherited and customize the permissions, click on the It will be option and select the It won't be:
You should display the group all users in the Personalize Permissions field, as shown in the following screen:
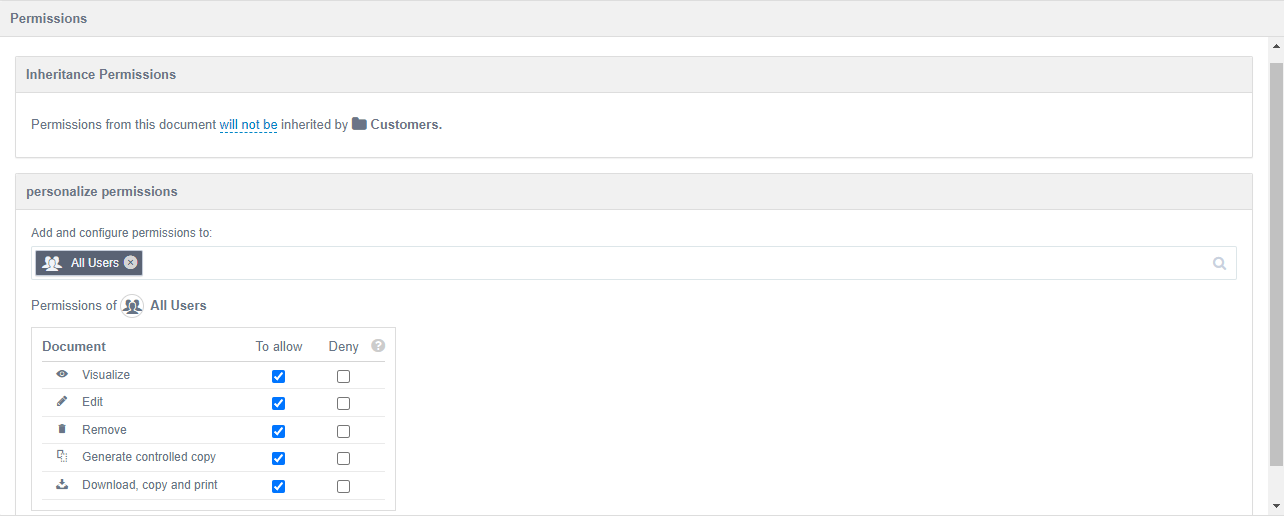
It is possible to insert specific users/role/groups in the permissions of the new document:

Attention: By default selecting a user will display with all options set in To Allow:

- Select To Allow Visualize so that the user, group, or role has permission to view the documents.
- Select To Allow Edit to allow you to edit the documents.
- Select To Allow Remove to allow you to delete documents.
- Select To Allow Generate Controlled Copy so that you can create a controlled copy of the documents.
- Select To Allow Download, Copy and Print to allow downloading, printing, and copying documents.
Attention: Deny settings stand out from release settings, for example, if the folder has the option to Deny visualize, even if you have published documents to which the user has access, it will not be possible to visualize the folder or your document.
Attention: It is important to remember that the hierarchical order of permissions is first those defined in Document Type, Folder and finally those defined directly on Documents.
When you've completed the permissions, click Save.
Once the permissions are set, click Next to access the Social tab.
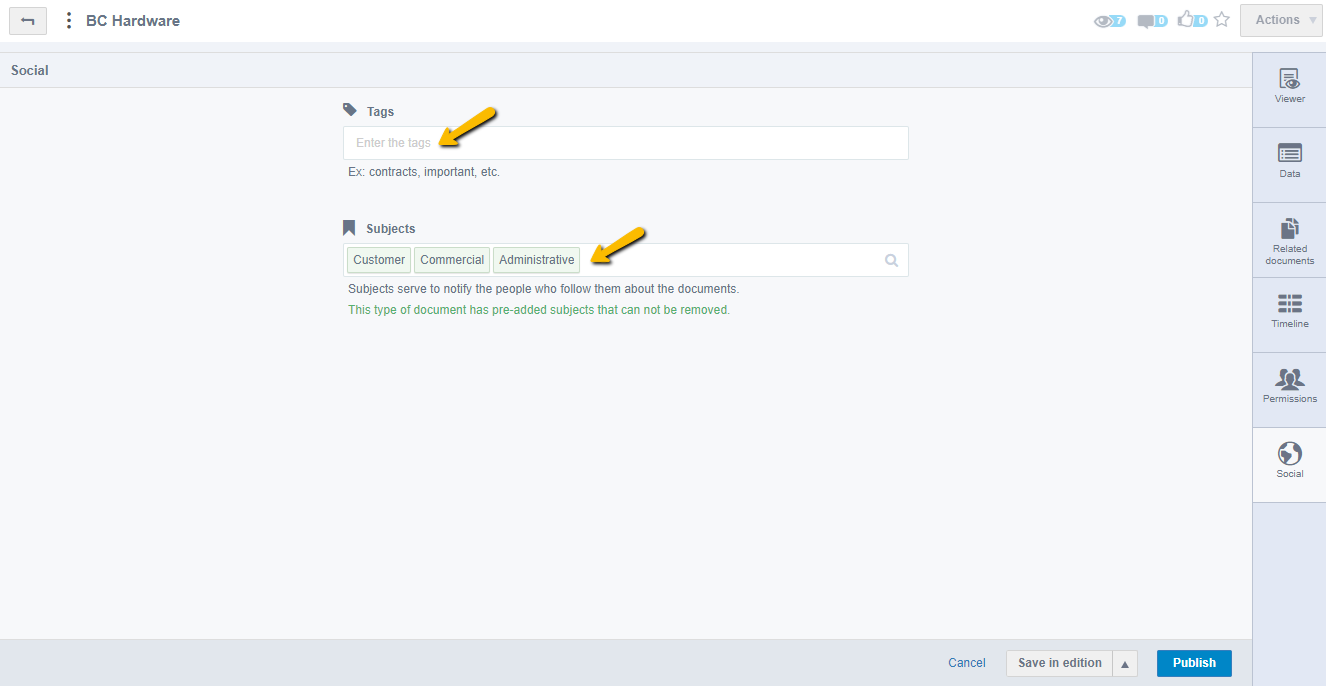
Social Step
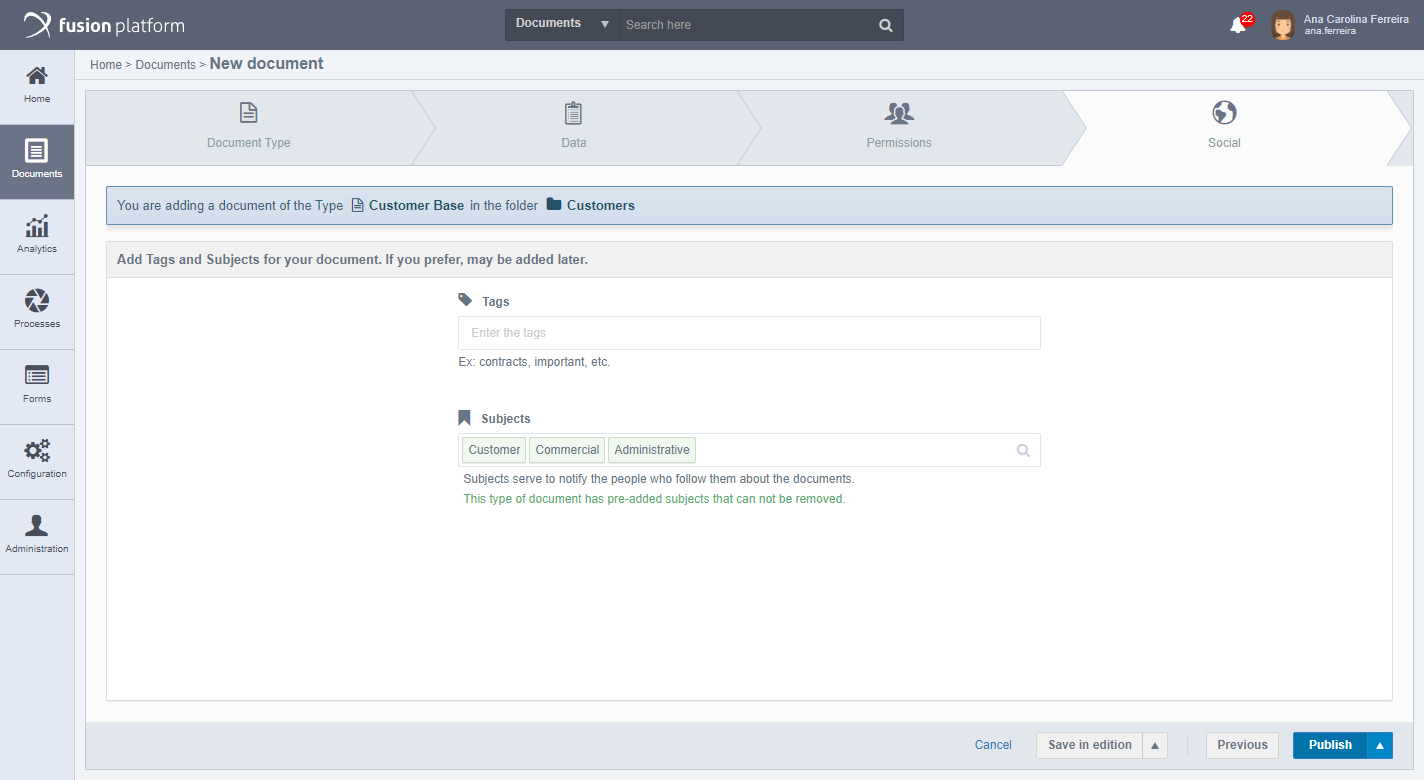
You can insert Tags and select Subjects to the new document, as shown in the following image:
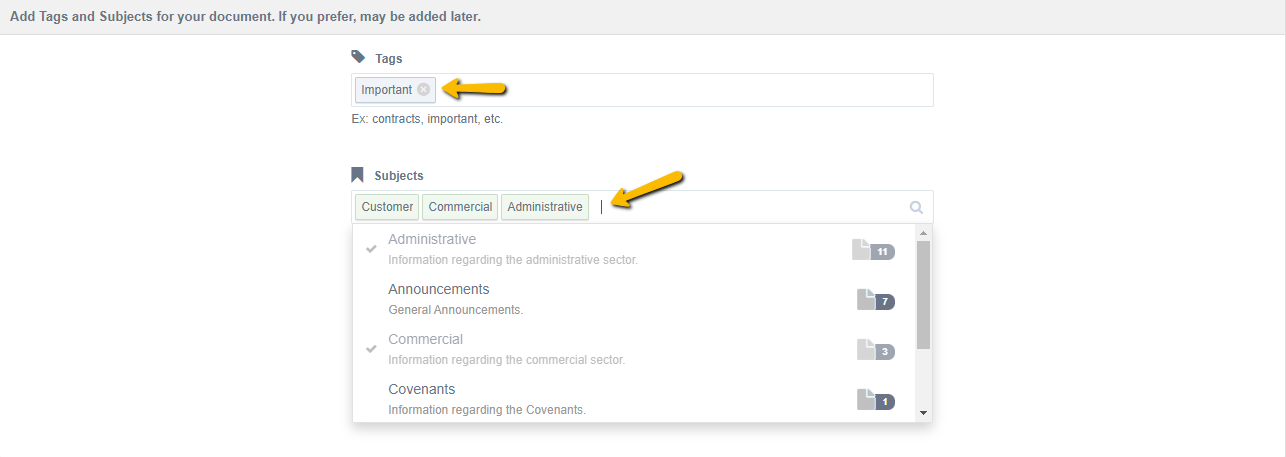
Attention: If there are pre-defined subjects in the document publication, which have been defined in the document type settings, then these cannot be deleted when publishing the new document.
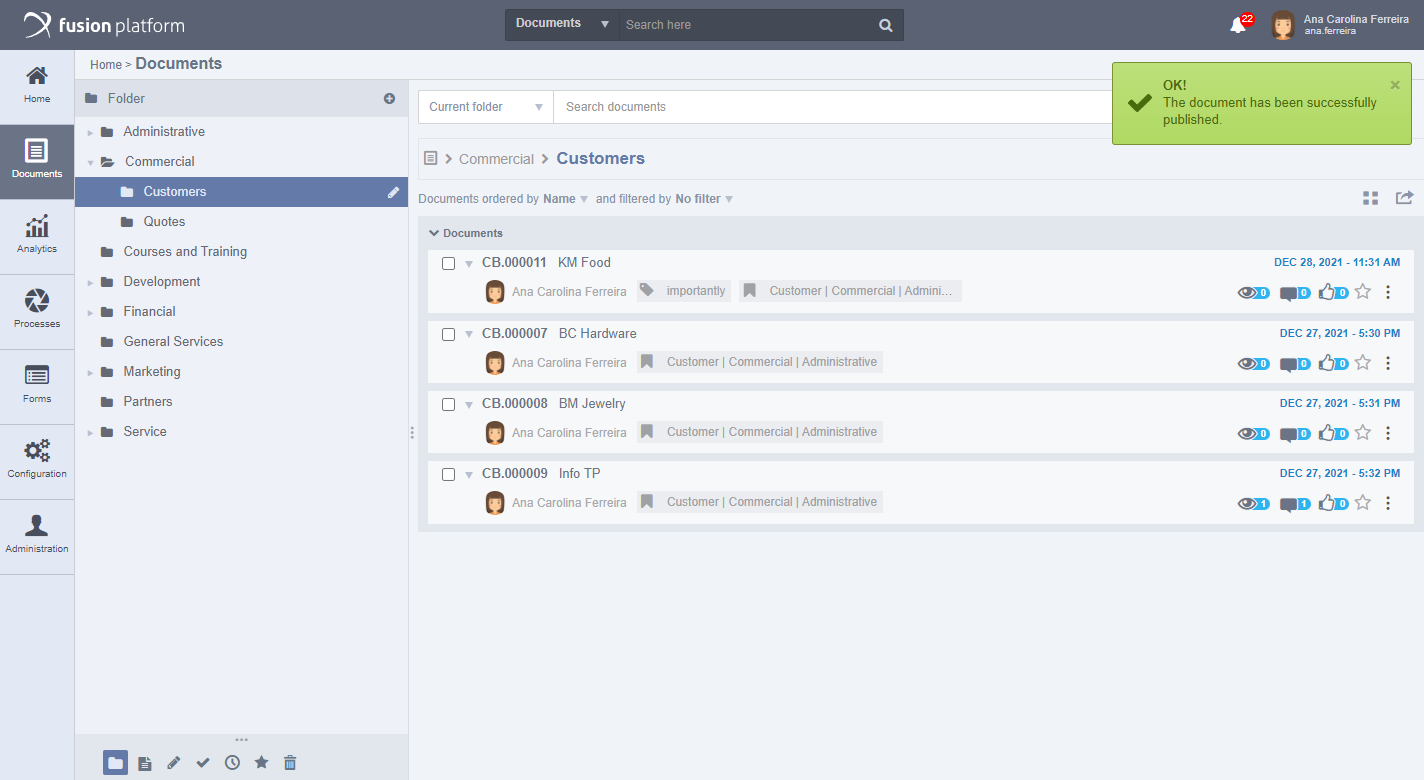
When completed, click Publish. If the document does not require approval, it is immediately published and the system redirects you to the document central displaying feedback from the publication:
Publishing Approved Documents
Depending on the type configured, the document being created may ask for approval before being released to Fusion users. In the document central select the desired folder and click to create a new document, select a document type that is already set up with approval.
Fill in all required fields and click Publish, then you should redirect to Document Central displaying a markup indicating that the document is in approval for publication and displays feedback message stating that the document has been published and submitted for approval:
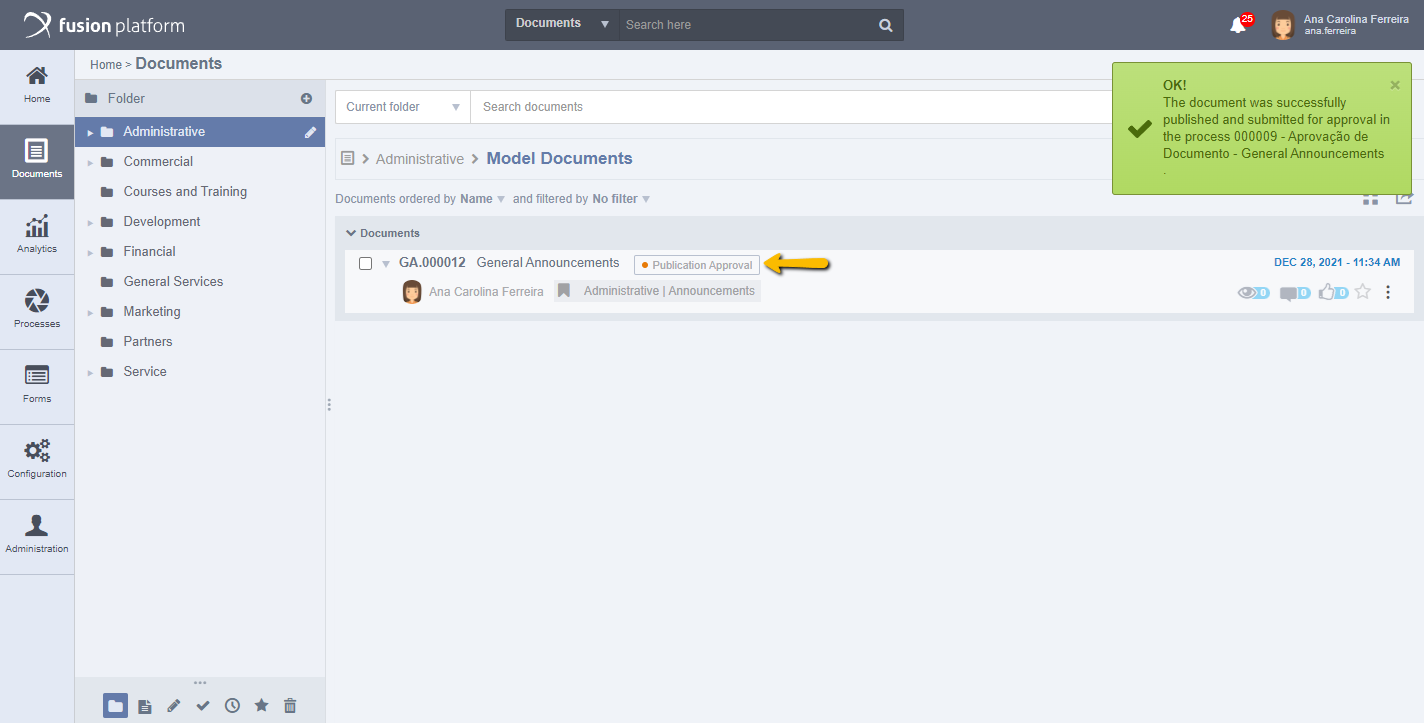
Attention: After the document is submitted for approval, other users will not have access until the document is approved.
Publishing Versioned Documents
Versioned documents are required so that, with each update of the document, its old version is saved. To publish a versioned document, go to Document Central, select the desired folder and click to create a new document, select a document type that is already configured to be versioned.
Fill in all the required fields and click Publish, then you should redirect to the Document Central showing next to the document that it is in the first version as shown in the following image:

To change the document version, click to Edit the document through the actions arrow of the document in the listing, make changes, and click Publish, it should display the following screen:
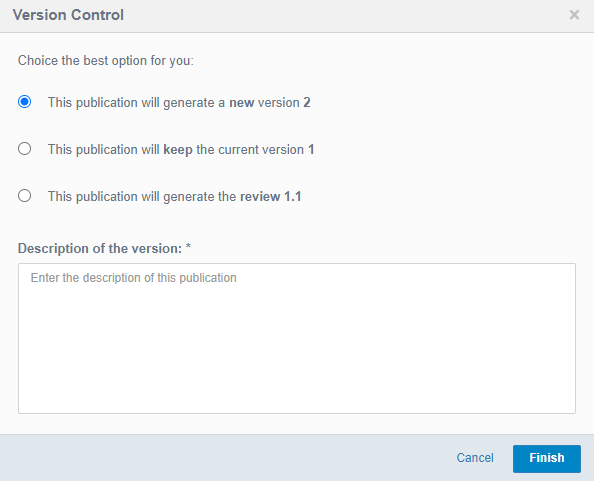
After choosing whether to generate a new version, a review or maintain the current version, it is necessary to fill in the Description of what was performed, click Finish to finalize, the system will redirect to the Document Central and display feedback message informing you that a new version has been published:
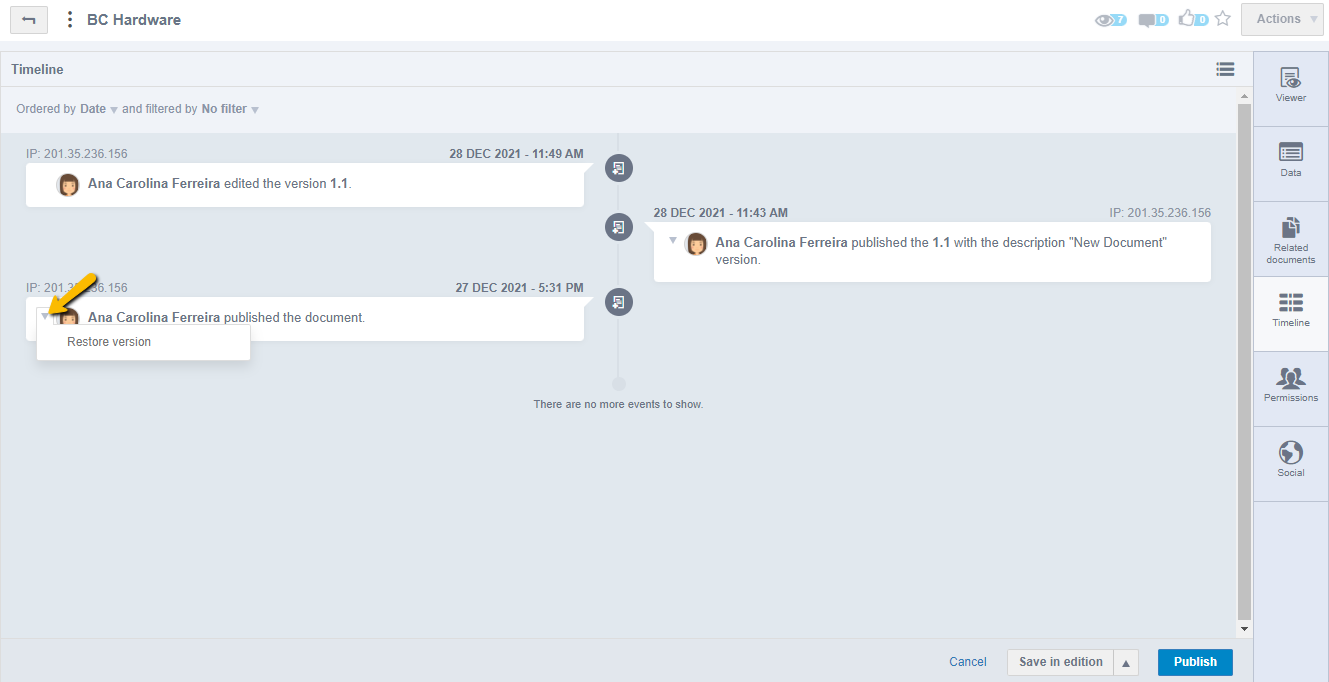
Restoring Version of a Document
You can restore previous versions of a document, click on the desired document and access the Timeline tab, as shown in the following image:
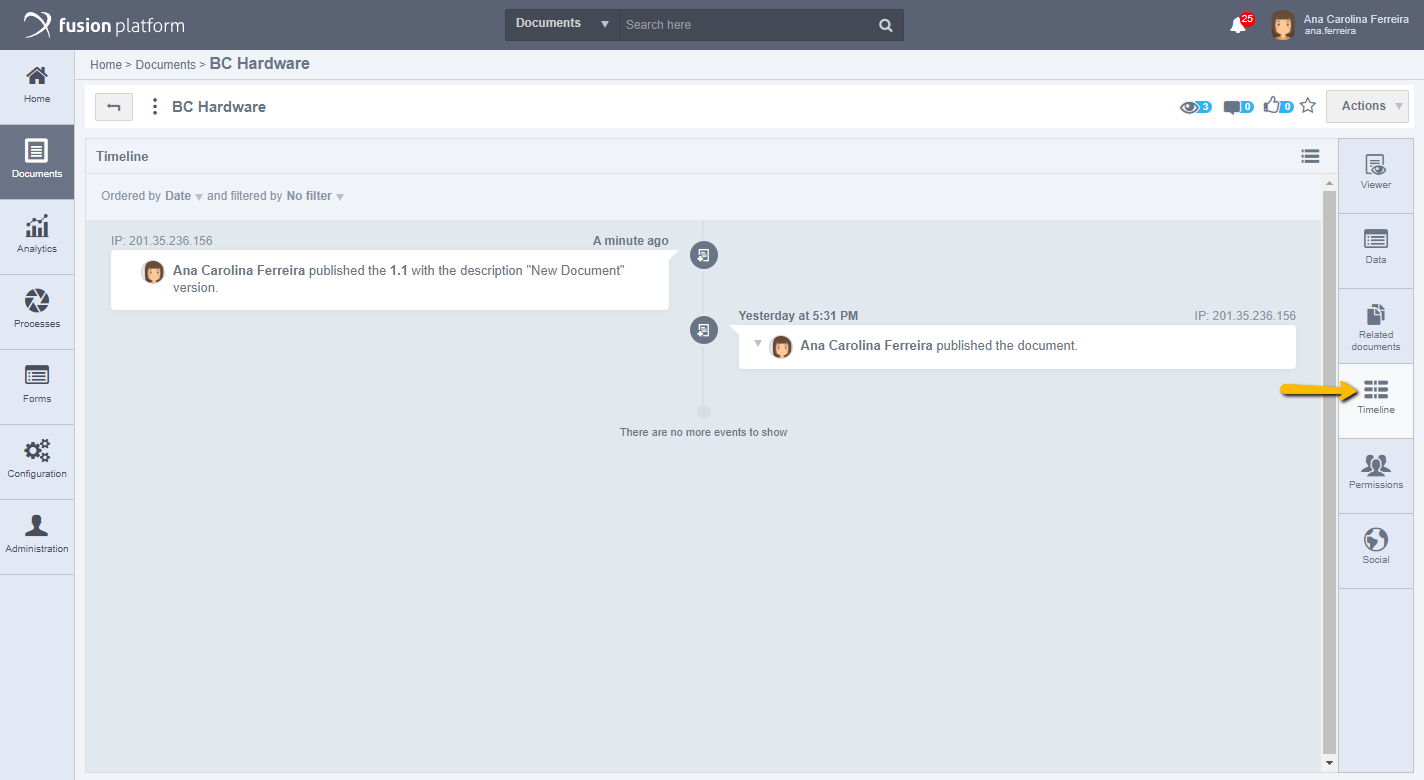
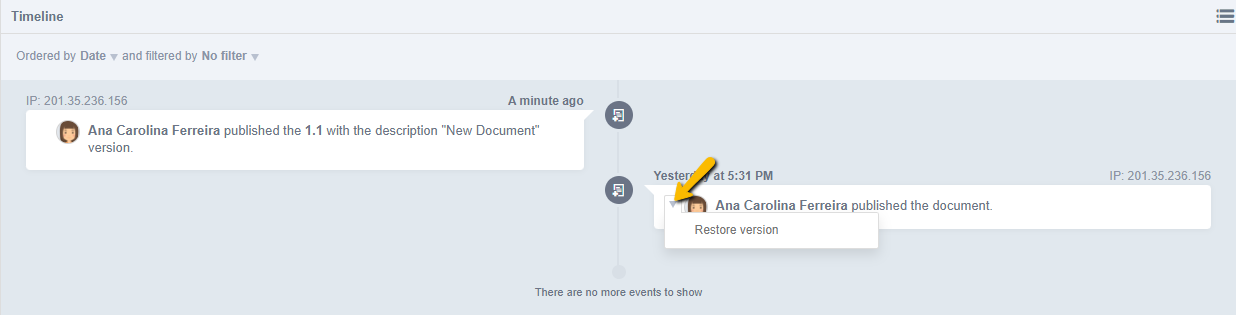
To restore the version, click the actions arrow next to the record of the version you want to restore and click Restore Version. As shown in the following screen:
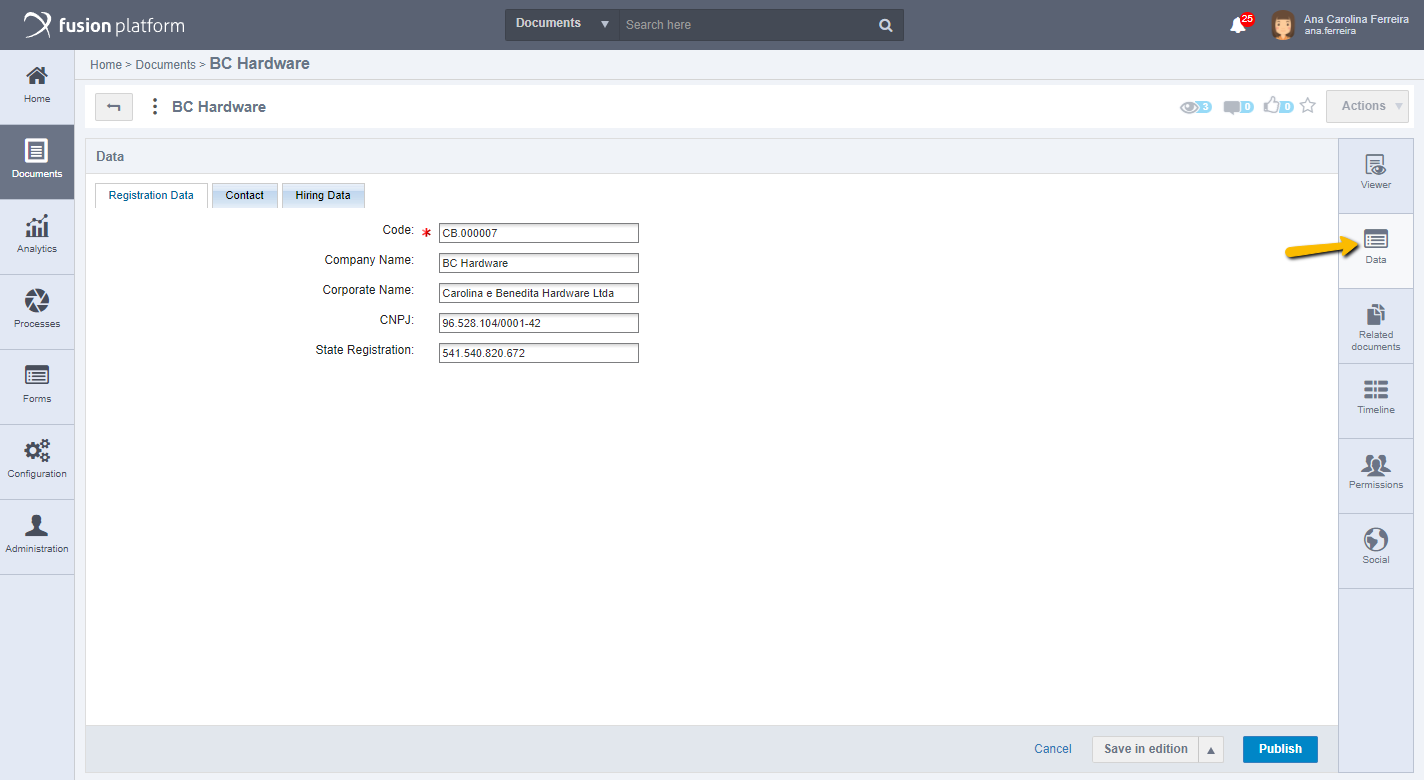
Clicking Restore Version redirects you to the Data tab, with the information for the restored version:
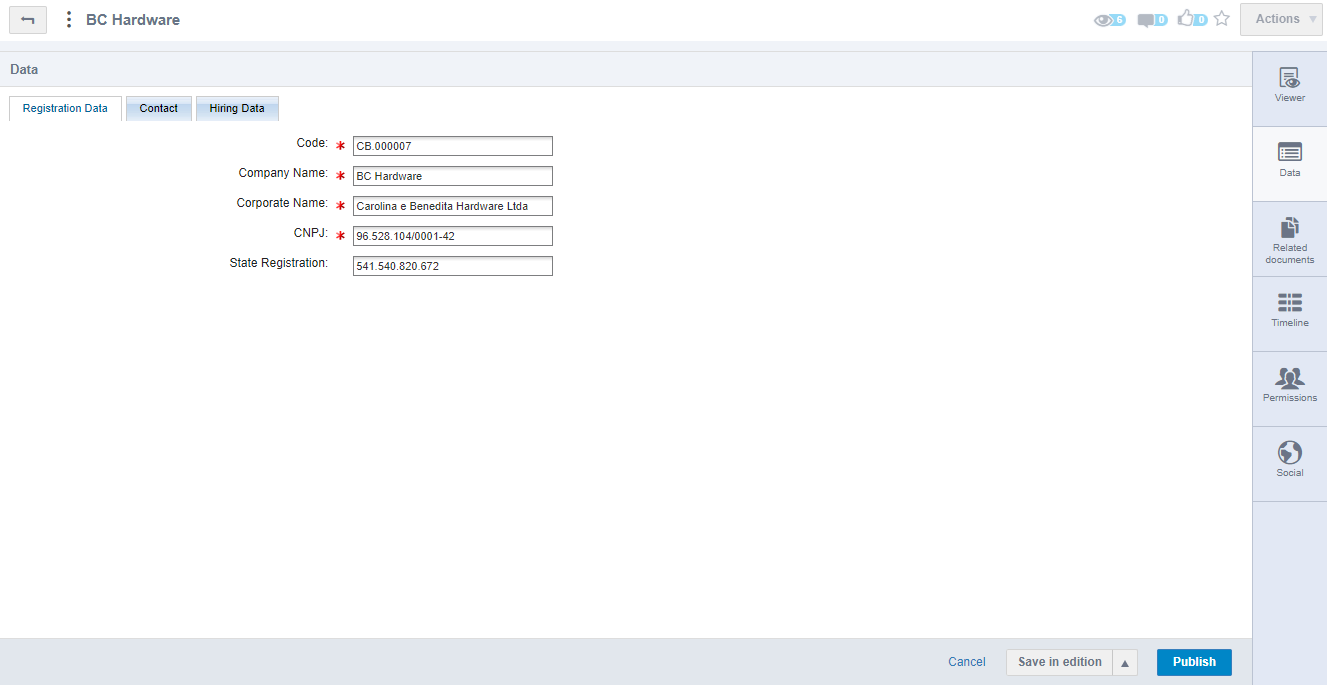
Click Publish to release the document to the system in a new version with the information for the restored version:

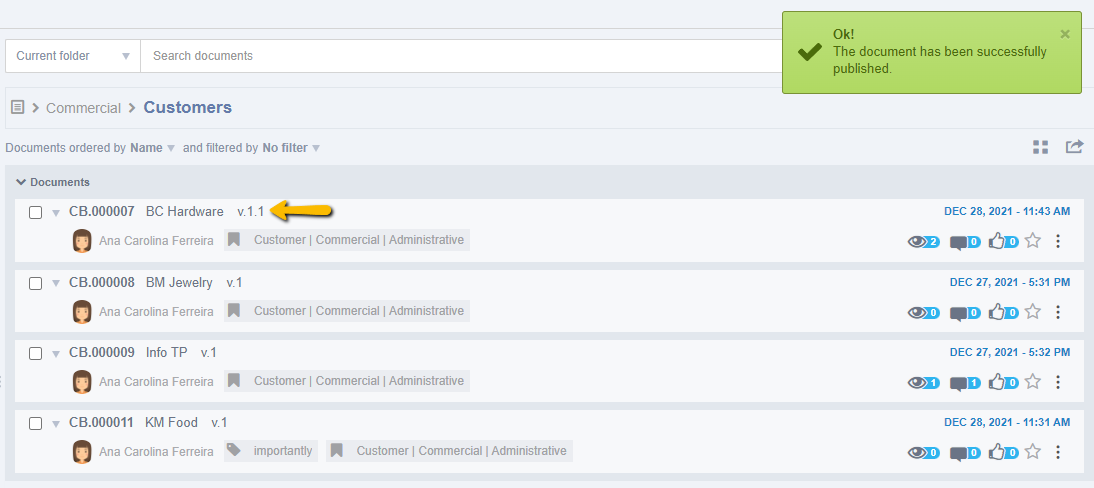
Upon completion, you will be redirected to the Document Central, with the new version published.
Publishing Expired Documents
The expiration of documents allows you to create deadlines for documents in EDM. With this, after a certain time, the document expires, and is no longer available to users. Go to Document Central, select the desired folder and click to create a new document, select a document type that is already set to expire. Fill in the fields configured in the document type, note that it will display a field called Expiration Date, this field is not mandatory, but it is displayed when setting the document type allows changing the expiration date of the document.

Attention: If the Expiration Date field is not filled in, the date set in the document type will be considered.
After completing all the required fields, click Publish, then you should redirect to the Document Central informing you next to the document how many days are left until its expiration:
Attention: Clock icon colors vary according to deadline, for example:
Green Clock: Indicates that the document is up to date.

Yellow Clock: Indicates that the document is 3 days to expire.

Red Clock: Indicates that the document has expired.

Attention: Once expired, the date that will display on the listing will be the expiration date.
Document Management
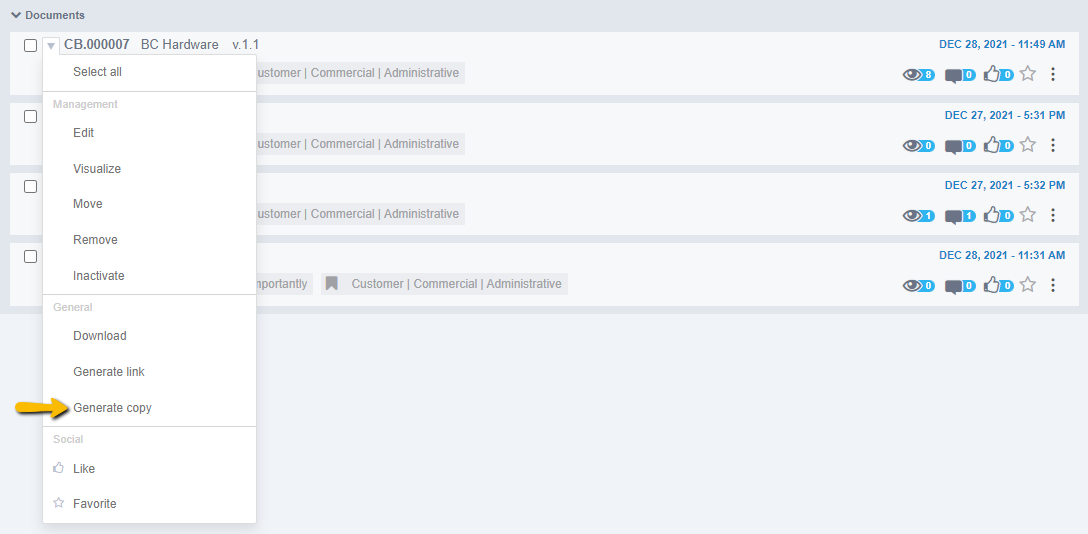
Once a document is published, some actions are possible on it. To access the possible actions click on the document menu:
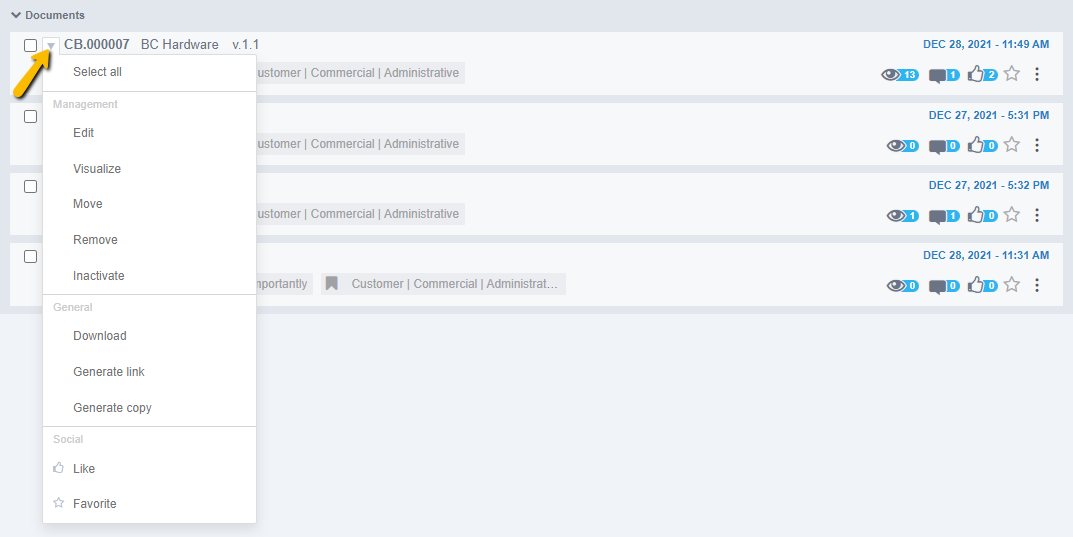
Management options include: edit, visualize, move, remove, and inactivate. General options include: download, generate link and copy. And finally, the social options that are to like and favorite. Each of these options will be described below:
Editing Documents
You can make changes to documents that are already published in the system, go to the Document Central, choose a document, click the document actions arrow and select the Edit option, you should open the document in edit mode as shown in the following image:
Note that when you click on edit the document, it already opens in the Data tab, where the fields configured in the document type for editing will be available, as well as editing the file attached to the document.
Note: Changes can be made effective by clicking Save, Save in Edit, or Publish. The Save Properties option is redirected only to save the Related Documents, Permissions, and Social tabs.
In the Viewer tab, you can view the document.
To review related documents or even list or remove documents, click the Related Documents tab.
Adding Related Documents
It is possible to relate documents so that you can obtain information related to the subject of the document in an easier and more agile way. To relate documents, click to edit the document where you want to list more documents. In the document you are editing, access the Related Documents tab, click in the search bar enter the title of the document you want to relate and click to search, you should display the documents found, as shown in the following screen:
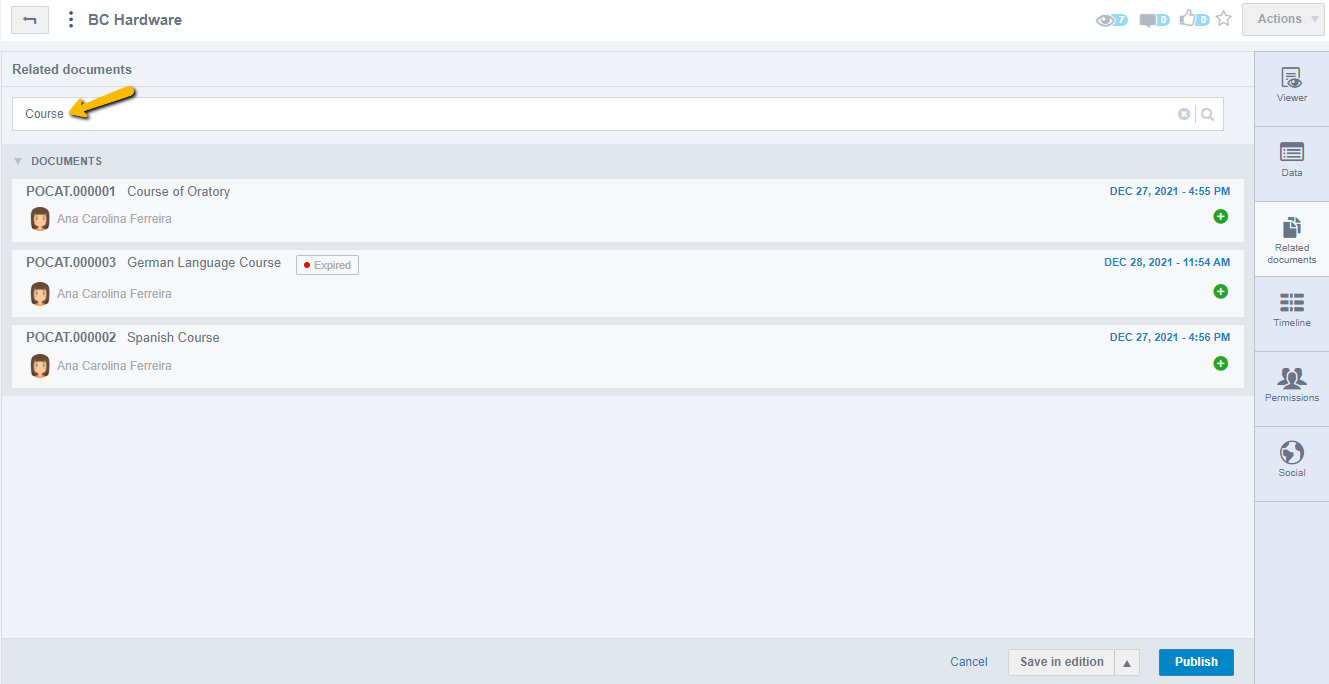
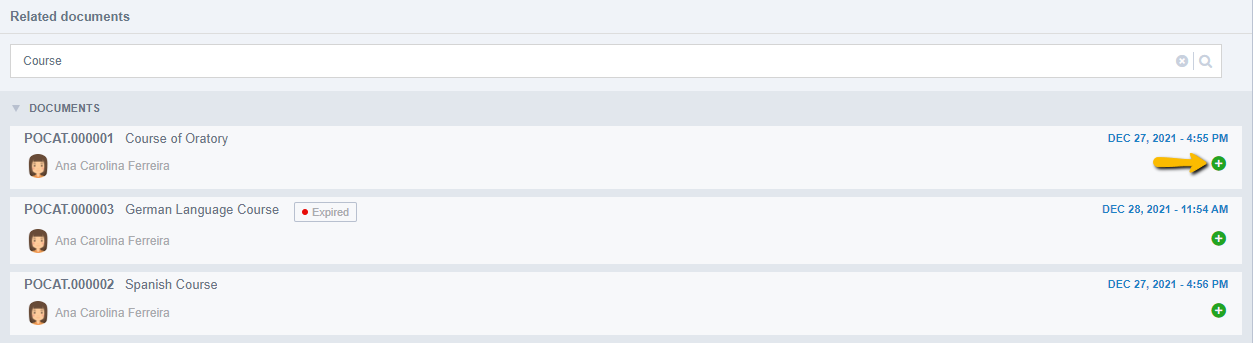
To relate a document, click the (+) icon, as shown in the following image:
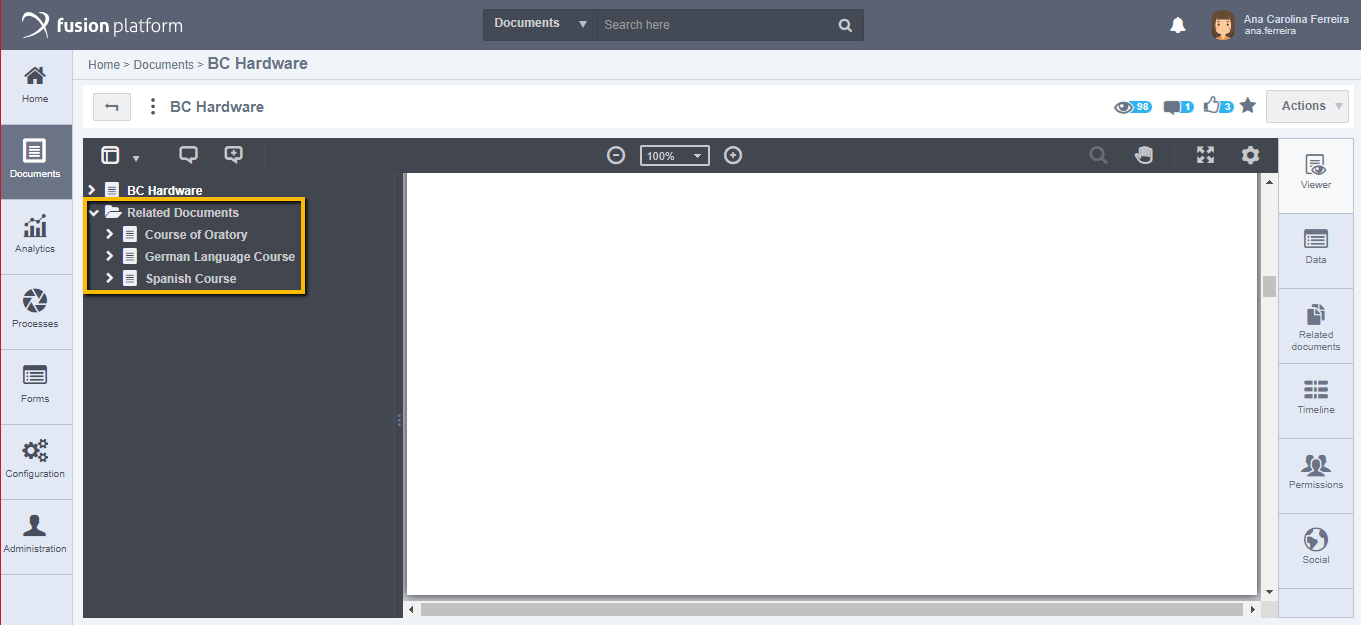
After listing the desired documents and publishing them, they will remain on the list in order of relationship, that is, the first document to be listed will be at the top of the list and the document that is listed last will be at the bottom of the list.
To view the Related Documents, if the user accesses the list of documents in the file viewer, the order of the related documents must be exactly the same as the order of the documents added in the tab "Related Documents".
Attention
Note that in the listing where the document was related, the system should also keep the documents sorted by order of relationship and no longer by publication date.
Click Publish to save the related documents. To view the related documents, access the document and click on the Related Documents tab. If you need to remove a document that is related, click to edit the document, and click the trash can icon.
Note: The actions of relating a document or removing a related document will only persist if the document is published.
By accessing the Timeline tab it is possible to check all the actions that will occur with the document, all the history since it was published.
Note: When document A relates to document B, when viewing the related document session of document A, the related document A and B is displayed and when viewing the related documents option of document B, it is now showing the relationship to document A also.
Reordering Related Documents
You can reorder Related Documents by going to the Related Documents tab, clicking edit, then selecting and holding down the desired document and dragging it into the desired order.
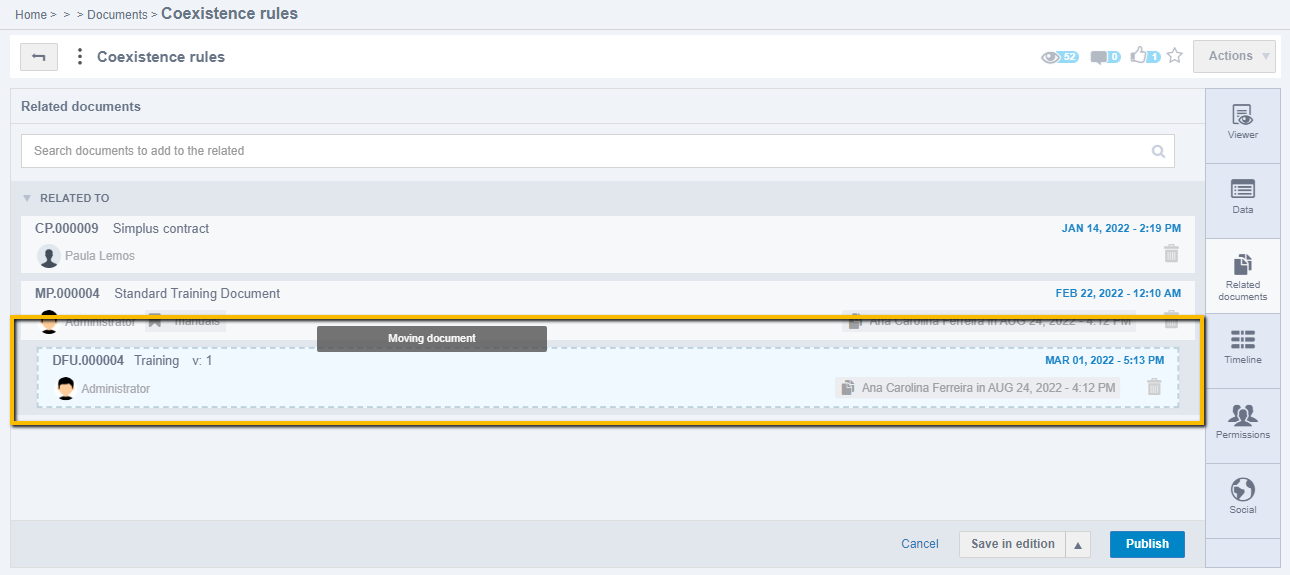
After performing manual sorting, you need to click "Publish" or "Save Properties" for the document to actually apply the new sorting. If you choose to click "Cancel", the applied manual sorting will be undone.
This new sorting should be applied when displaying the related documents in the file viewer.
Note
New related documents will be added to the end of the listing.
Understanding the Document Timeline
Timeline makes sure that all actions performed on the document are recorded, with this we can have greater security and control over the document information, as we know each step of changes and releases that have been made. To access the document Timeline in the document central, click to view it then you should display the following screen:
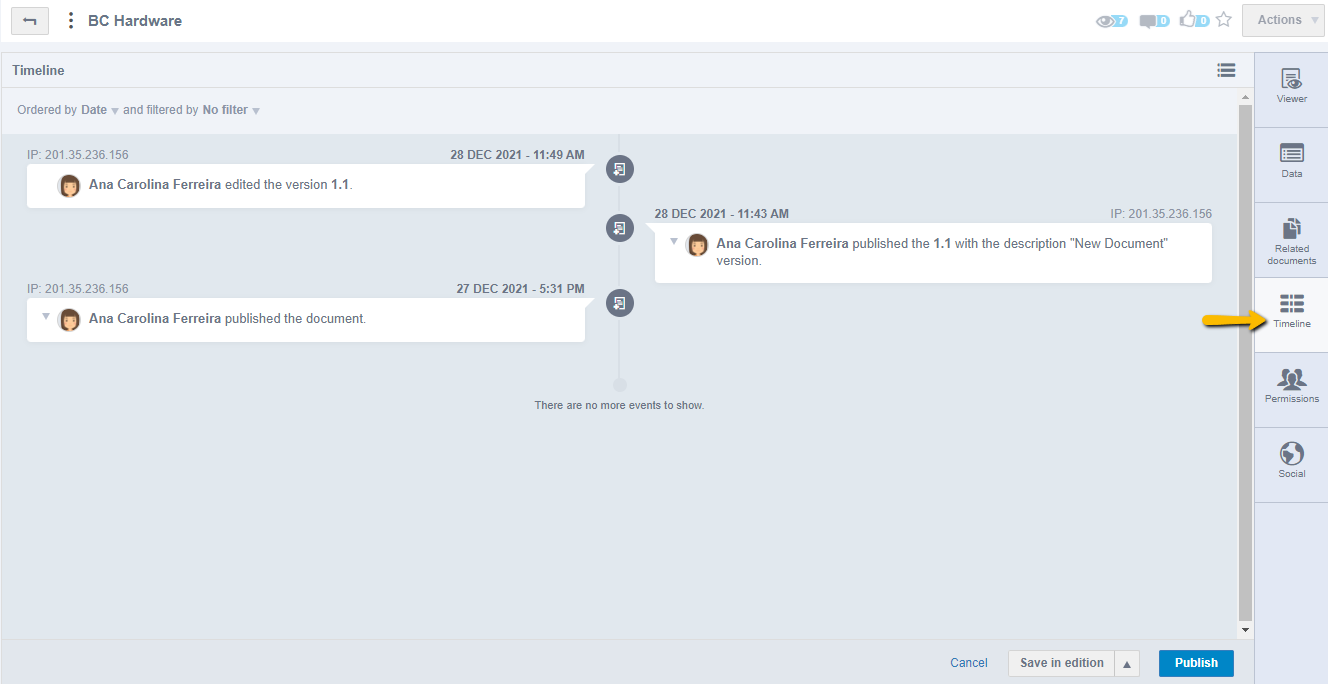
Click on the Timeline tab of the document, it should display all the records that occurred in the document since its publication, stating the date and time when the actions were performed and the user who performed it.
Ordering and Filtering the Timeline
You can filter the events displayed in the document timeline at the top left of the screen, click the No Filter option, and select the desired option:
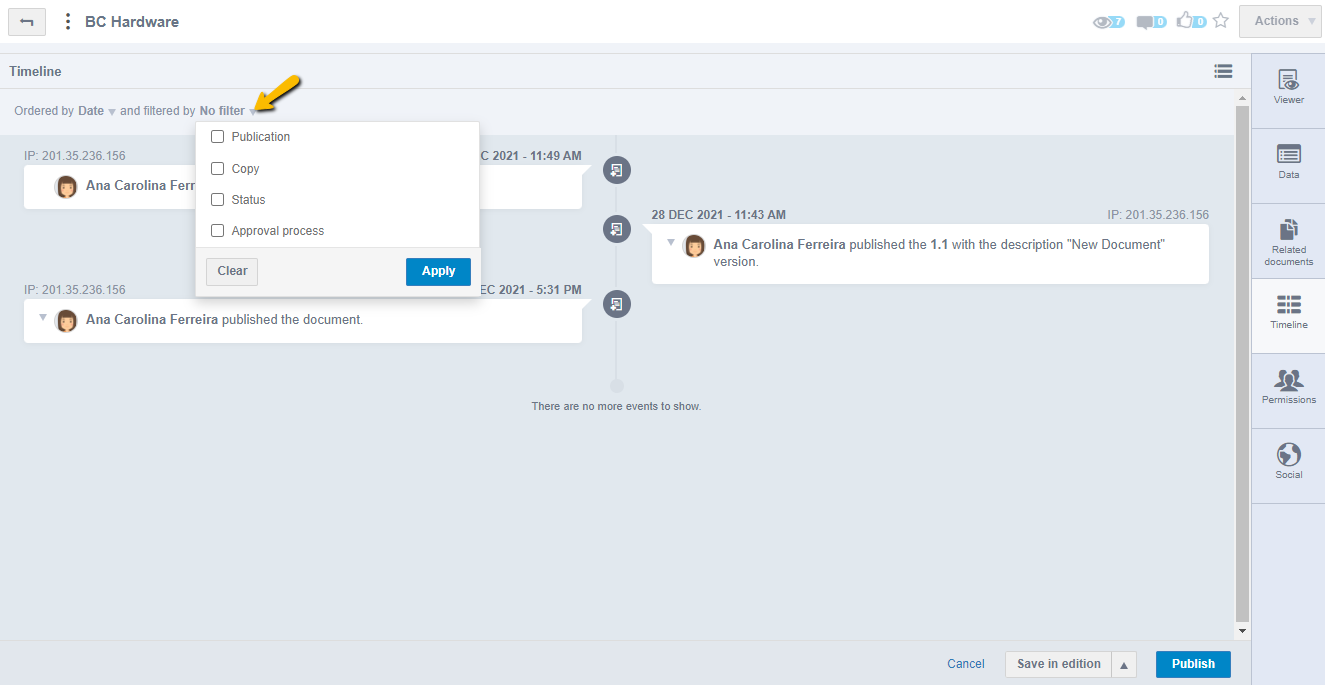
Detailed filter options:
- Publication: This is meant to display only records when the document is published, selecting this option releases three more filter options:
- Versioned: To show only document versioning records.
- Reviewed: To display only records of revisions that occurred in the document.
- Edited: To display only events when the document underwent any changes and soon after it was released into the system.
- Copy: Only controlled and uncontrolled copy records are displayed, when you select this option, two more filter options and their situations are displayed:
- Not Controlled: Selecting this option only the Active situation is selectable, this filter will only show records of uncontrolled copies that were generated in the document.
- Controlled: Selecting this option releases three situations to select in the filter:
- Active: which means that it will bring in the Timeline only records of controlled copies that are still active in the system.
- Inactive: which will display only those copies that have been inactivated.
- Expired: which by selecting this situation will display only those controlled copy records that have already expired.
- Status: it is used to display only records of some specific situation that occurred in the document, the situation options are:
- Active: Only records of when the document was activated in the system.
- Inactive: Only records of when the document was inactivated.
- Removed: Shows events where the document was forwarded to the trash.
- Restored: Displays events from when the document was restored from the trash.
- Expired: Displays records of when the document expired.
- Approval process: This option is used to display only records when the document has undergone an approval process.
After selecting the filter options, click Apply so that the records entered are according to the selected filters.
Attention: Clicking the Clear option within the Filters menu shows all records in the Timeline again.
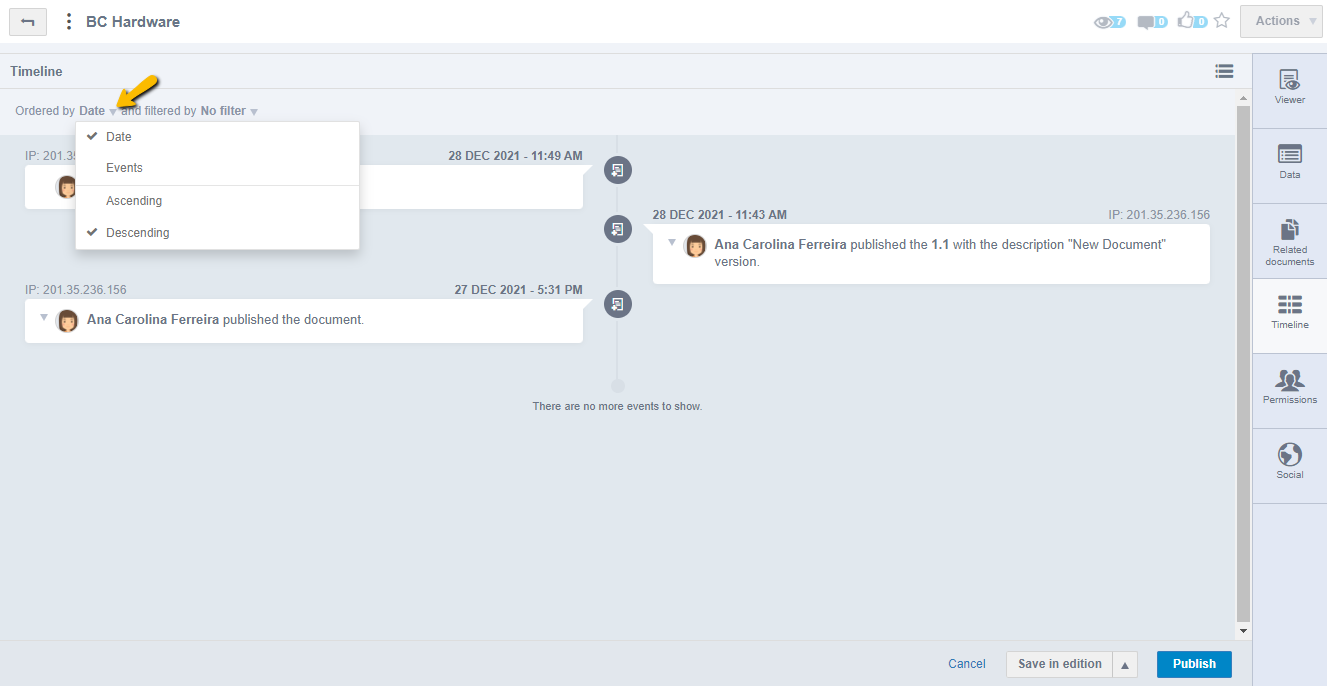
You also have the option to change the ordering of events, by default it is ordered by Date, but when clicking it displays other ordering options, as shown in the following screen:
Restoring Document Versions
Inside the Timeline it is possible to perform some actions on the document, when a document is versioned, it is possible to restore previous versions, to do so click on the action arrow of the publish event you want to restore and click on the Restore Version option, as shown in the following screen:
Editing Document Permissions
You can modify the permissions set in the document, for that when you click to edit a document go to the Permissions tab, then you should display the options for customizing users' permissions, as shown in the following image:
Editing Document Subjects and Tags
By accessing the Social tab when the document is in editing, you can relate Subjects to the document and insert Tags, or if necessary remove the options already registered.
Deleting the Document
To delete a document, go to the document's actions arrow and click the Remove option. You can also remove the documents in batch, select the documents you want to remove, and click the Remove Selected option. Clicking Remove or Remove Selected will display a confirmation screen. Click Remove, then the deleted documents will be forwarded to the trash.
Attention: Documents being edited or documents related to the system cannot be removed.
Viewing Documents
The Fusion Platform has two viewers for document visualization: the Universal Viewer and the PDF Viewer. They are designed so that users do not need to have additional programs installed to view documents published in the system. These viewers convert the file, generating a PDF and displaying it to the user. With the viewers, it is also possible to restrict the user from copying and printing documents. The viewers can generate images from files such as PDF, Power Point, Word, TXT, Excel, among various other formats.
Note
In the case of Microsoft Office, the Fusion document viewer does not support macros.
By default, the system will use the Universal Viewer as the default viewer for file visualization in the system. If you want to change the default viewer to the PDF Viewer, you will need to modify this option in the system settings. For more information on how to make this change, click here.
Note
When you click to view a document, all tabs become accessible in viewing mode. If you need to make any changes, click to edit the document.
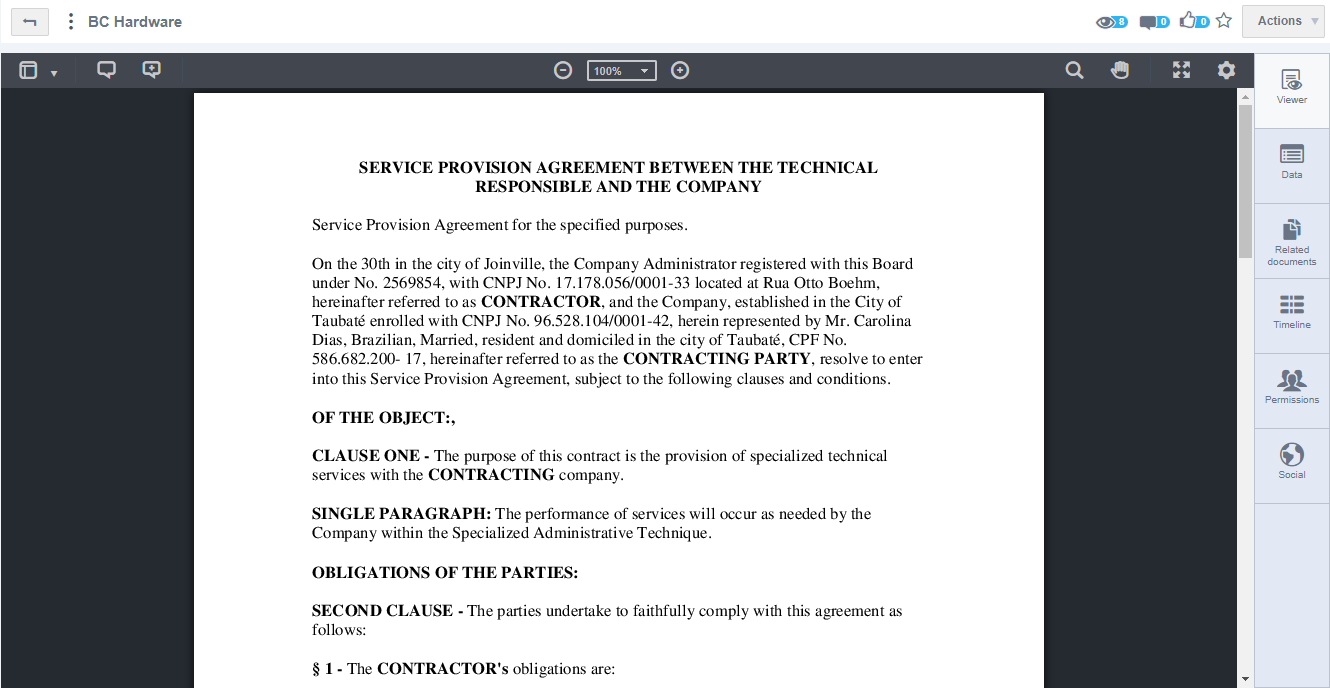
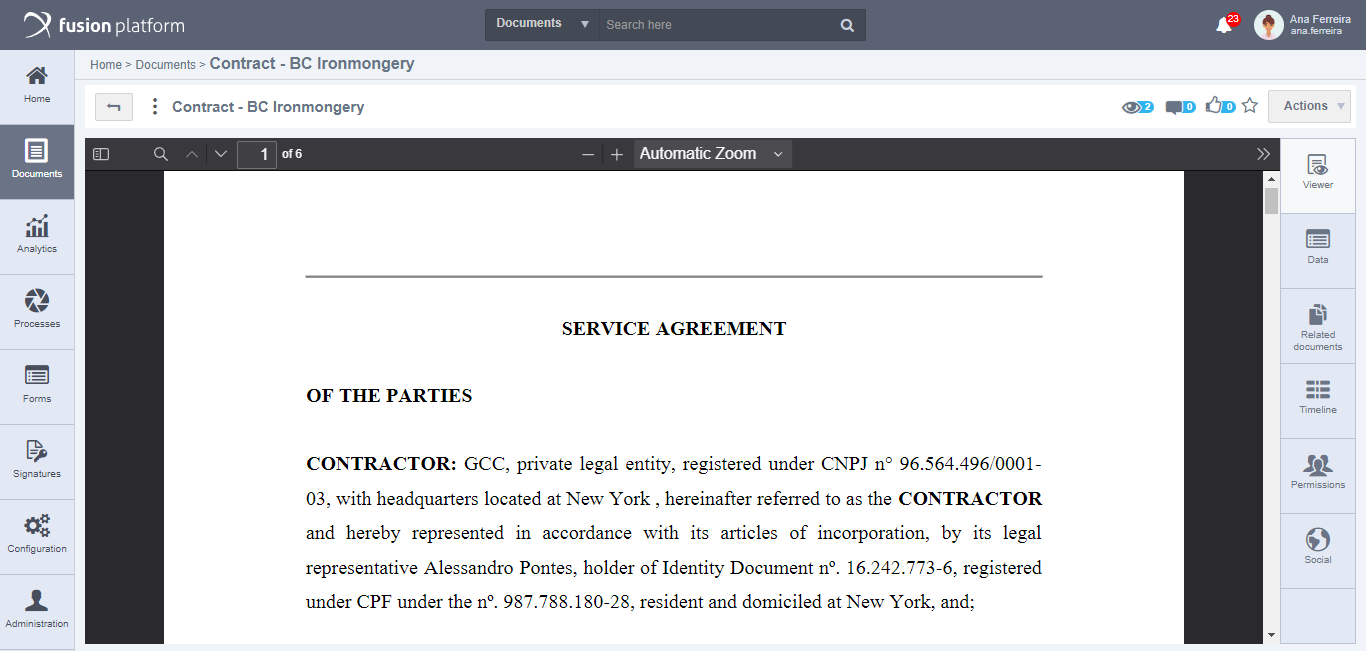
Universal Viewer
In the document listing, click on top of the document, then it should open in preview mode, as shown in the following screen:
The viewer operates by converting the attached file at the time of document publication and then displaying it to the user. However, it has limited accepted file extensions, including:
| Application | Supported Extensions |
|---|---|
| Office Suite and Text Editors | DOC, DOCX, XLS, XLSX, XLSM, PPT, PPTX, PPS, PPSX, LOG, ODT. |
| PhostScripts | PDF. |
| Images | JPG, JPEG, PNG, BMP, GIF, TIF, TIFF. |
| Videos | MP4. |
| Audio | MP3. |
| CAD Files | DWG, DXF, EPRT, EDRW, SLDPRT, SLDASM, SLDDRW, STL, OBJ. |
Universal Viewer Menu
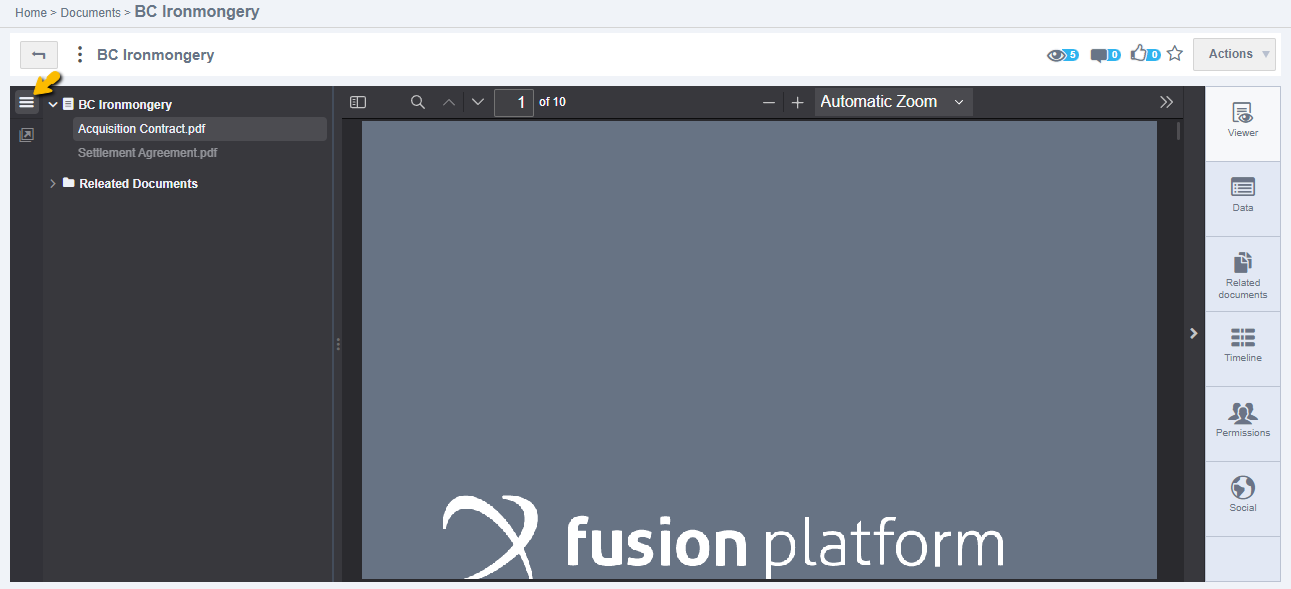
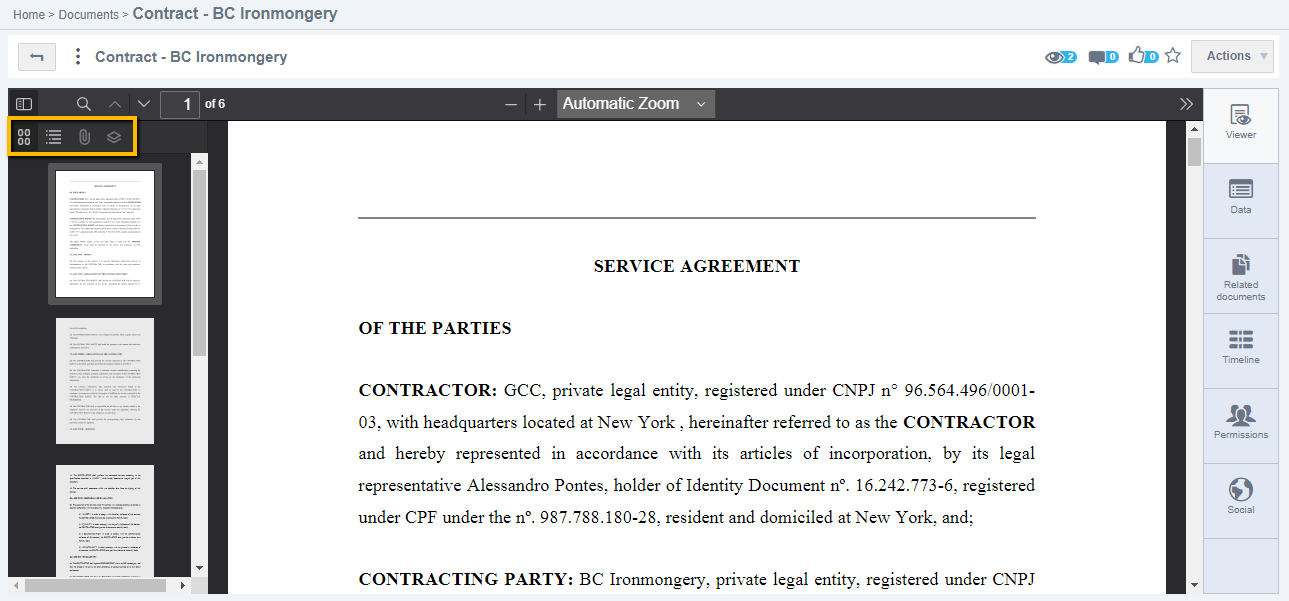
The Show Menu icon appears in the upper left field of the viewer, as shown in the following image:
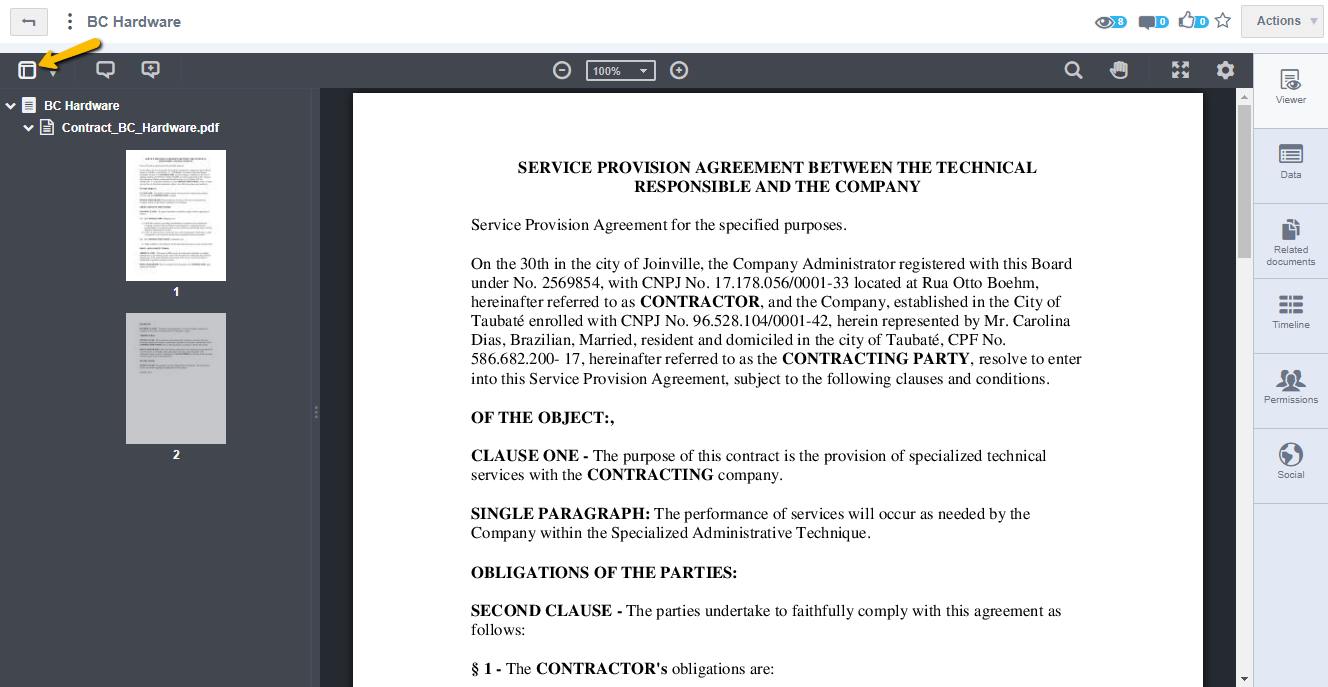
Clicking Show Menu displays the thumbnails of the document pages. This view assists in viewing when searching for a specific page. Next to the Show Menu option there is an action arrow so that the user can change the view of pages from thumbnails to list mode.

Universal Viewer Settings
To perform basic settings in the document preview, click the Settings icon in the upper right corner to display the following screen:
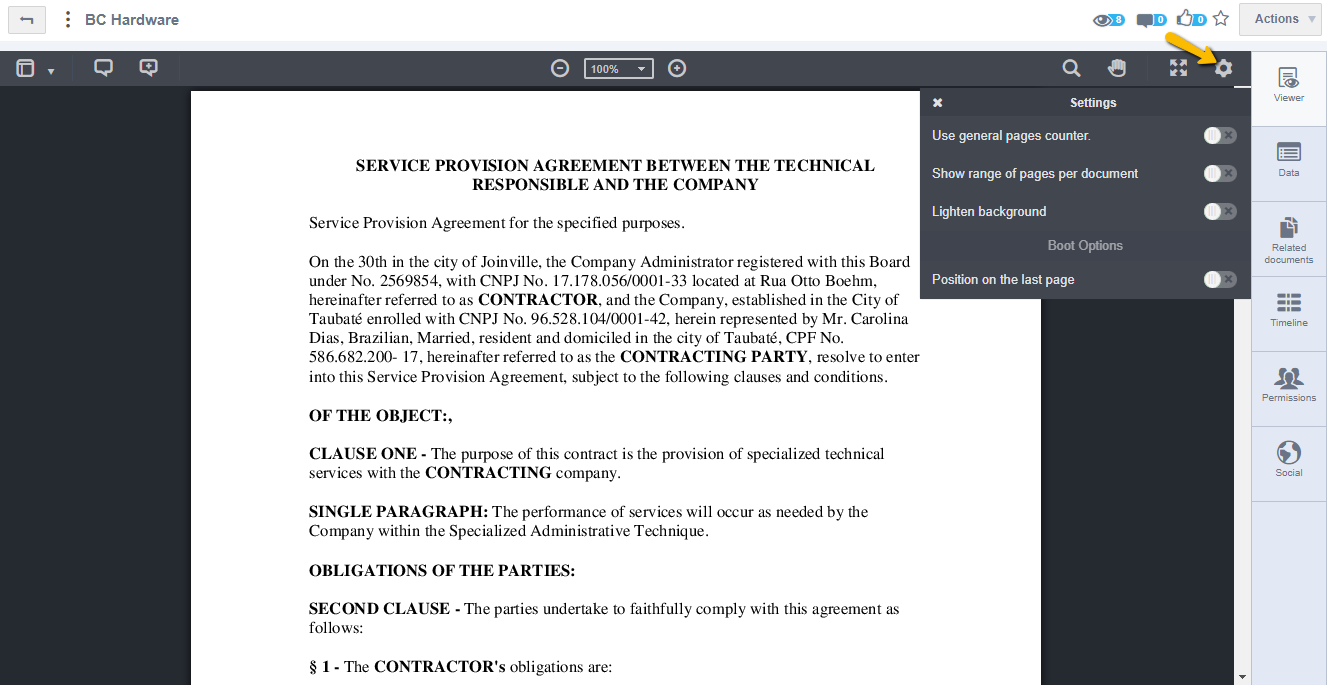
- Use general page counter: Select to have pages numbered by the total number of pages of all documents that the viewer presents. By deselecting this option, pages will only be numbered by the number of pages in each document.
For example: By checking this option, if two documents are being displayed in the Viewer and the first one contains 50 pages, the markup of the first page of the second document will be numbered 51. Unchecking the option, the first page of the second document will be numbered 1.
- Show range of pages per document: Check to have the document, in the menu, display the number of pages.
Note
The settings display the Lighten Background option where you can select so that the background is a light color, making it easier to view the document.
- Position on the last page: When the document is opened it will be positioned on the last page.
Adding Comments in the Universal Viewer
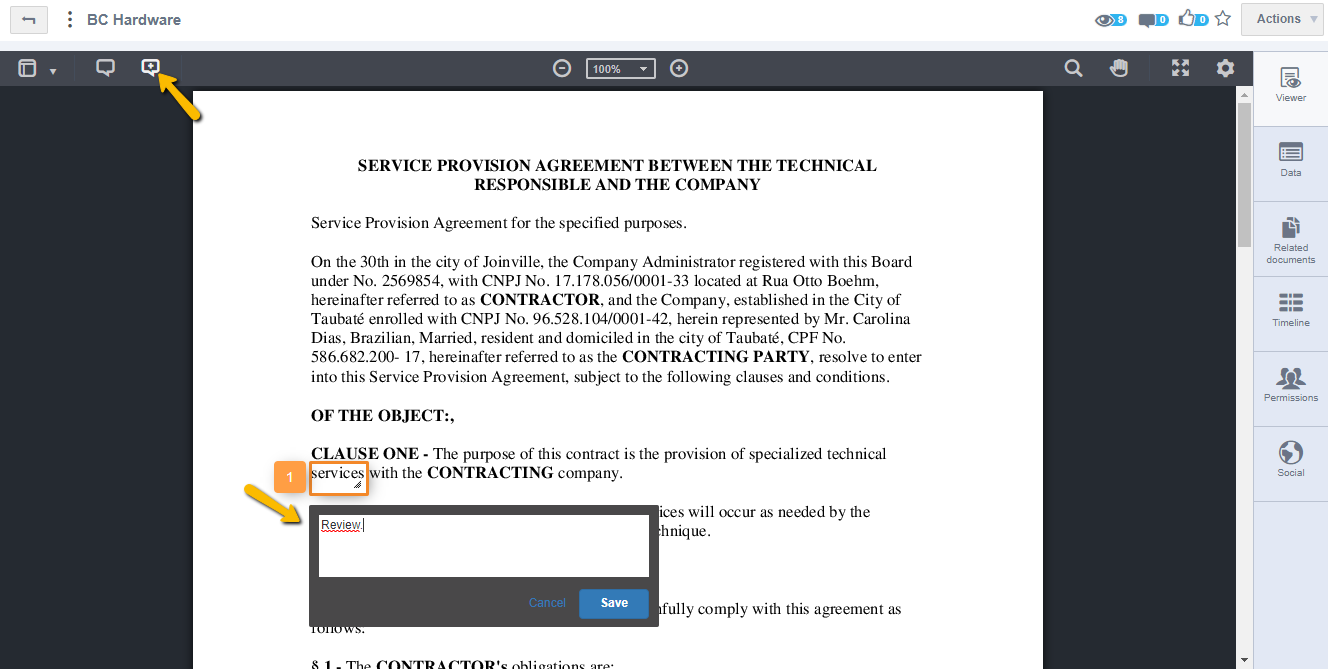
You can create comments in the document. To do this, click the Add Comment icon, as shown in the following image:
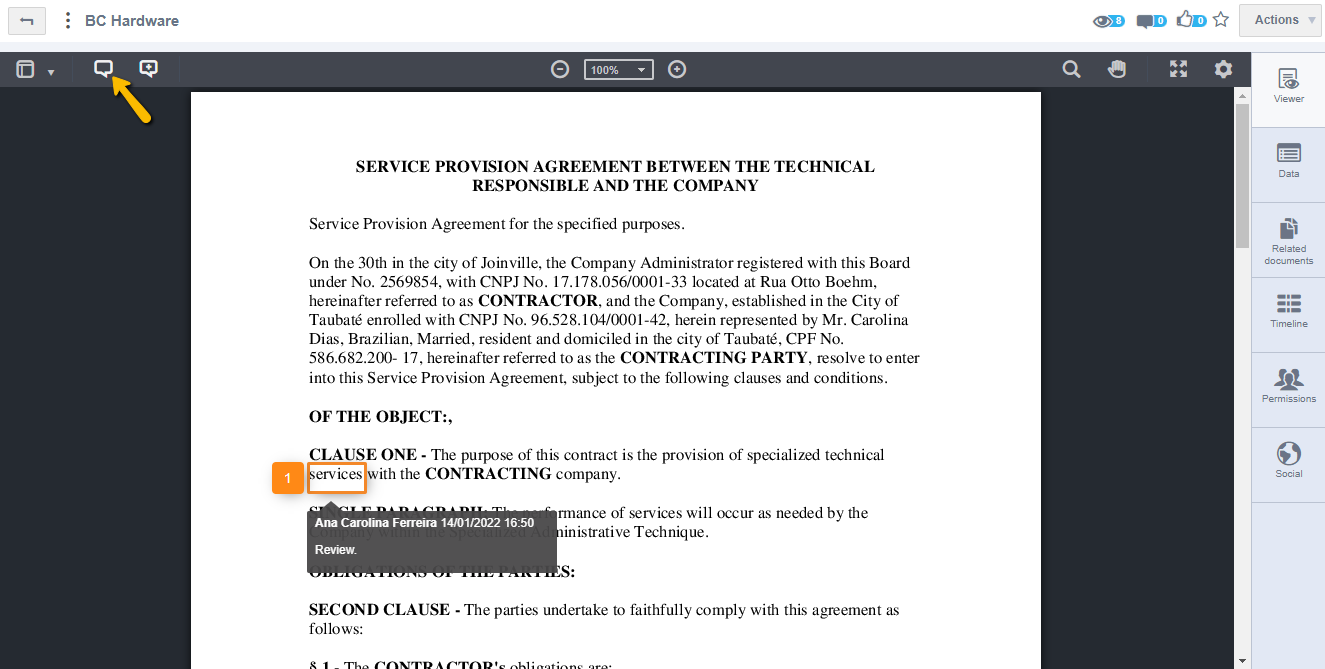
The added comments are available for viewing by all users who have access to the document. To find comments in the document, click the Comments icon:
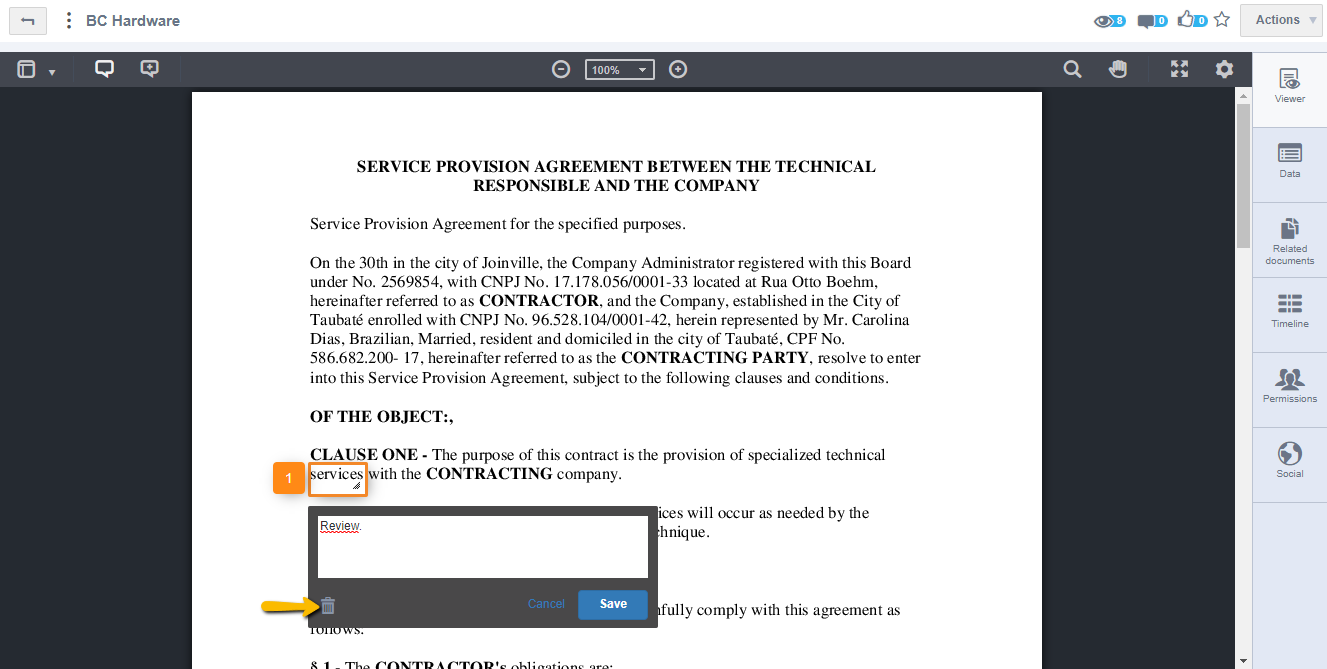
With the document open in preview mode, click the add comments option, select the location where you want the comment to appear, enter the comment, and click the Save option. Comments can be added to all types of files, from text to audios and videos.
When you click to enter comments in an audio or video, you must enter the time at which the comment should be displayed.
After entering the comment and setting the time it should be displayed, click Save.
Attention
The comment will only appear in audio and video at the set time if Viewer Comments is enabled. In addition, all users who have access to the document will be able to view the comments entered in the document.
To view these comments made in the document, place your mouse on top of the document, it will display the numbers according to the number of comments on the page, hovering over the number will show the contents of the document.
Another way to view comments is by clicking on the Comments option, then you should display all the comments on the screen.
In the comment you can see the user who commented as well as the date and time when the action was performed.
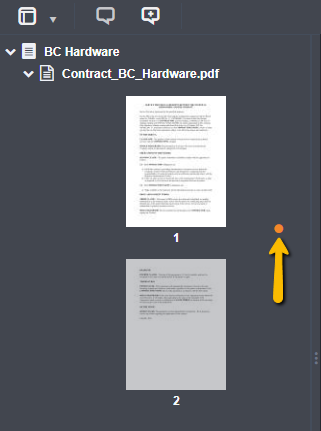
When accessing the document in preview mode, it is also possible to view through the paging menu which pages have comments. When the menu is selected to show in Thumbnail Mode, next to pages that have comments will show an orange ball.
When viewing pages in List Mode, it will display an arrow to the left side of the page that had the comment and expanding it displays the user who made the comment as well as the date and time when the action was performed:

To delete a comment made on the document, access the comment and click on the Trash can icon, as shown in the following image:
Attention
Only users who are administrators of the EDM module will be able to modify and delete comments entered in the file.
Attention
Comments made within the document are not integrated with the social part of Fusion. Social comments belong to another comment format.
Universal Viewer Navigation
In the viewer, you can open more than one document. To do this, in the document navigation, select more than one document and click the actions arrow for one of the documents and select the View All Selected option. Clicking View All Selected opens all selected documents in the Viewer.
During the document preview it is possible to select the “little hand” option to be able to navigate the document in a better way.

Universal Viewer Pagination
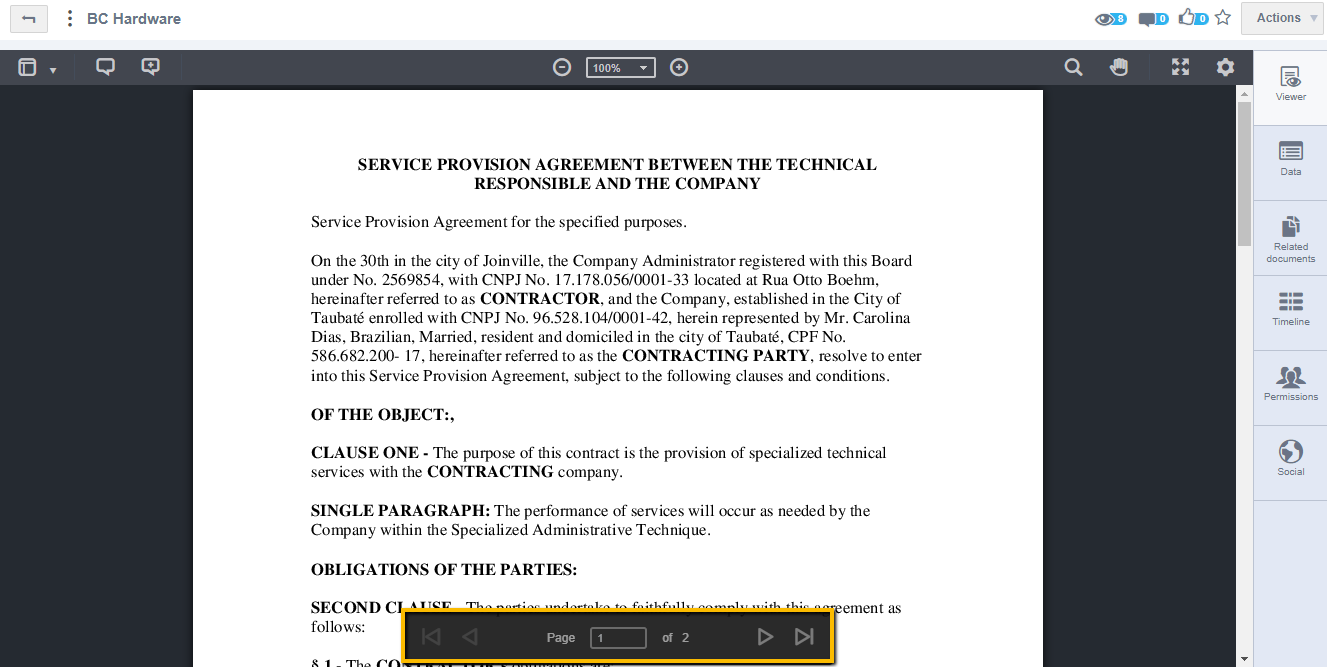
The Pagination menu is available at the bottom of the document. It is possible to view information about the number of pages that the document has and the page that the document is currently on. Pagination also provides cross-page navigation, with First Page, Previous Page, Next Page, and Last Page buttons:
Zoom in the Universal Viewer
At the top are menus that provide different ways to view the document. The following image shows the viewer zoom options:
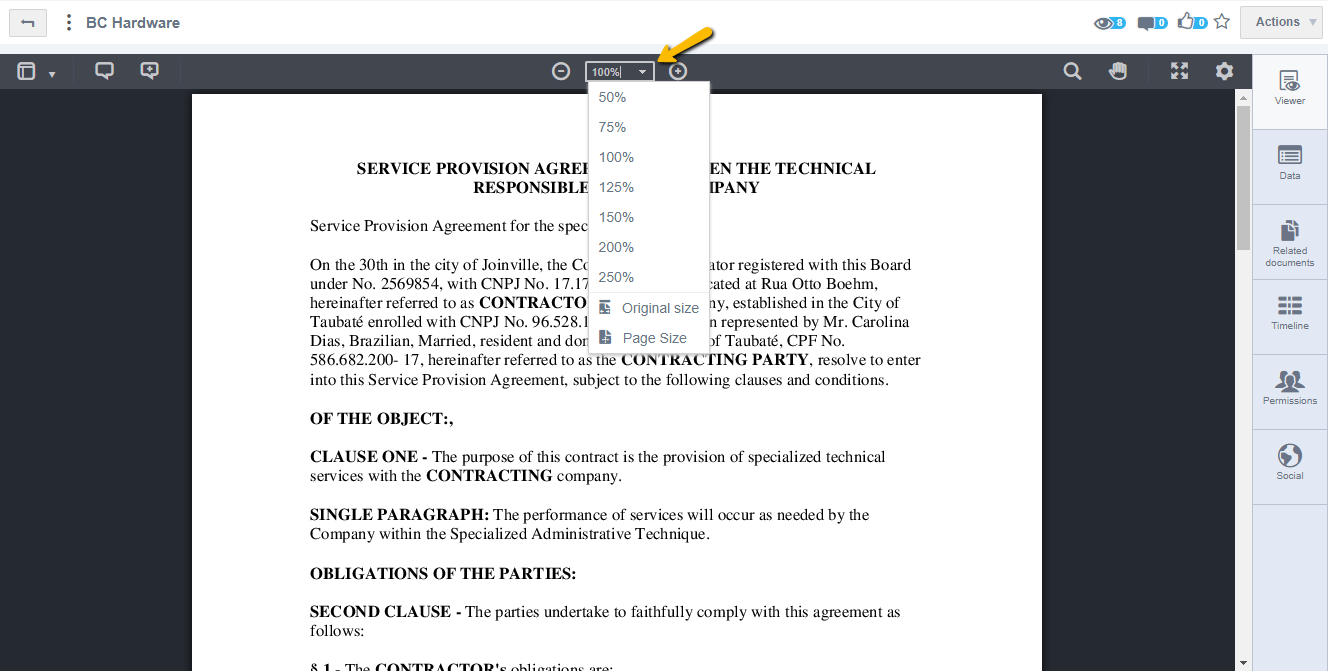
In the zoom field, the zoom is displayed as a percentage of the document size.
- Click the (-) icon to zoom out of the document.
- Click the (+) icon to zoom in on the document.
- Click on the Original Size option so that the document is displayed at 100%, in its original size.
- Click the Page Size option so that a full document page appears in the viewer.
Next to the settings icon, the option to Open Full Screen appears so that the document appears throughout the Fusion screen. As shown in the following image:

To exit, click the Close icon in the upper right corner.
Universal Viewer Navigation
In the viewer, you can open more than one document. To do this, in the document navigation, select more than one document and click the actions arrow for one of the documents and select the View All Selected option. Clicking View All Selected opens all selected documents in the Viewer.
During the document preview it is possible to select the “little hand” option to be able to navigate the document in a better way.
Searching Inside a Document
With the Fusion document viewer, you can search for the content of the entire document because it has OCR technology. This technology recognizes characters from image files, files scanned, handwritten, printed, etc., and with this the Fusion Platform can obtain an editable text file, to index and allow the query. To be able to search the document, it must be in preview mode from the document central.
Opening the document and placing the mouse on the search icon will display a message that the document is still in process and in a moment the search option will be released. After the document is loaded, click the search icon, check that it displays a bar to enter the search term, and two arrows, one to advance to the next search result and another to return to the previous result. Click the magnifying glass icon that appears in the top bar:

Type in the bar the term you want to search and press Enter, then it will display a yellow tag to identify the search term, and orange markup will appear to identify the term that is focused on the search.
Note
Clicking on the option to advance to the next result will be displayed in orange, and so on.
In the viewer's search bar, after searching for a term it displays an X icon so that the user can clear the search and perform a new search.
Note
The percentage of correct answers in the search for OCR will depend on the quality of the document. For example, if a document was scanned with 300dpi quality it will have a 95% hit percentage, that is, since the document quality is good, Fusion will recognize the words more and return in the search.
Copying Textual Content
Still at the top, on the right side, we have an icon to copy content:
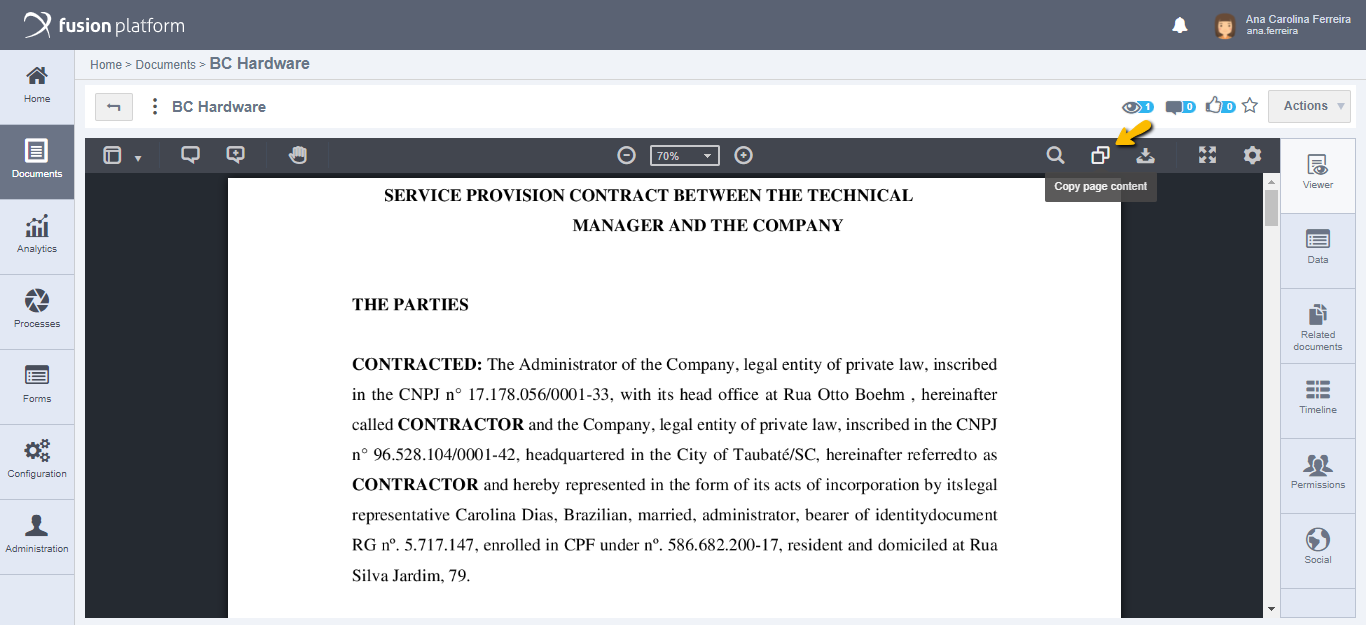
It is possible to copy the text content of a page from a file at the time of viewing the file. That is, just click on the page to which you want to copy the content and select the option indicated in the previous image.
Attention
The text content can only be copied from the current selected page.
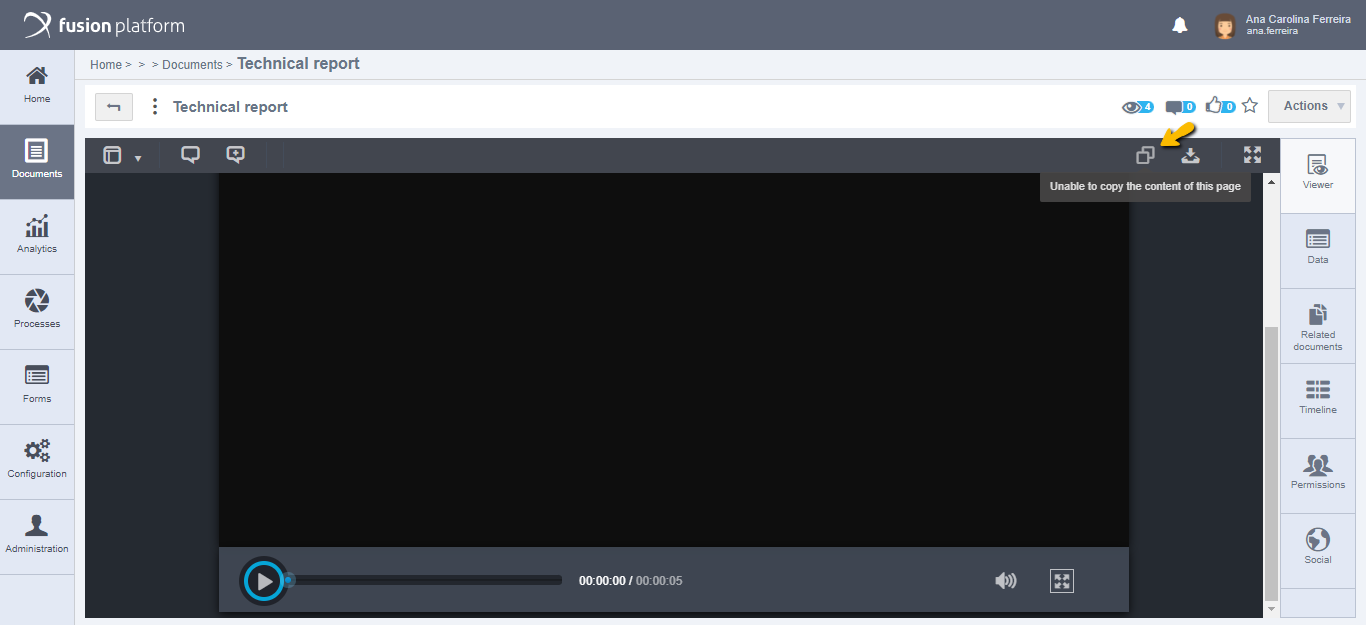
Files that have the field configuration or Document Types, Documents and/or Folders that do not have copy permission, will not be able to have their textual content copied.
In addition, non-static files such as videos, audios and gifs, will also not be allowed to copy and therefore, the option will be disabled as shown in the image below:
For the content to be copied correctly, it will depend on the file format.
When it is possible to copy the text content directly from the original file (PDF, DOCX, among others), the text will be copied in this way.
On the other hand, if the original file cannot be used, the copy will be generated through OCR.
Note
It is worth pointing out that the higher the quality of the file, the more assertive OCR will be in generating the text correctly, without writing or structuring errors.
When you click to copy the page content, a second screen will appear for viewing. There, the information will be loaded, and then the contents of the file will be available or not for copying.
During loading, it is possible that some failure may occur, generating an error screen as shown below:
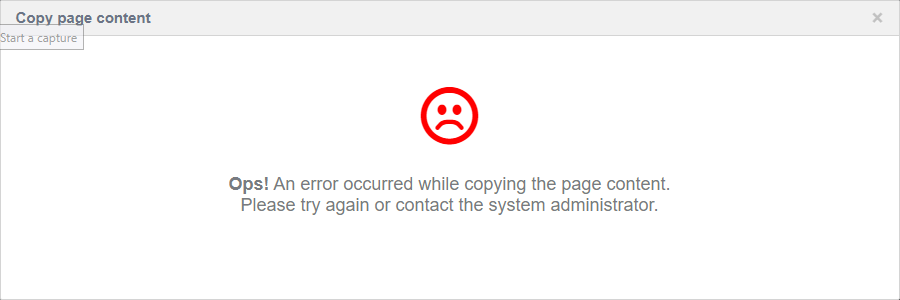
This error can occur if the environment goes offline when loading or if there is a failure in the connection with the internet or server, for example.
After successful loading, a copy of the information will appear on the screen:
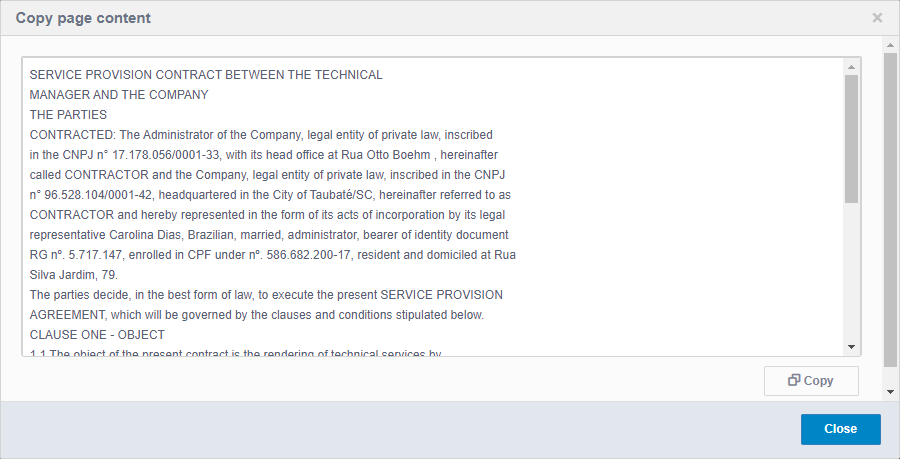
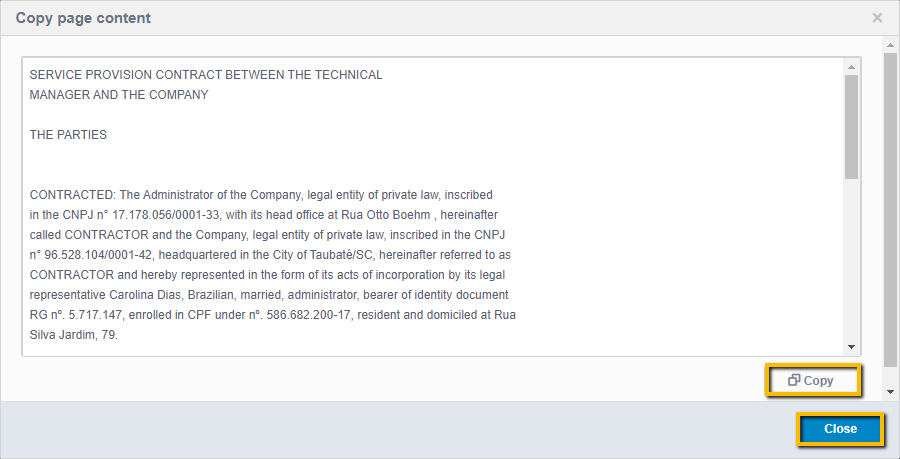
Also on this screen, you can edit the structure in which the text is laid out, and also make adjustments if necessary.
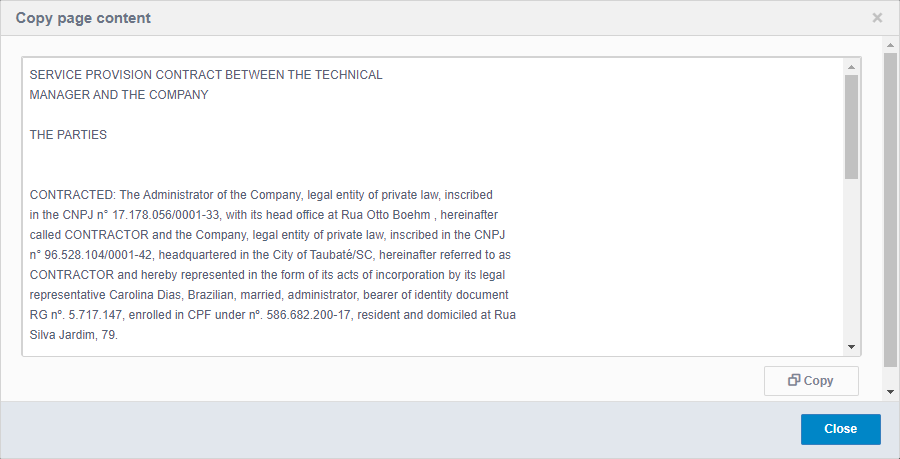
Then, to generate the copy simply click on the Copy option to copy the information, or Close if you decide to cancel copying the content.
File Download
Next to the copy icon, we have the icon that allows the user to download the document.
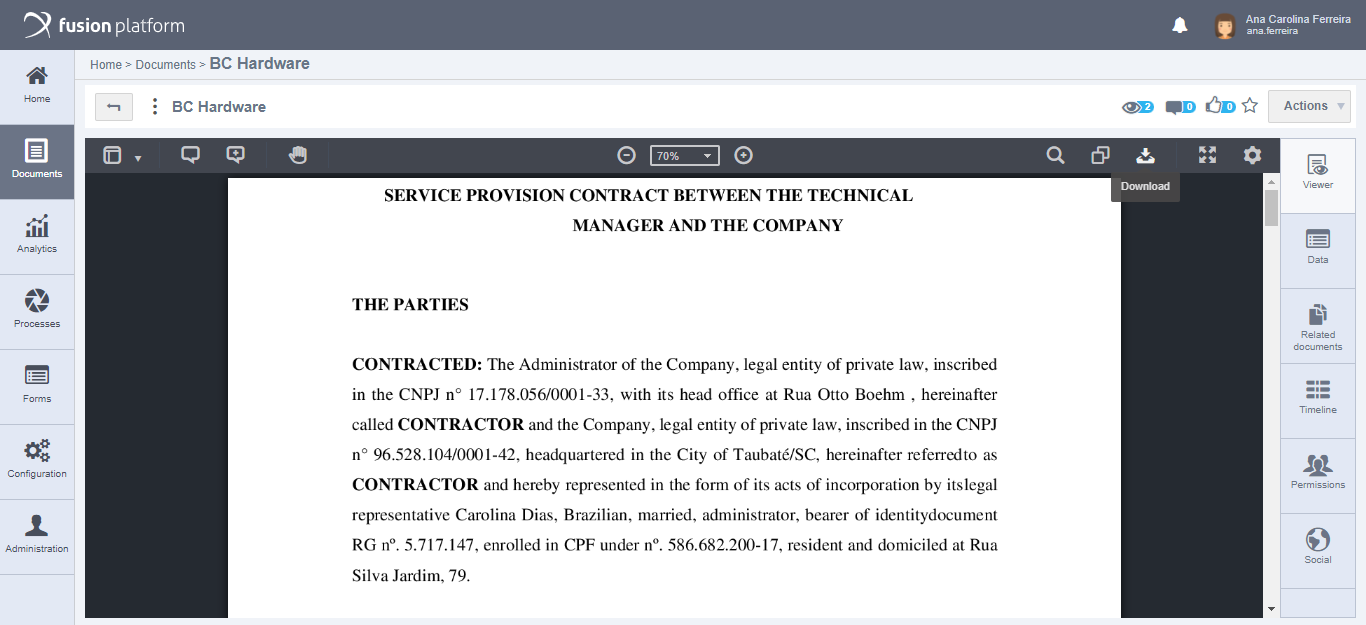
Files that do not have download permission will have the icon disabled.
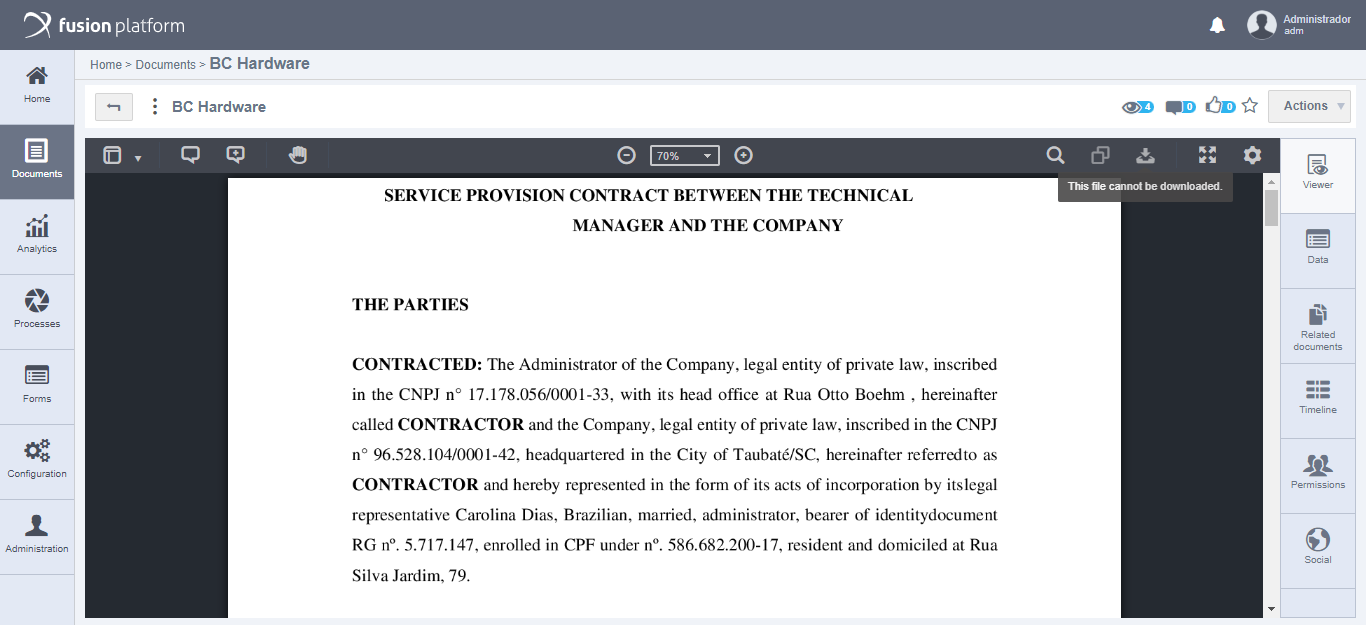
Note
Remember that the user who publishes the document will always have all permissions on the document in question. Not allowing the download of a certain document will only be applied to other users.
When the option is selected, a second screen provides the file download settings.
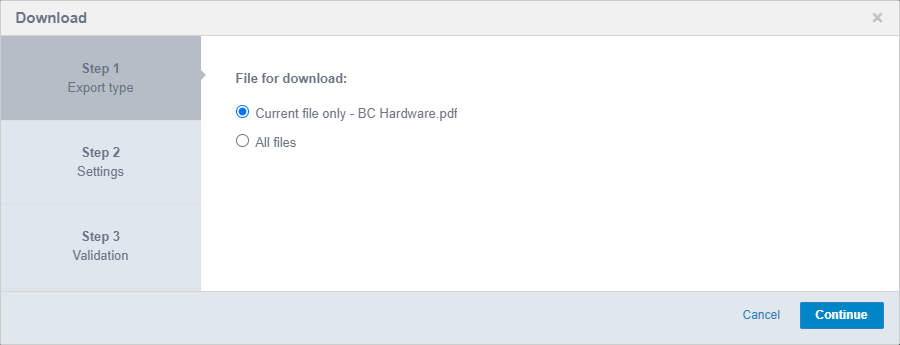
On this screen you can select between the options:
Current file only: In this case, only the file currently being viewed will be downloaded. In this option the file title is referenced and is selected by default.
All files: In this case, all files of the document in the viewer will be downloaded, or all files that the logged-in user has permission to download.
When you select the Current file only option and proceed to the next step, the screen for choosing the format of the file to download will be available.
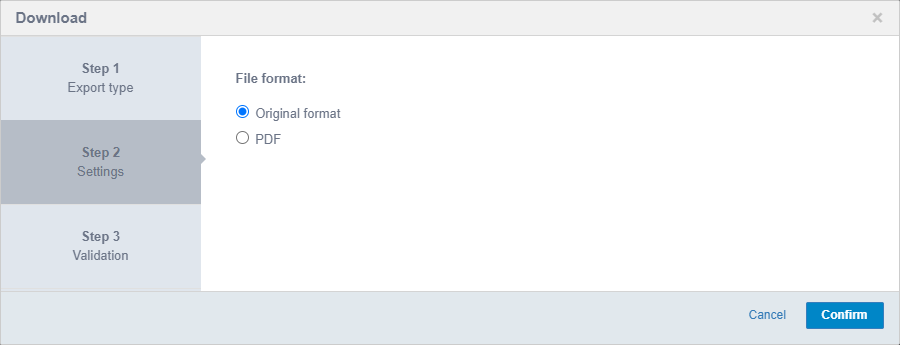
The options available are Original File Format, selected by default, or PDF.
Then, to proceed with the download, just click Confirm.
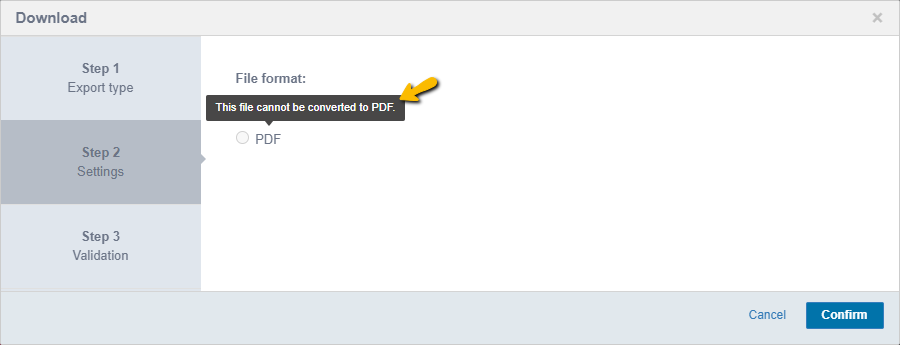
Note
If the file cannot be converted to PDF (video or audio format, for example), the PDF option is disabled, as shown below:
When you go back to the first file download step and select the option for All Files, when you go to the second step and choose PDF, other options will be available.
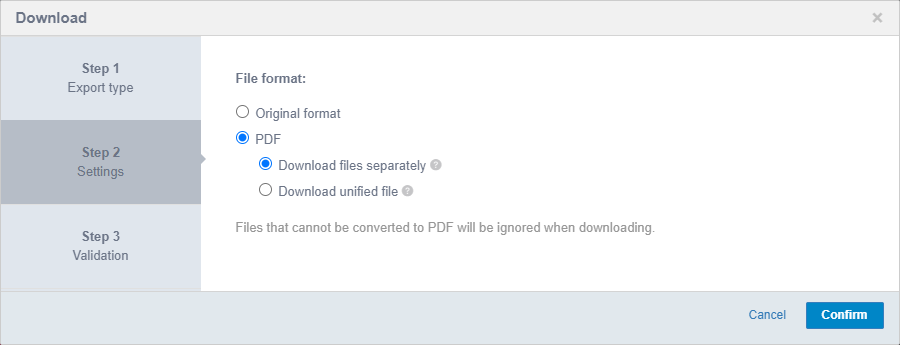
These include:
Download files separately: It means that all files will be downloaded in a single PDF.
Download unified file: It means that all files will be downloaded separately in one compressed file (zip), keeping the original name of each of them.
Attention
Remember that files that cannot be converted to PDF or that the logged in user does not have permission to download will be ignored.
When you proceed to the last step, which is Validation, the download will be successfully completed.
Still about the download, it is possible that when you proceed to the Validation step an error occurs.
This can occur if the environment goes down when loading, or if there is a failure in the internet or server connection, for example.
File formats supported by the Fusion Platform Universal Viewer.
| Classification of Formats | Extensions | Copy Textual Content (OCR) | Export in Original Format | PDF Export |
|---|---|---|---|---|
| CAD | dwg, dxf, dwf.eprt, easm, edrw, eprtx, easmx, edrwx,sldprt, sldasm, slddrw, prtdot, asmdot, drwdot, stl e obj | All allowed | All allowed | All allowed |
| Images | png, jpg, jpeg e bmp | All allowed | All allowed | All allowed |
| Images | tif ou tiff | Allowed | Allowed | Allowed |
| Image | gif | Not Allowed | Allowed | Not Allowed |
| Office and Text Editors | doc, docx, txt, log, xls, xlsx, csv, ppt, pptx, pps, ppsx, vsd, odt, ods, odp e rtf | All allowed | All allowed | All allowed |
| PhotoScripts | eps e ps | Not Allowed | All allowed | Not Allowed |
| PhoroScript | Allowed | Allowed | Allowed | |
| Video | mp4 | Not Allowed | Allowed | Not Allowed |
| Audio | mp3 | Not Allowed | Allowed | Not Allowed |
Attention
Fusion does not currently convert Tiff/Tif to PDF.
PDF Viewer
In the PDF Viewer, the opening of compatible files occurs more quickly, with a tool optimized specifically for displaying files in PDF format. This reduces the number of conversions required for the display of individual files.
In the document listing, click on the document, and it should open in viewing mode, as shown in the following screen:
The viewer operates by converting the attached file at the time of document publication and then displaying it to the user. However, it has limited options for accepted extensions, which are:
| Application | Supported Extensions |
|---|---|
| Office Suite and Text Editors | DOC, DOCX, XLS, XLSX, PPT, PPTX, LOG, ODT, ODS, ODP, TXT, RTF e VSD. |
| PhostScripts | PDF. |
PDF Viewer Side Menu
On the left side of the PDF viewer, you will find two icons.
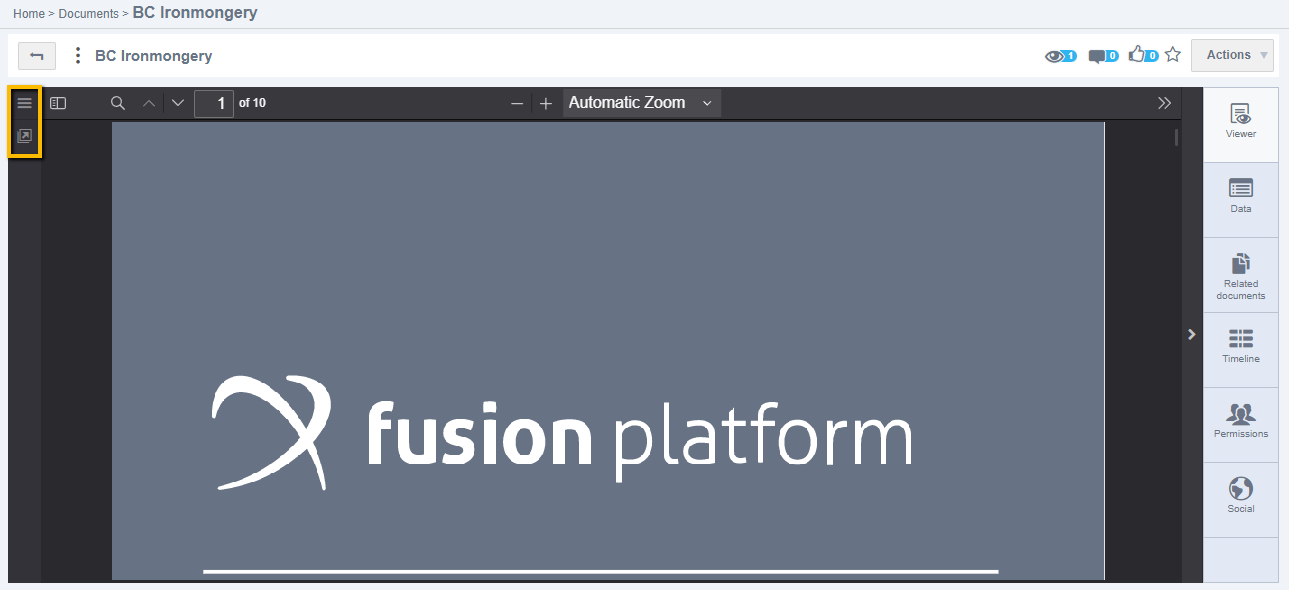
They have the following functions:
Show/hide file panel: This option allows you to show or hide the file panel, providing a broader or more focused view, according to your needs. Open in a new tab: By clicking on this icon, the PDF Viewer will be opened in a new browser tab, providing flexibility during navigation.
These features aim to make your interaction with PDF documents more efficient and customizable.
PDF Viewer File Panel
When clicking to open the file panel, a detailed list of files inserted in the document will be displayed.
This feature will show all files related to the document, including related documents.
This panel offers flexibility, allowing you to adjust the width as needed. Simply click and drag on the handle to customize the display.

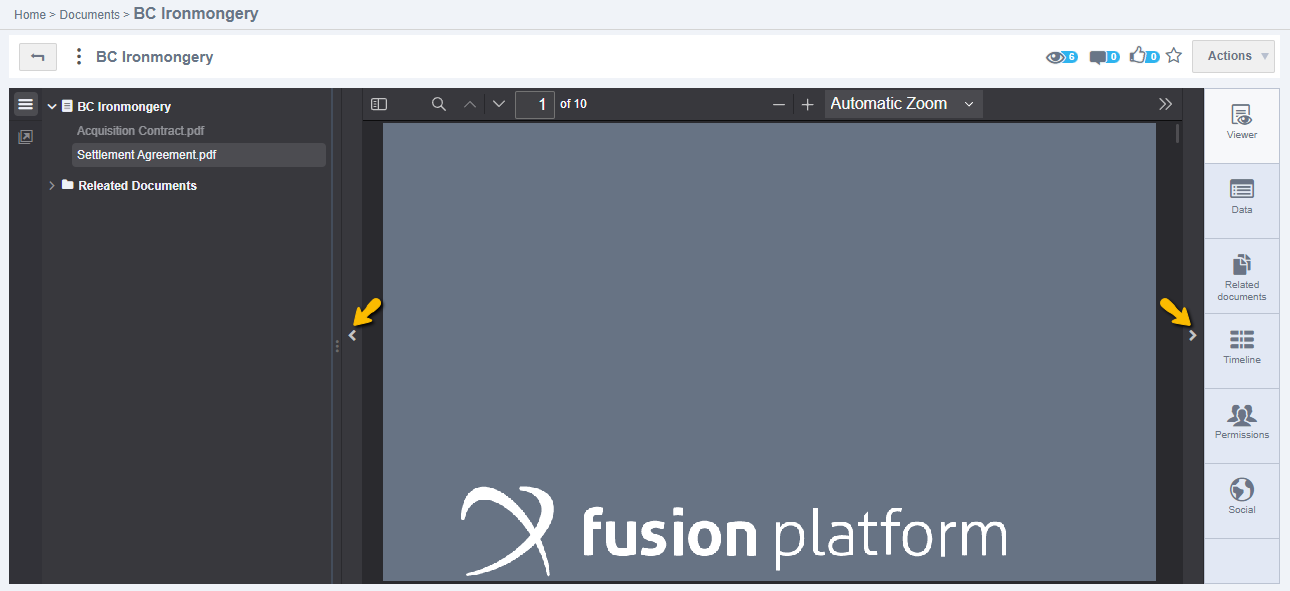
The files continue to be displayed individually in the PDF Viewer. This listing allows navigation between other files in the document, which can be done in two ways:
- Clicking on the file titles in the side panel;

- Clicking on the Next File and Previous File arrows.
Note
If the viewed file is the first or last in the list, the options for Previous File or Next File, respectively, will not be available.
Therefore, if a document with only one file is opened, no arrows will be displayed.
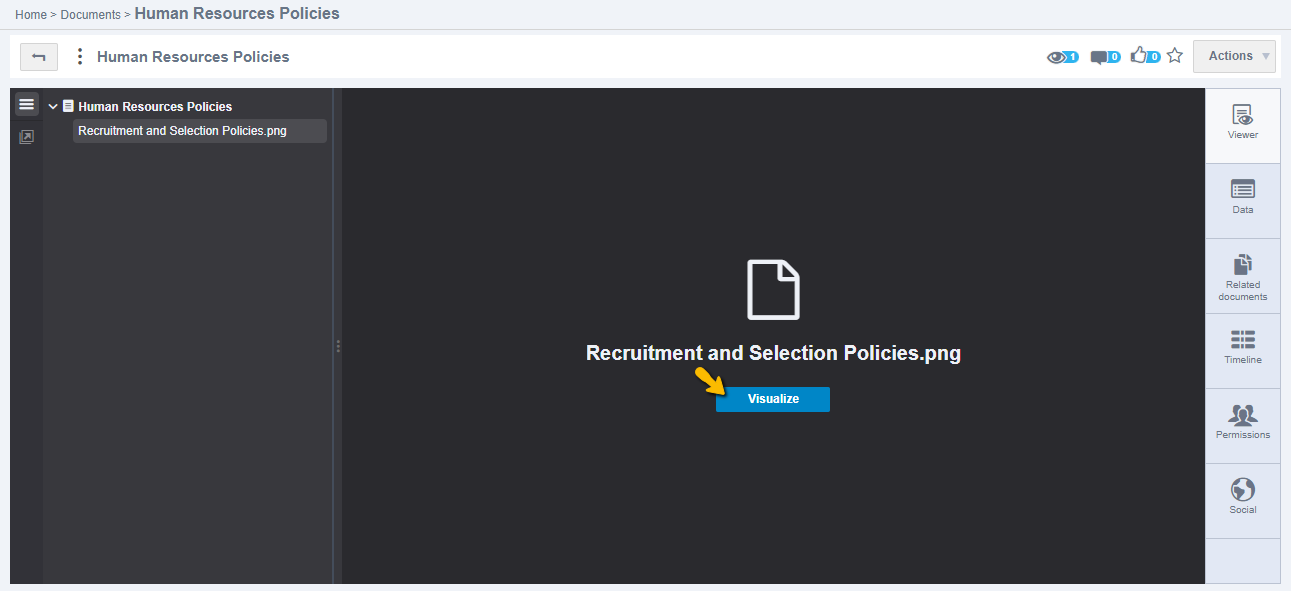
If there is a file in the list that cannot be converted to PDF but can still be viewed in the Universal Viewer (such as JPG, JPEG, PNG, BMP, GIF, TIF, TIFF, among others), a screen with the file name and the option to view it in a new tab will be displayed.
Furthermore, by clicking on the document title in the file panel, it is possible to open a document that cannot be viewed by the PDF Viewer. In this case, the file will be converted by the Universal Viewer.
PDF Viewer Side Panel
Next to the file panel, there will be an icon to Toggle Sidebar, as shown in the following image:
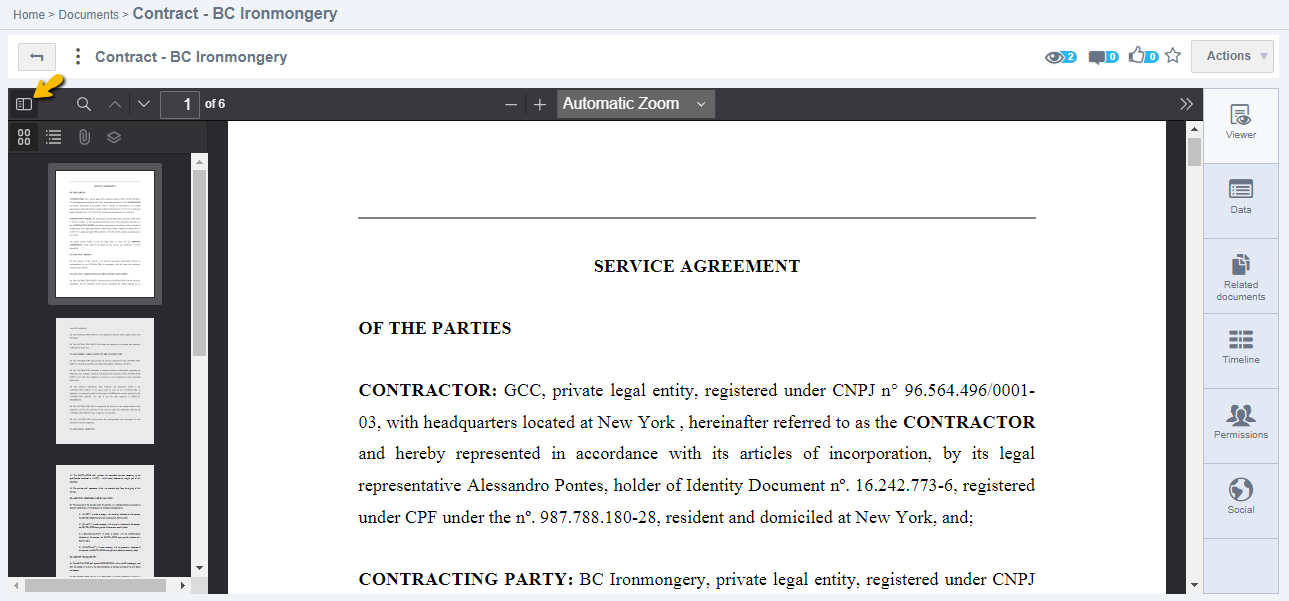
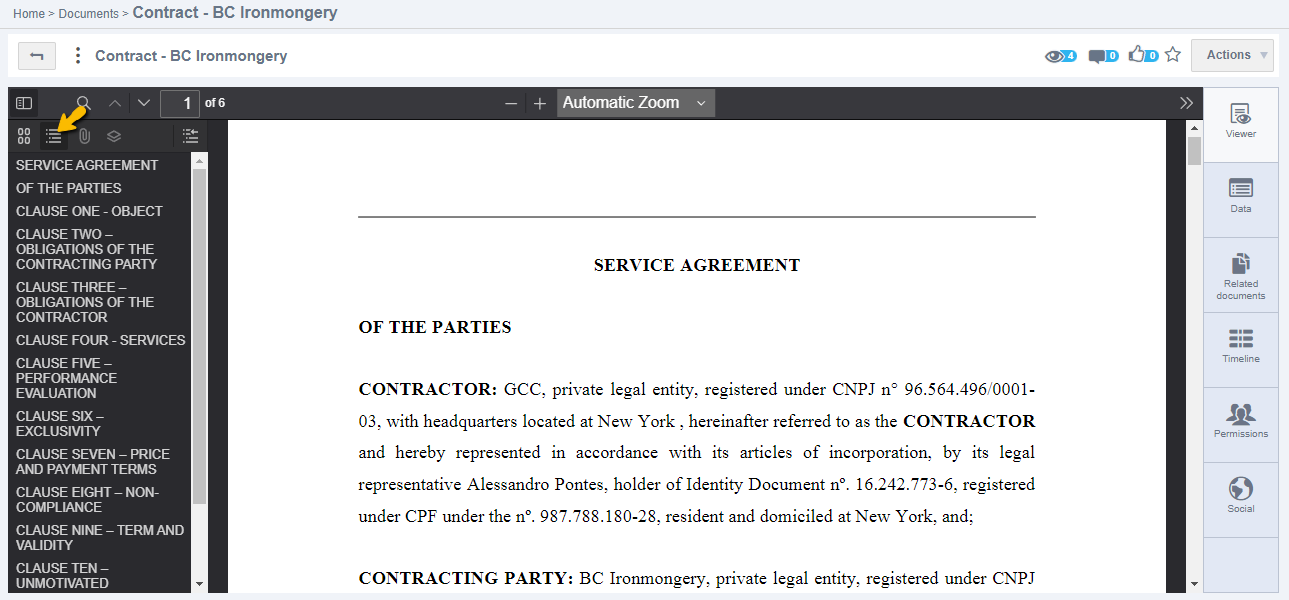
Clicking on this option displays thumbnails of the document pages. This view assists in locating a specific page.
Below the Toggle Sidebar option, there will be other document viewing options.
The Show Document Outline option can be enabled only if the document being viewed has a structure that assigns names to pages, so that each page has a name. This is common in PowerPoint files, where each slide is automatically named without the need for renaming, or in Word files, where it's possible for some text to be considered a title.
Additionally, when enabling this viewing option, the Find Current Outline Item button becomes available. Clicking on this option allows the user to identify the page they are on, facilitating navigation through the side menu.
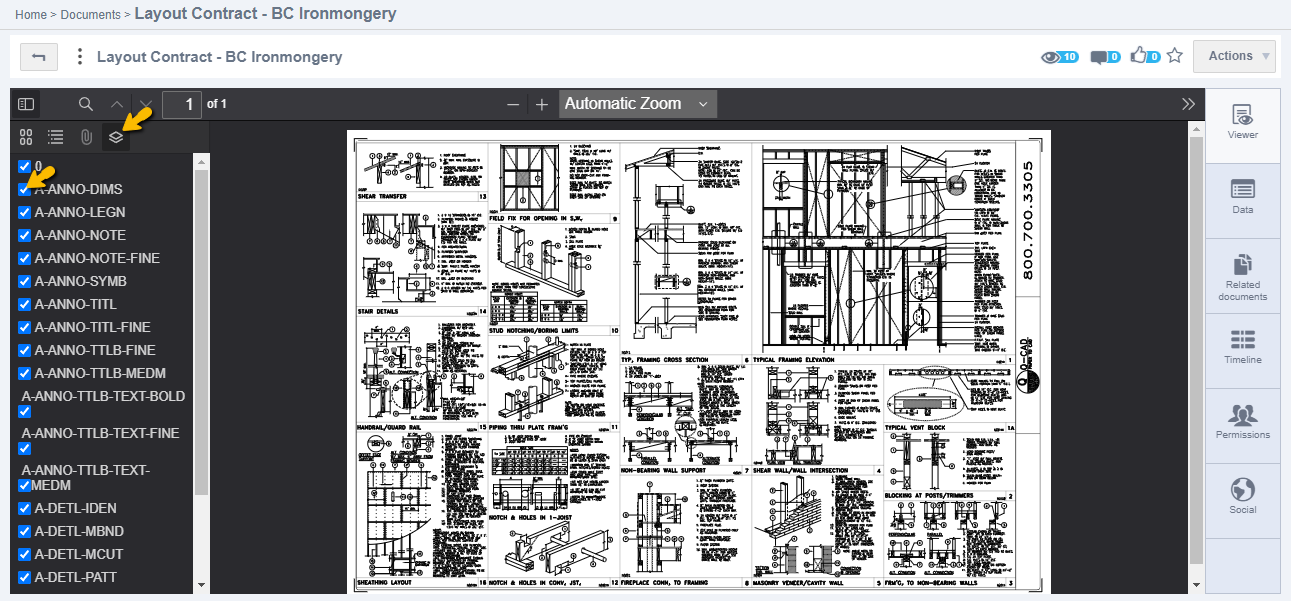
The last option is called Show Layers. It can be enabled whenever a file contains layers, such as in the case of a PDF where new layers can be activated. By choosing this view, it's possible to enable or disable layers as desired.
PDF Viewer Settings
To make basic settings in the document view, click on the settings icon in the upper right corner to display the following screen:
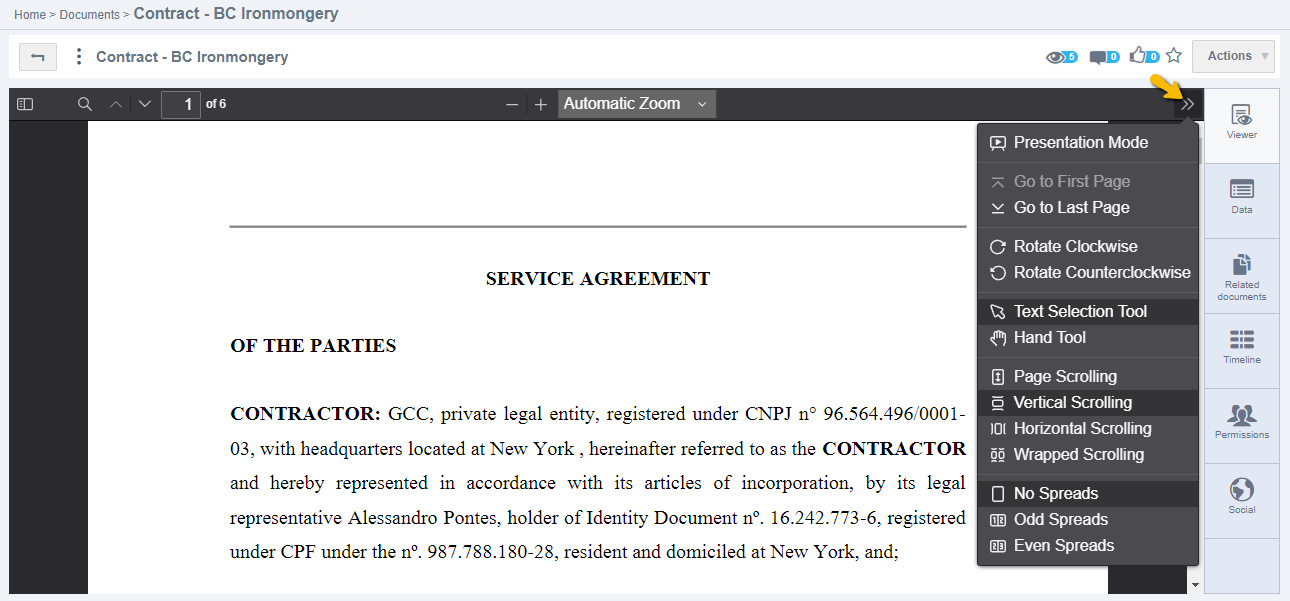
- Presentation Mode: In presentation mode, the viewer will be in full screen, allowing navigation to the next pages through mouse clicks or arrow keys.
- Go to First Page: This option is available only when the viewer is not positioned on the first page. Clicking on it will take the user to the first page.
- Go to Last Page: This option is available only when the viewer is not positioned on the last page. Clicking on it will take the user to the last page.
- Rotate Clockwise: Clicking this option rotates the document clockwise.
- Rotate Counterclockwise: Clicking this option rotates the document counterclockwise.
- Text Selection Tool: When the PDF Viewer is in Text Selection Tool mode, the cursor will have the standard Windows arrow.
- Hand Tool: When the PDF Viewer is in Hand Tool mode, the cursor turns into a hand, allowing the user to pan pages.
- Page Scrolling: Enabling this option makes the viewer display the file by pages. Therefore, with this view, it will be necessary to switch pages through the side page show menu.
- Vertical Scrolling: Enabling vertical scrolling displays the file vertically, in this case, to view other pages, it will be necessary to scroll the file vertically.
- Horizontal Scrolling: Enabling horizontal scrolling displays the file horizontally, in this case, to view other pages, it will be necessary to scroll the file horizontally.
- Wrapped Scrolling: Enabling wrapped scrolling allows the user to view multiple pages at once.
- No Spreads: Enabling this option will show only one page at a time.
- Odd Spreads: Enabling this option will extend odd-numbered pages. In this case, whenever there are odd-numbered pages, it will display two pages at a time.
- Even Extend: Enabling this option will extend even-numbered pages. In this case, whenever there are even-numbered pages, it will display two pages at a time.
Note
To view more than one page in Wrapped Scrolling mode, it is necessary to zoom out in the viewer.
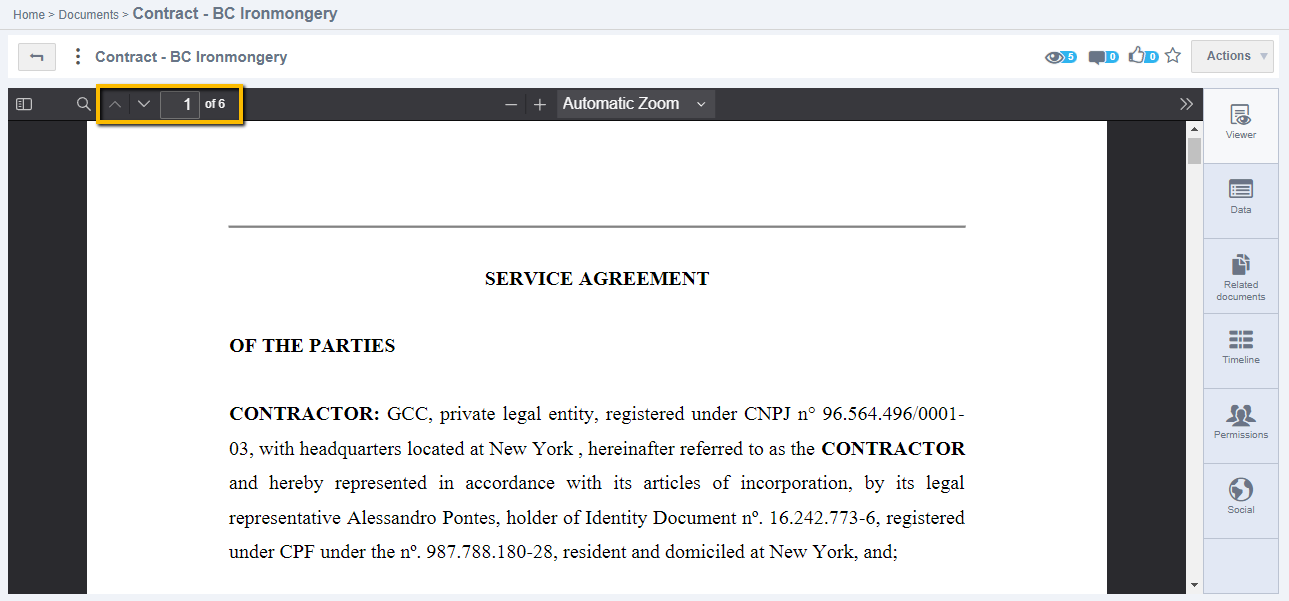
Pagination in the PDF Viewer
At the top of the document, the Pagination menu will be available. In it, you can view information about the number of pages the document has and the current page of the document. Pagination also offers navigation options between pages, allowing you to advance to the next page, go back to the previous page, or even enter the desired page number.
Zoom in the PDF Viewer
At the top, menus are displayed that offer various options for viewing the document. The following image shows the zoom options in the viewer:
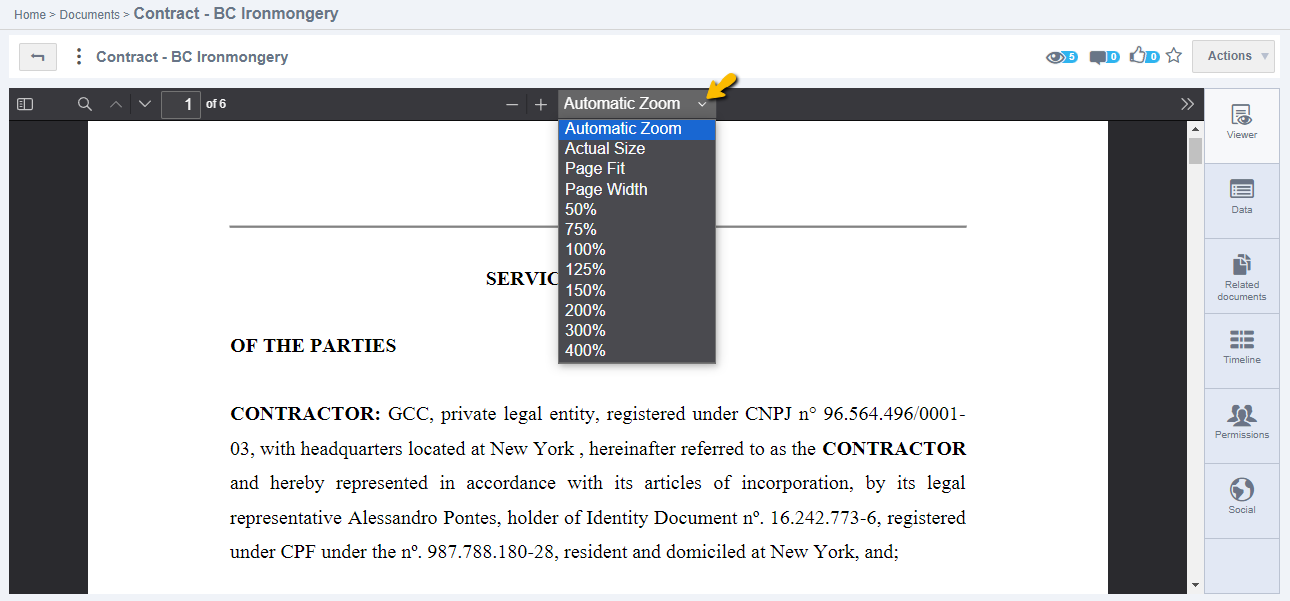
In the zoom field, the zoom level is displayed as a percentage of the document size.
- Click on the (-) icon to decrease the document zoom.
- Click on the (+) icon to increase the document zoom.
- Click on the Automatic Zoom option to adjust the zoom automatically according to the document size.
- Click on the Actual Size option to view the document at 100%, in its original size.
- Click on the Page Fit option to display each page of the document adjusted to the open window.
- Click on the Page Width option to view the document pages with the width of the screen.
Conducting searches in the PDF Viewer
The Fusion PDF Viewer also provides the ability to search through the entire document content, thanks to OCR technology. This technology recognizes characters from image files, scanned files, handwritten or printed text, etc. Thus, the Fusion Platform can obtain an editable text file to index and enable queries.
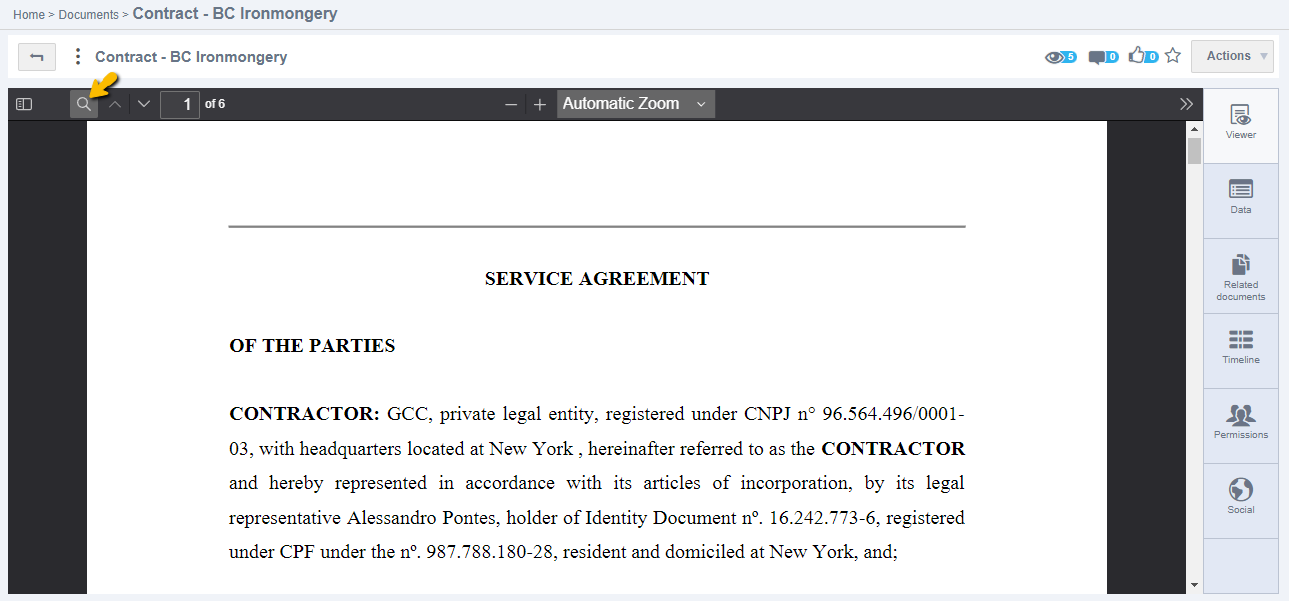
To conduct searches in the PDF Viewer, click on the magnifying glass icon displayed in the top bar:
After entering the desired term in the search bar, simply press Enter. It will then highlight the searched term with a blue marker.
Note that after clicking on the magnifying glass icon, the viewer displays a bar to enter the term you want to search for, along with two arrows, one to move to the next search result and another to go back to the previous result. Additionally, there are terms that can be used for detailed searches.
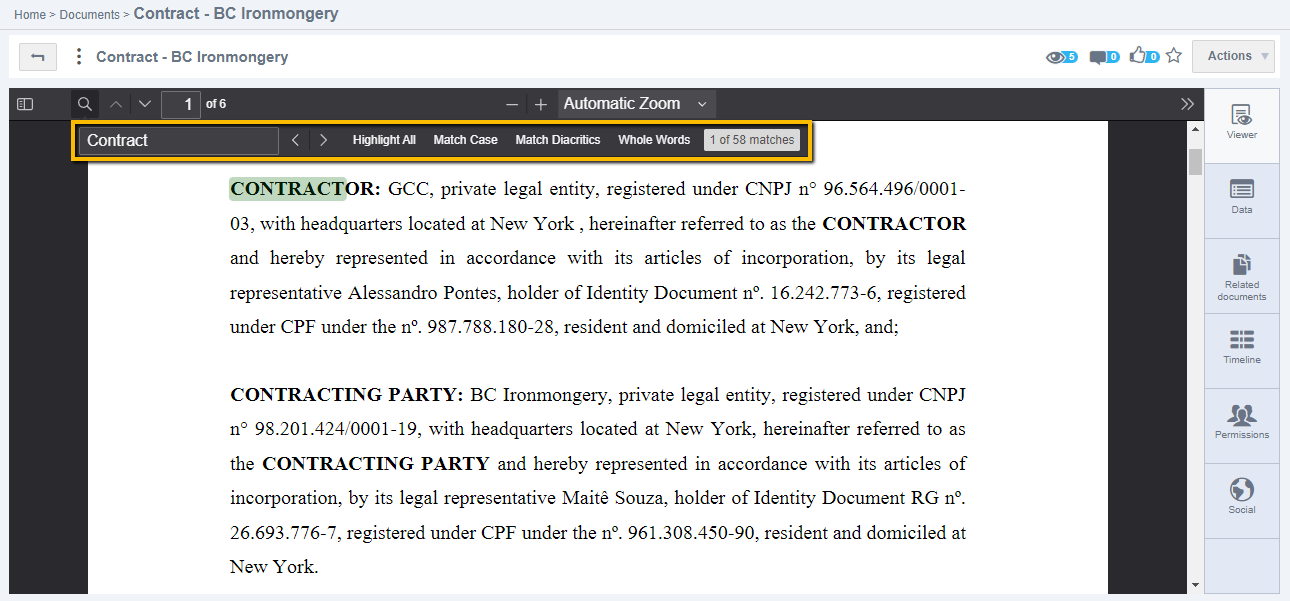
- Highlight All: By enabling this option, the viewer will highlight all occurrences that match the searched term. In this case, the highlighted term will be displayed in blue, while other terms will be in purple.
Note
When clicking on the option to move to the next result, it will be displayed in blue, and so on.
- Match Case: When enabling this option, the viewer will perform the search differentiating between uppercase and lowercase letters.
- Match Diacritics: When enabling this option, the viewer will perform the search differentiating accents.
- Whole Words: When enabling this option, the viewer will perform the search considering that the term specified in the search field is a whole word.
Attention
The OCR search accuracy percentage will depend on the quality of the document. For instance, if a document was scanned at a 300dpi quality, it will have an accuracy percentage of 95%. In other words, with good document quality, Fusion will recognize words more accurately and return search results with higher precision.
Differences between the Universal Viewer and the PDF Viewer
The Universal Viewer and the PDF Viewer in the Fusion Platform have some differences in terms of functionalities and behaviors. Here are some distinctions between them:
| Functionalities | Universal Viewer | PDF Viewer |
|---|---|---|
| Watermark display | OK | OK |
| Lighten background option | OK | X |
| Position on the last page option | OK | X |
| Page content copying | OK | X |
| Add/Read Comments | OK | X |
| Use general pages counter | OK | X |
| Show range of pages per document | OK | X |
| Download per file | OK | X |
| Rotate counterclockwise/clockwise | X | OK |
| Mouse-Based document movement | OK | OK |
| Go to last/first page | X | OK |
| On-Screen text selection | OK | OK |
| OCR-Based search | OK | OK |
| Zoom options | OK | OK |
| Tree or Scroll navigation | OK | OK |
| Loader before pages load | OK | OK |
| Multiple file display | OK | X |
| Content search within files | OK | X |
| Overlay viewer on screen | OK | X |
| Image, video, or audio files | OK | X |
Viewing Document Metadata
During document viewing, users have the option to access the data entered during document publication. In the document central click on the preview option of the desired document, with the viewer open, click to access the Data tab, as shown in the following image:
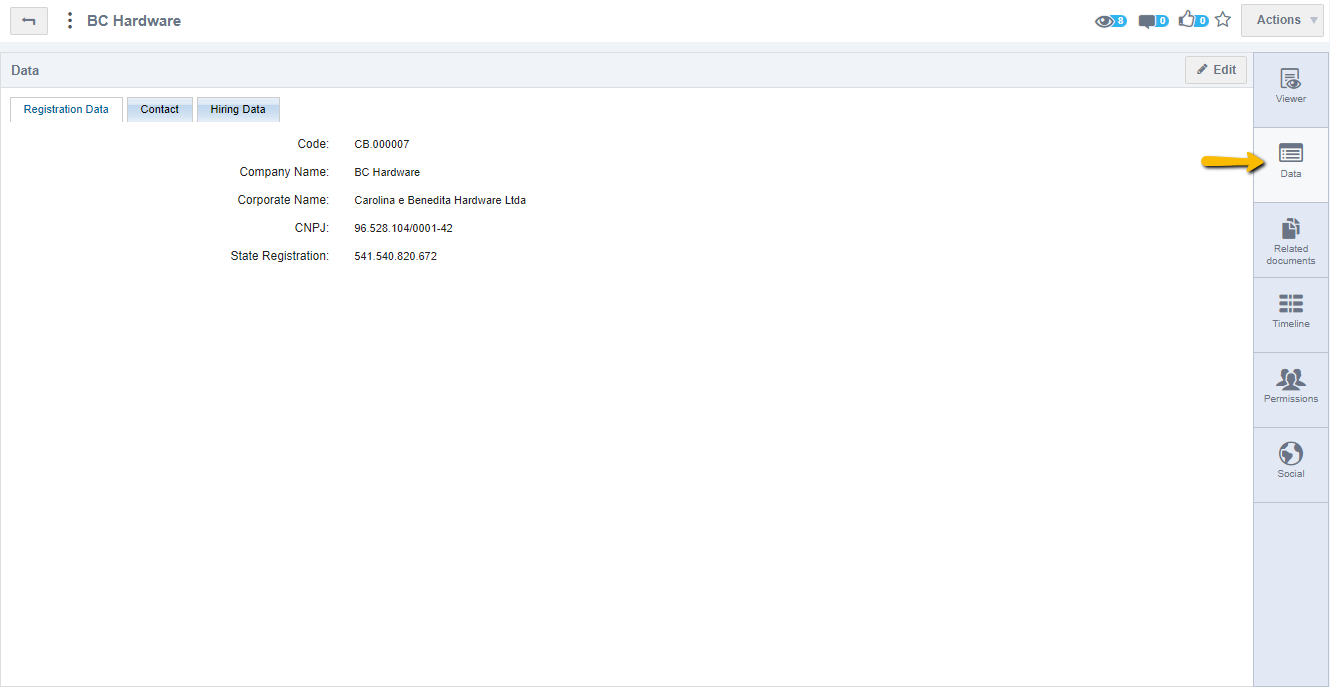
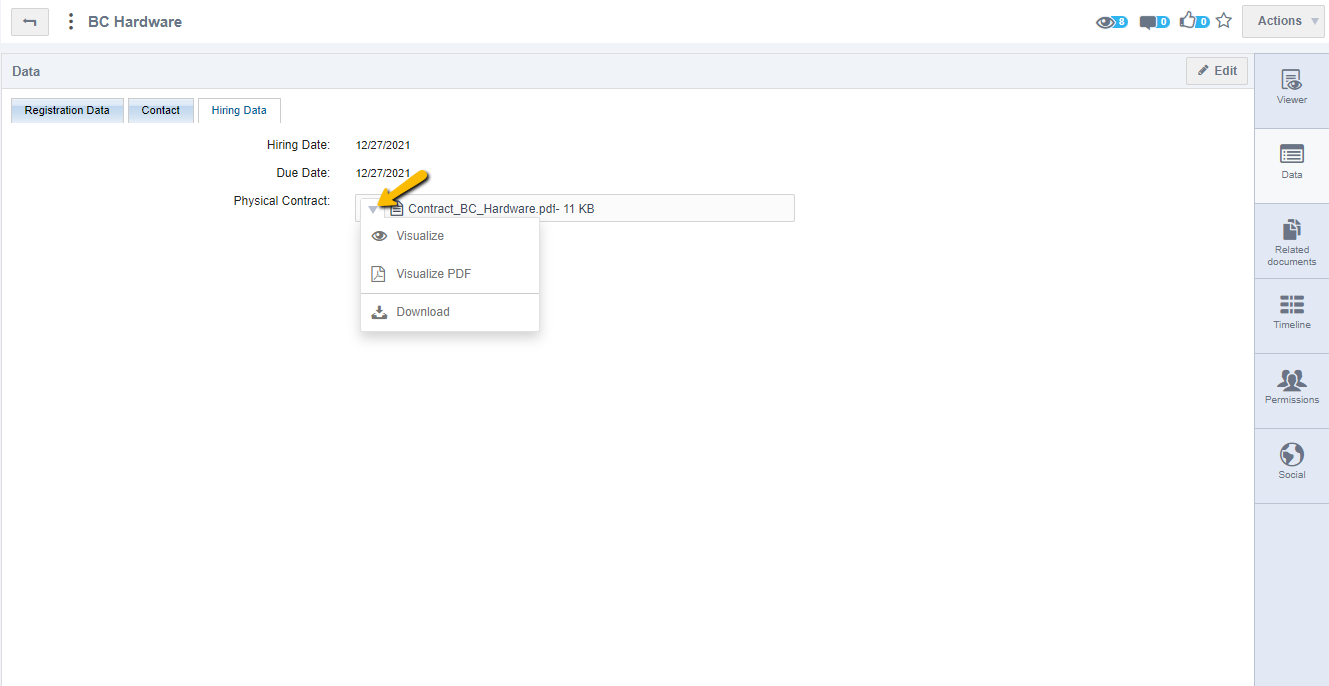
In the Data tab, this is where the system displays the fields that were filled during the publishing/editing of the document. It is possible to download the file attached to the document as well as open it through the Viewer from the Data tab, the following image displays the screen:
If it is necessary to make any changes to the document, the user can click on the Edit option displayed in the Data tab, then they must release the fields so that they can be edited.
Attention: After the changes made, you must click the Publish button to save them in the document.
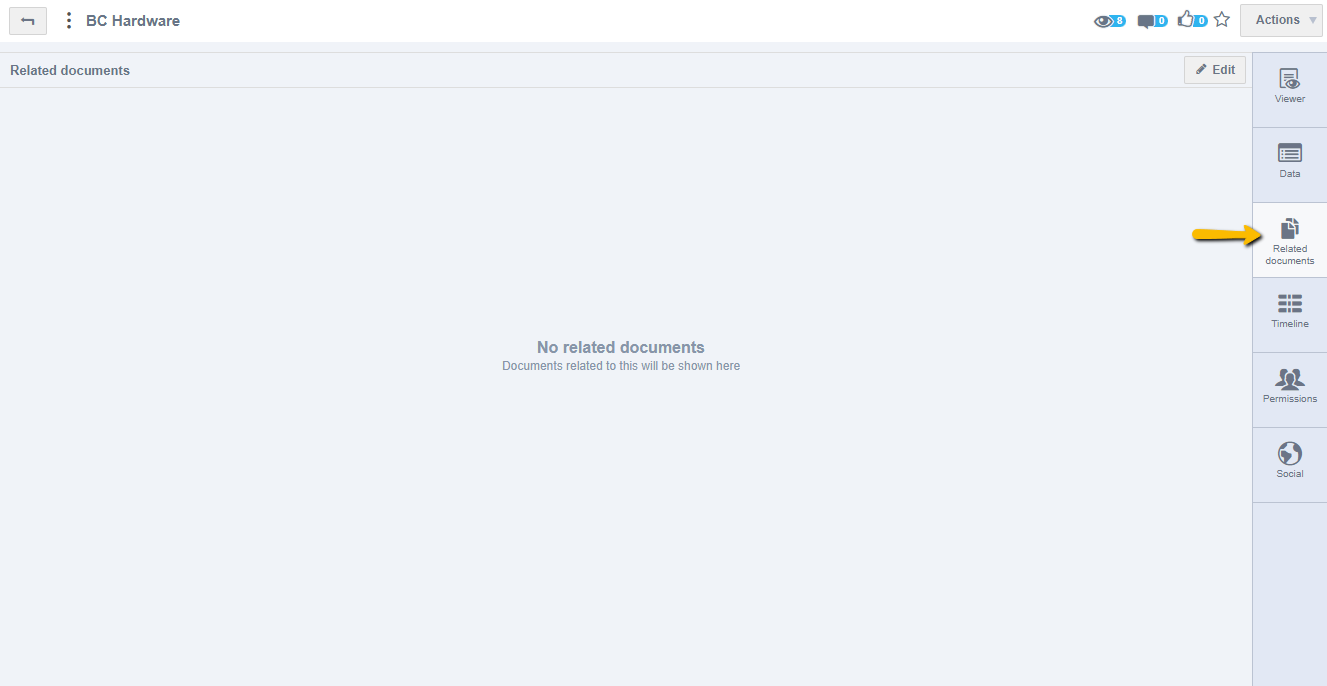
Viewing Related Documents
After a document is published in the system, when editing it, it is possible to relate documents so that it can obtain information related to the subject of the document in an easier and more agile way. While viewing the document, we were able to view the documents that were related, go to the Document Central, click to view a document and access the Related Documents tab.
Viewing Documents with a JT Extension
You can open files with .jt extension on Fusion Platform. For this, you need to install the "JT2GO Desktop" application.
When there is a need to open a file in this format, the system will initiate communication with FusionBox and it will open the file, the preview will occur directly on the JT2GO tool.
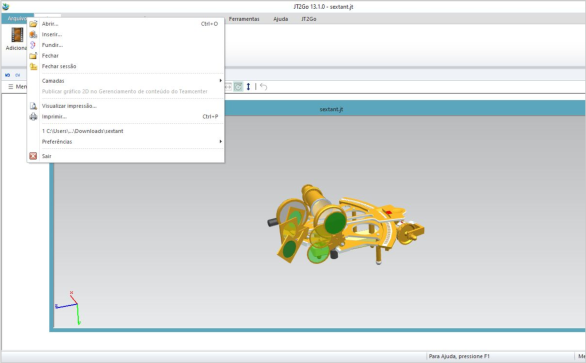
It is important to note that you cannot edit or save information in JT2GO, it is only for viewing the file.
Attention
The file size limit has been set by default to 5GB.
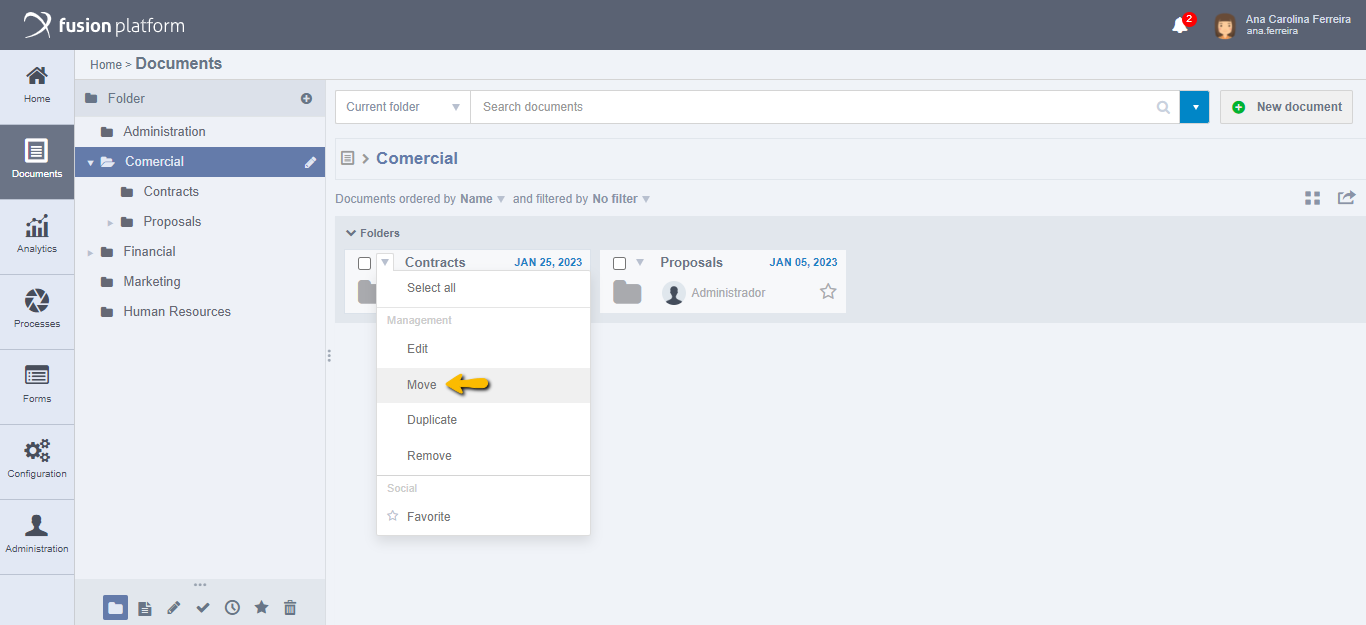
Moving Documents
The option to move documents is so that the user can always organize their documents in a way that is more consistent with their business rule. To move documents, go to the document central and click the actions arrow of the document you want to move, click the Move option, as shown in the following image:

It should then show a screen so that the user can select the folder from which to receive the document, it is possible to search for folders if necessary using the search bar, as shown in the following image:
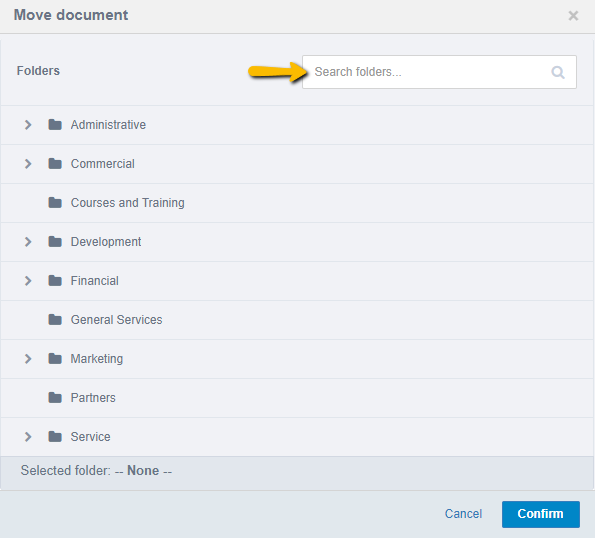
Attention: The system will only show folders that are allowed to receive the document, for example, if you have a folder that only accepts documents published with the document type “contracts”, that folder will not display on this screen when you move a document that is from another document type.
Once the destination folder is selected, click Confirm.
Note: Only users with permission can move folder documents.
Inactivating Documents
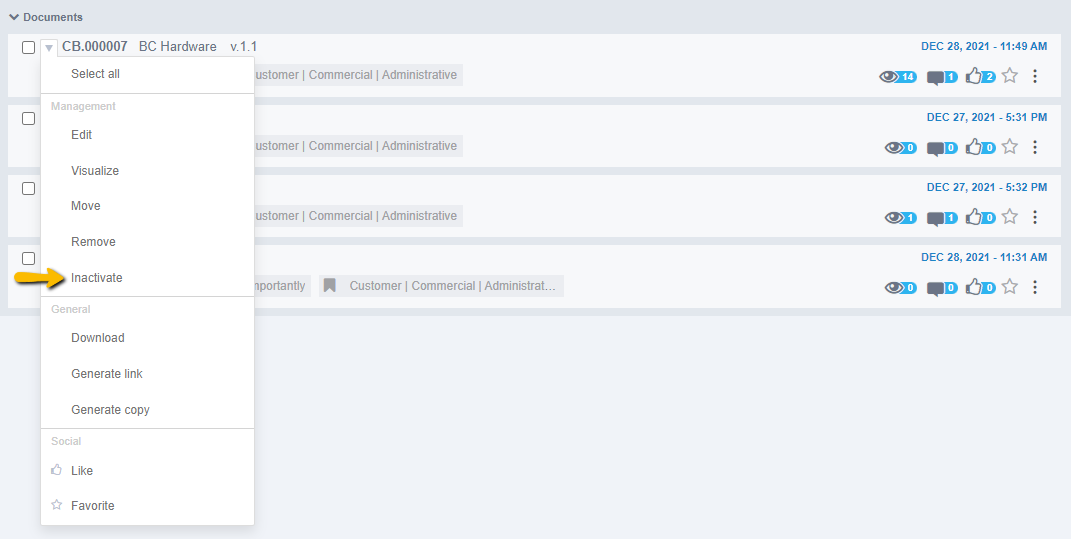
Fusion allows you to Inactivate documents so that when they are discontinued, they still have their registration in the system. After inactivation, no actions can be performed with this document, but it will remain available for viewing purposes. To inactivate documents, go to the document central and click the document actions arrow and select the Inactivate option, as shown in the following image:
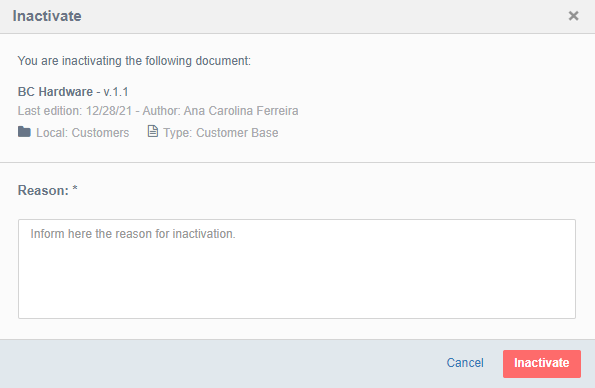
Clicking the Inactivate option should display a screen so that the user can provide a reason for inactivating the document, after filling in the reason, click Inactivate, according to the following screen:
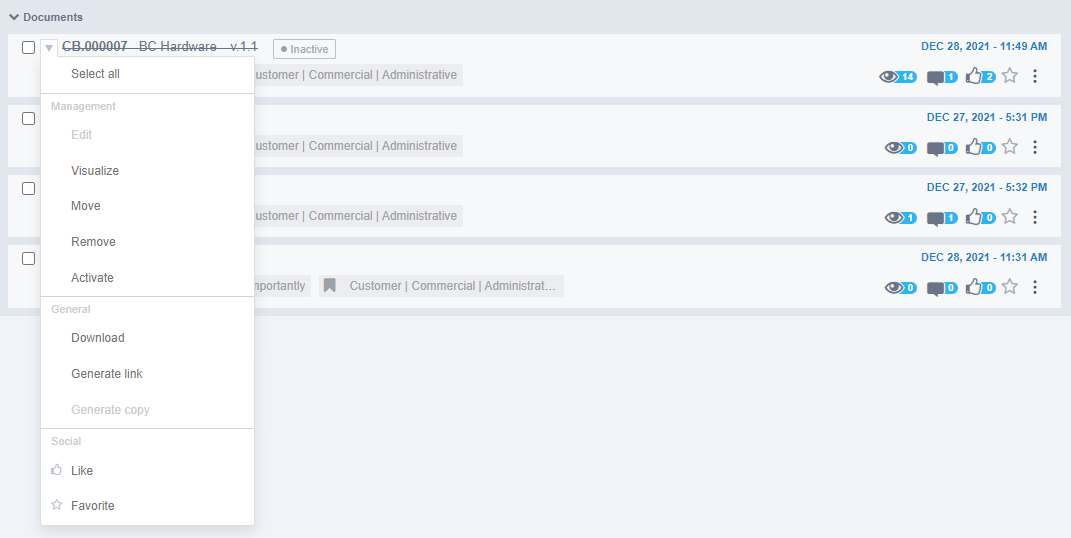
After clicking the Inactivate option, as shown in the previous screen, you should display a message stating that the document has been inactivated and it should display in the listing with a markup, stating that the document is inactivated:

When you click the actions arrow for the inactivated document, the system locks the Edit and Generate Copy the document options, and hovering the mouse informs you that it is not possible to perform the actions, as shown in the following screen:
Attention: Only users with permission can inactivate documents.
Downloading the Document
Fusion allows documents to be downloaded. To perform this action, go to the document central, click the document actions arrow and select the Download option, as shown in the following screen:
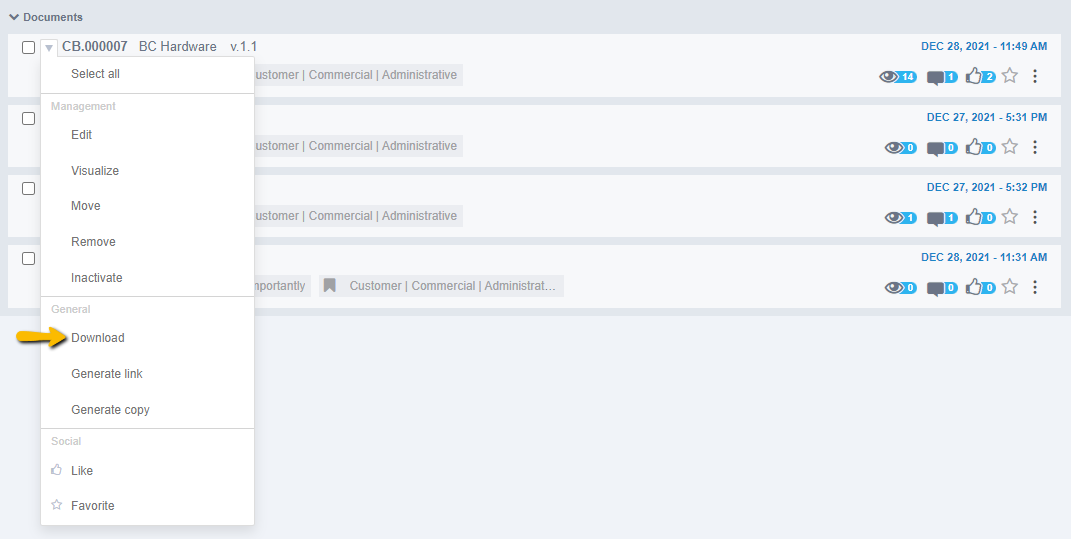
After clicking to download it, you should download a file of type .zip with the file.
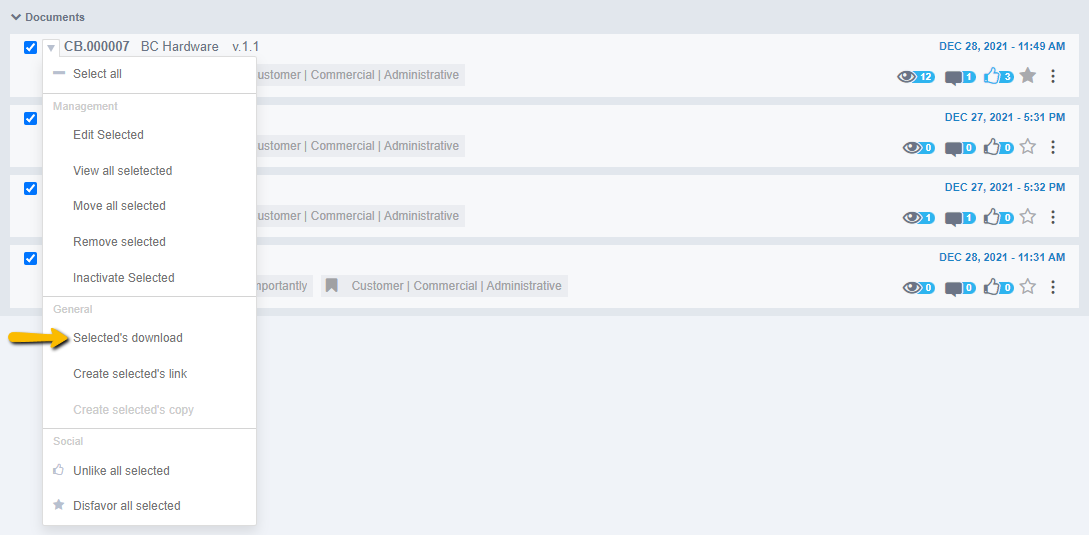
You can download more than one document at the same time, to do so, select the required documents, click the action arrow of one of them, and select the s Selected's download documents option.
It is also possible to download documents through the details of the document, click to expand the details and click on the option where it informs the size of the document, then you should download as shown in the following image:
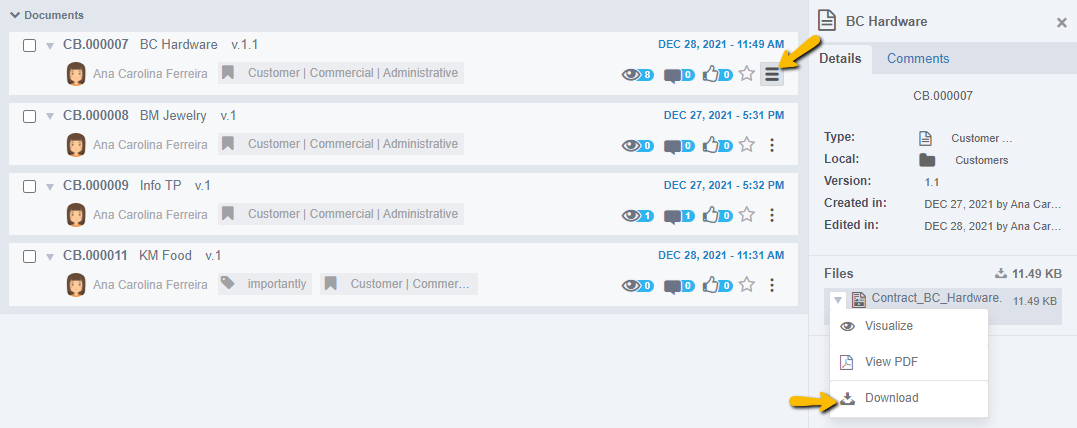
Attention: When the document has more than one attached file, clicking on the size of the document as shown in the previous image, a zip is downloaded that contains all the files linked to the document.
Attention: It is only allowed to download documents that have permission.
Generating a link for direct access to the Document
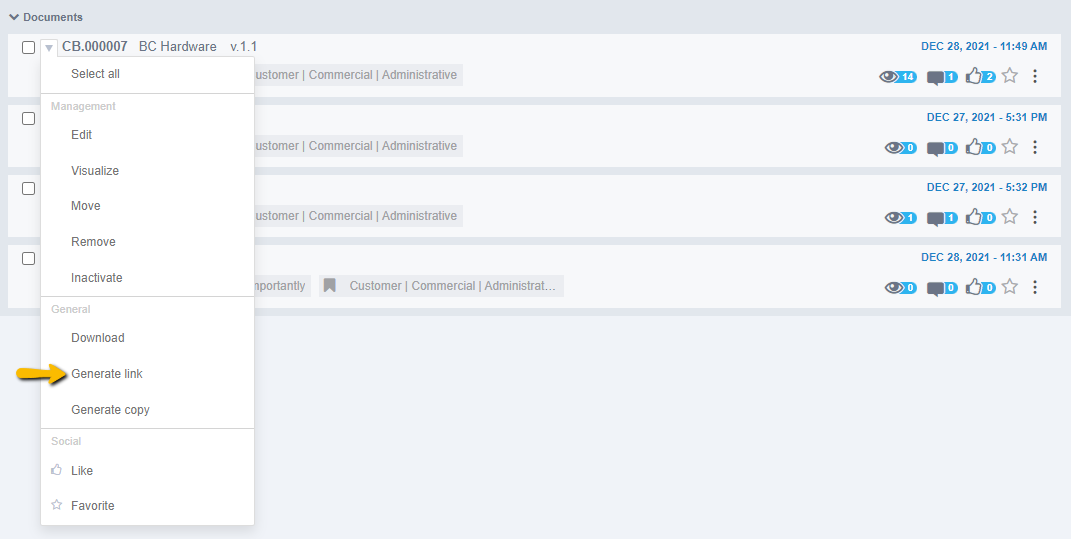
Fusion allows you to generate document links so that when accessing the link, it is already redirected directly to the specific document, without the need to navigate within the system to search for the document you want. To generate and copy a document link, go to the document central and on the document actions arrow click the Generate Link option, as shown in the following screen:
Clicking opens the screen with the document link, as shown in the following screen:
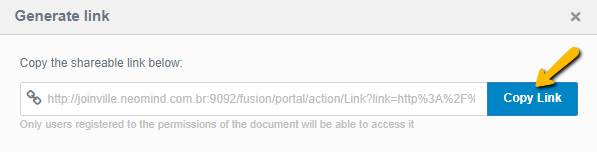
Click the Copy Link option:
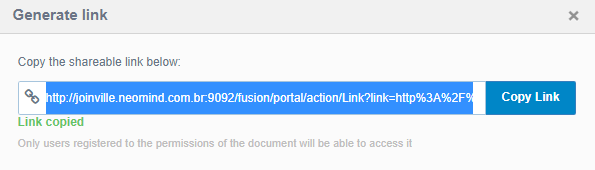
When accessing the generated link, you should redirect to the system login screen and after authentication automatically redirect to the document in preview mode.
Attention
Only users registered with the permissions of the document will be able to access it.
Generating a Controlled Copy of a Document
Controlled Copy allows you to control the printing of documents present in Fusion. The prints made can be recorded and stored, generating greater control of copies that may or may not be made. Go to the document central, click the actions arrow for the document where you want to copy, and select the Generate Copy option:
Clicking will display the screen to configure the copy options, as shown in the following screen:
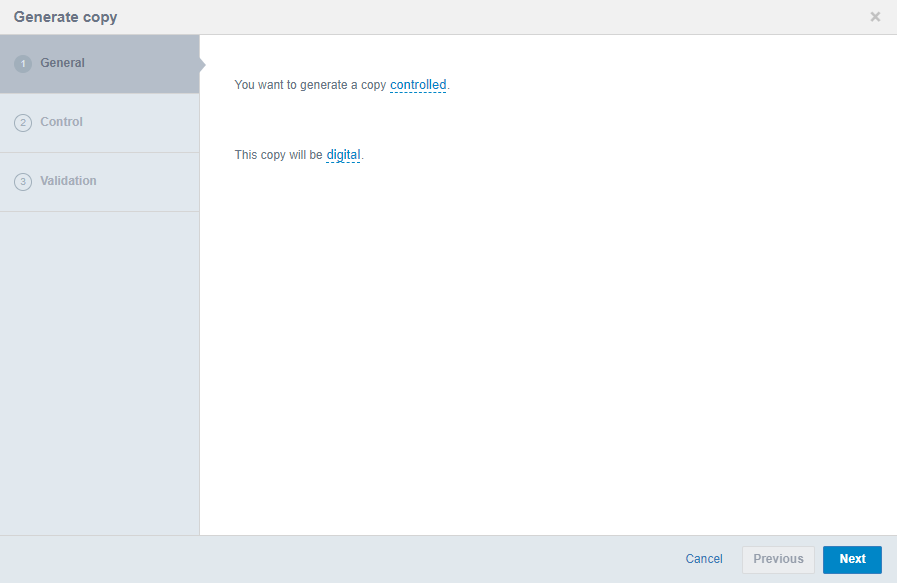
First, it is necessary to perform the settings of the General tab, as shown in the previous image. In this tab it is necessary to define whether the copy of Controlled or Not Controlled.
- Controlled Copy: Select Controlled Copy to have the printed document registered in the system.
- Not Controlled Copy: By selecting Not Controlled Copy, the document will not generate records in the history.
Then it is necessary to select whether the copy will be Digital or Printed:
- Digital: Copy in PDF format for download.
- Printed: Copy in printed physical format. Selecting this option should display the settings for selecting the printer and the number of documents that will be printed.
The Control step is where the user can select the recipients of the copy, that is, the people who will receive a controlled copy of the document.
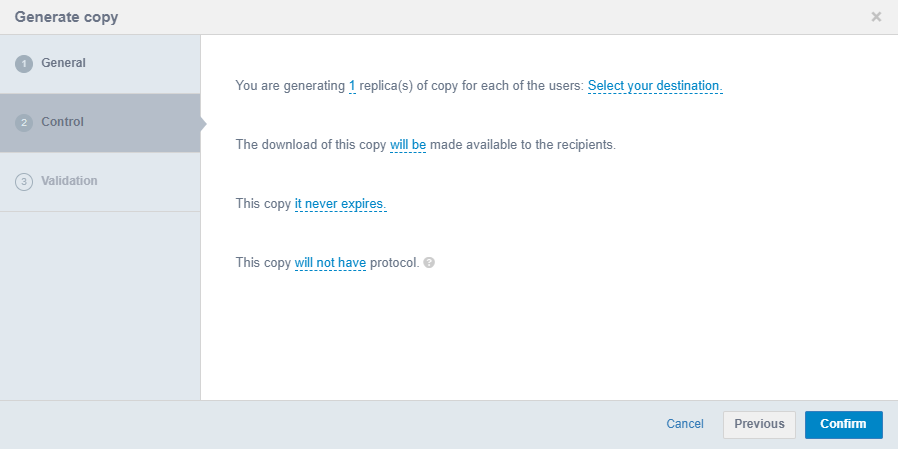
You can also change the number of copies audited for each of the users in the timeline of the document. Then, the sum of the selected quantity times the quantity of recipients will be audited in the timeline as a total of copies.
Note
Remember that repeated recipient users do not get double the number of copies. If a user has been defined both nominally and by a group/role they participate in at the same time, only the configured amount of copies will be counted once.
In addition, you can inform whether the user will or will not be provided with the link to download the copy.
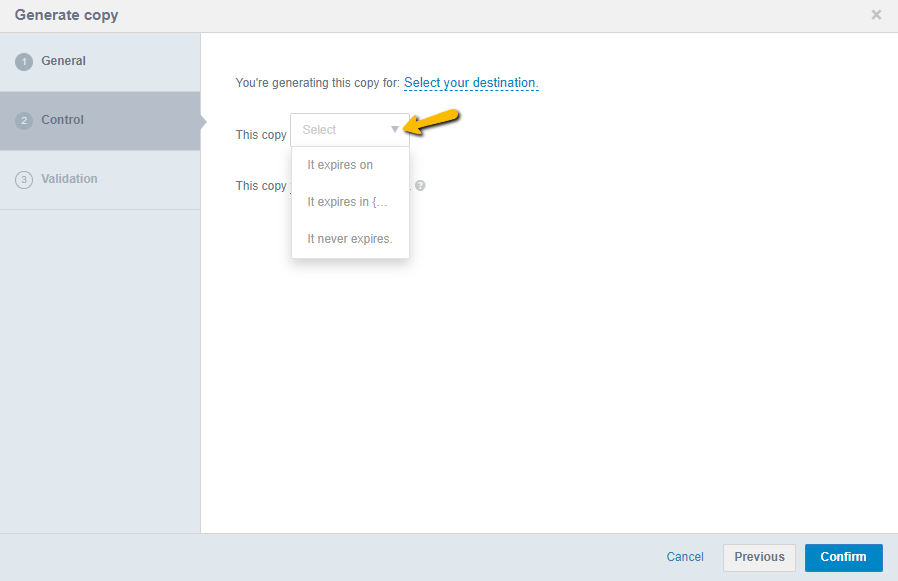
It is also possible to configure the copy expiration, select a date so that it is no longer valid, by default the option that the copy It Never Expires is selected, click on this option that will release to choose the options, It Expires On and It Expires in a few minutes, as shown in the following image:
Attention: Will only display the Control step when the copy option selected in the general step is Controlled Copy, otherwise the General step advances directly to the Validation step.
The last field available is about the protocol of the copy, you can choose to have or not have a protocol, which is a cover that will be used on your controlled copy.
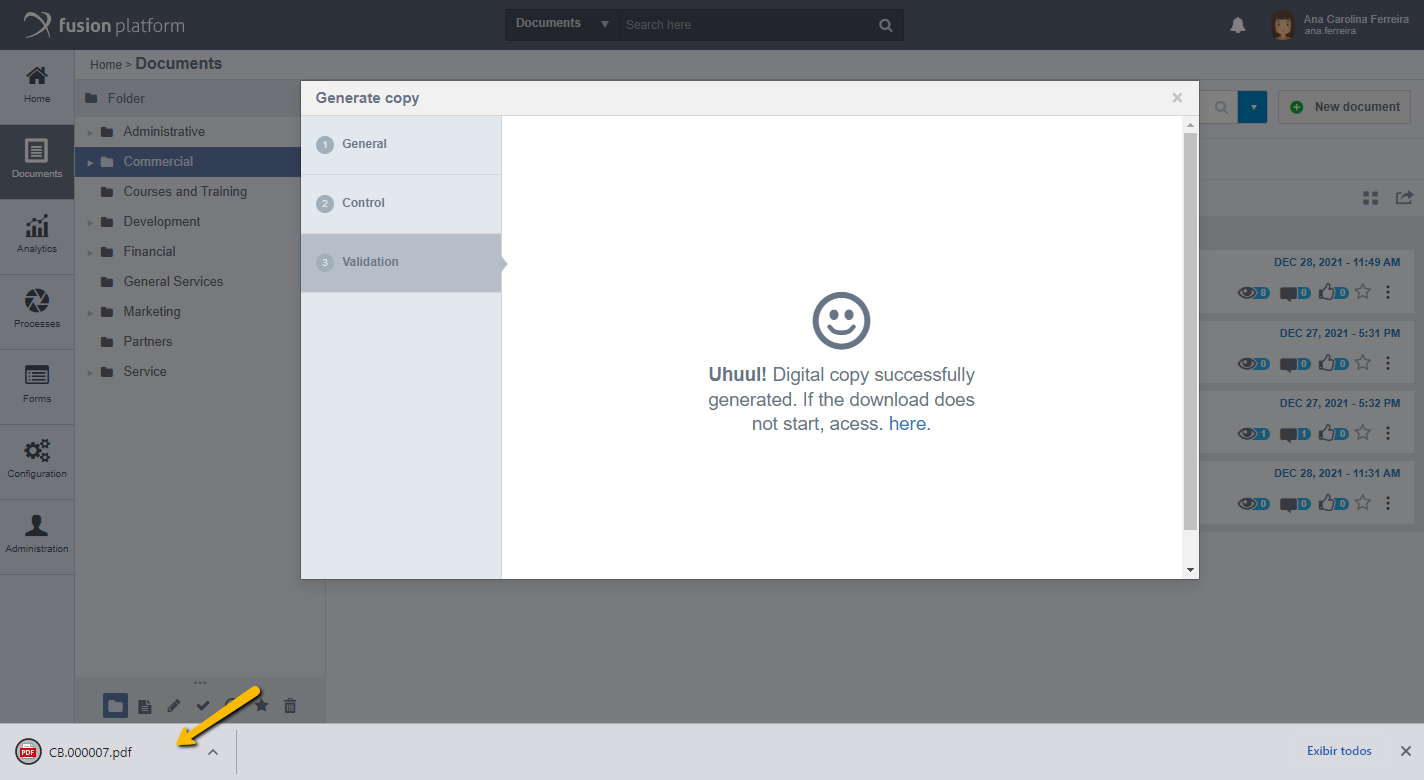
Finally, the Validation step, where it is shown that the copy was successfully generated and either downloads the copy file in pdf or informs the user that the copy was forwarded to the printer.
When viewing the generated copy file, it should display the copy watermark in the document.
Attention: It is only possible to generate copies of documents that have permission.
Note: In controlled copy events, it is possible to inactivate the copy event by clicking on the actions arrow of the copy event, and then click the Disable Copy option.
Liking Documents
When browsing the document central, Fusion allows users to like the documents by accessing the document they want to like and click on the Document Like icon, as shown in the following screen:
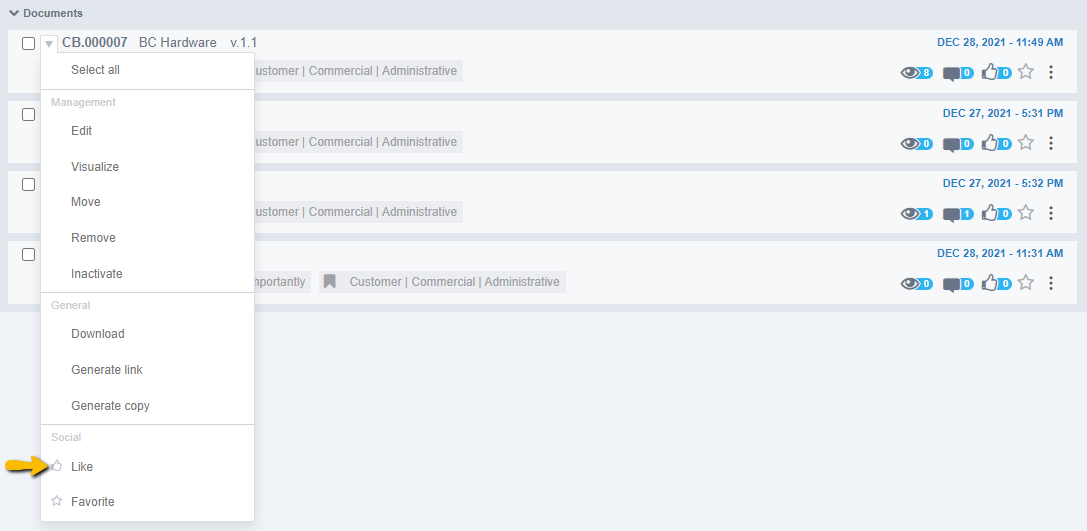
Clicking updates the counter showing the current amount of likes and hovering the mouse over the likes icon, the system shows the names of the users who liked the document, as shown in the following screen:

Attention: When the document has more than eight likes, it displays the option to click and view all users who like it.
The user can like a document in two ways, by listing documents as previously shown and inside the document. Click to view a document, then in the upper right corner you should display the likes icon, as shown in the following screen:
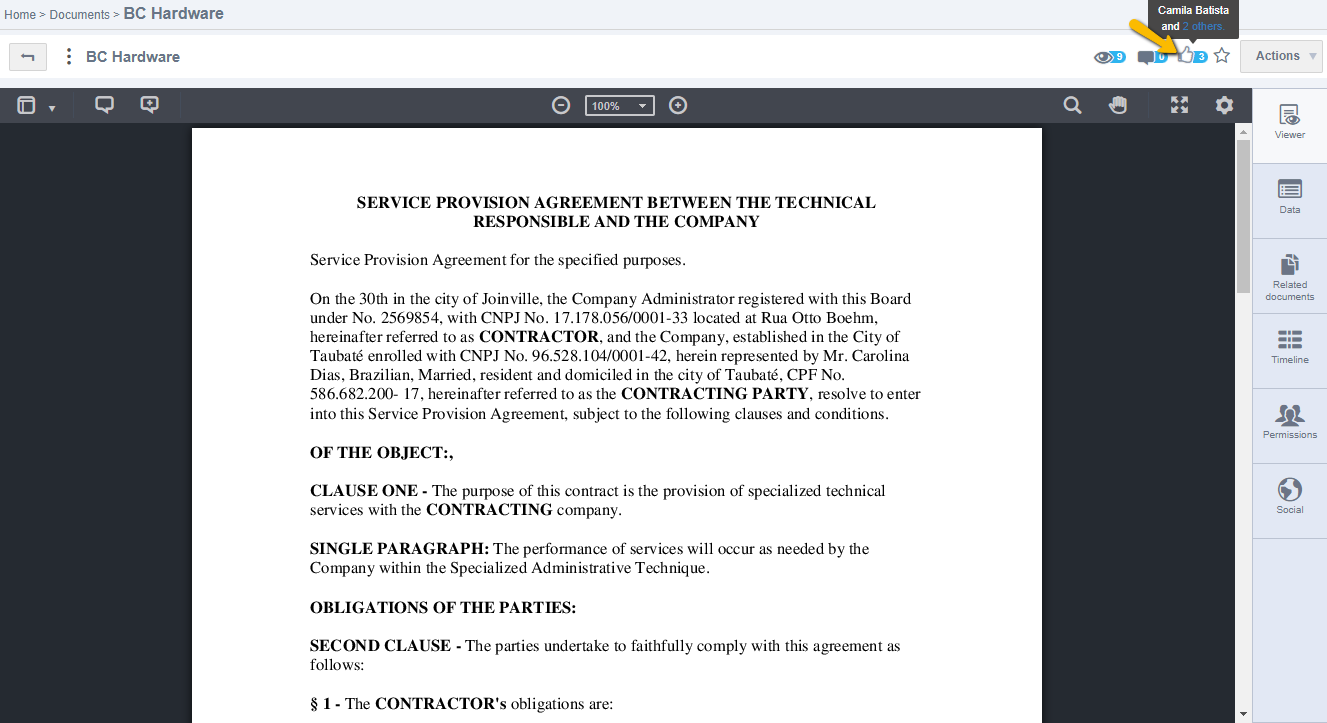
Whenever the document is liked, the publisher user will be notified.
Attention: Only users who have access to the document can like and view the likes that it has.
Commenting Documents
Fusion allows users to comment on documents, facilitating communication from within the system. When navigating through the document listing, click the comment icon so that you can do the same, as shown in the following image:
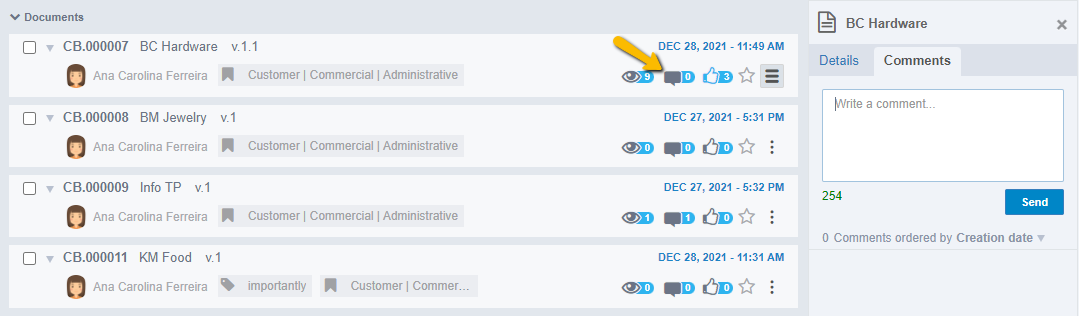
When you click on the comment icon through the document listing, you should open the details focusing on the Comments tab, so that the user can comment on the document.
After commenting, click the Send button, as shown in the previous image. Then you should update the counter to the current amount of comments.
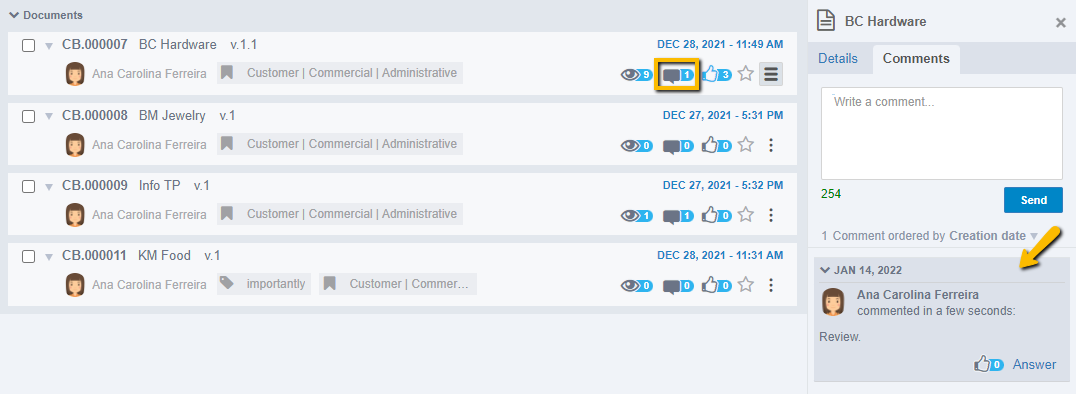
It is also possible to make comments from within the document, click to view the document, then in the upper right corner next to the likes icon should display the comments icon, clicking will expand the details inside the document with a focus on the Comments tab.
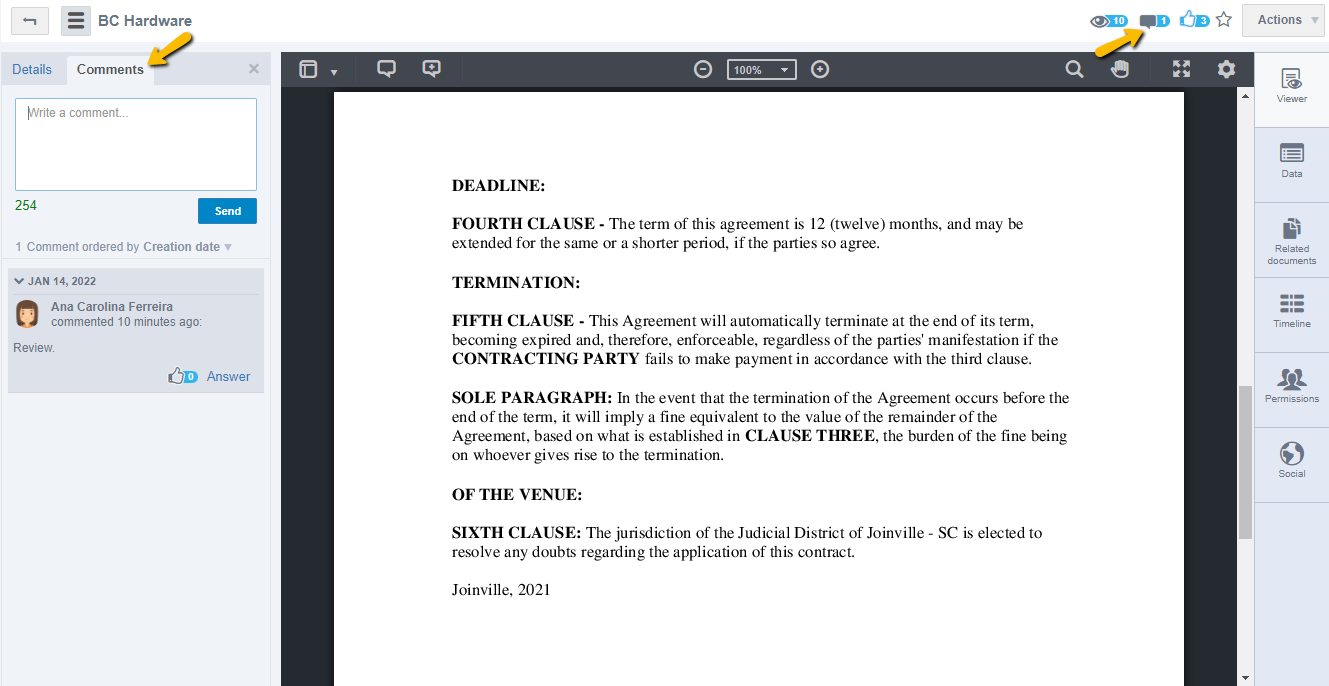
Attention: The comments made in this way are different from the comments made in the document by the universal viewer, that is, the comments made by the universal viewer are linked to the file, while the comments made through the details are linked to the document.
You can like and reply to comments made on the document, to like, access the comments and click on the likes icon displayed in the comment you want to like, and to reply to a comment, click the Reply option that appears in the comment, you must enable the text box so that the answer is performed, as shown in the following image:
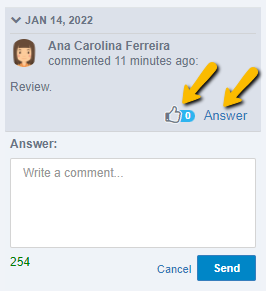
When liking, having the comment answered or being marked in a comment of a document, the user in question will be notified by the notification bell located in the upper right corner of the environment (next to the profile picture).
Attention: No notification regarding comments will be made via email.
It is allowed to order comments by Creation Date, Name and Version, to do so click on the Creation Date option, which is ordered by default, and choose which form of ordering you prefer, then the comments will be reordered.
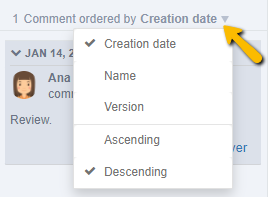
The system allows you to edit and delete the comments made, to do so click on the edit icon that appears in the comment and edit it, then click Save. If you want to delete the comment, click on the edit icon and then click on the trash, then you must delete the comment:
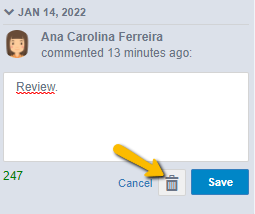
Attention: Only the creator of the comment is allowed to edit and delete it.
Favoriting a Document
To favorite a document, click Favorite in the document's actions menu, as shown in the following image:
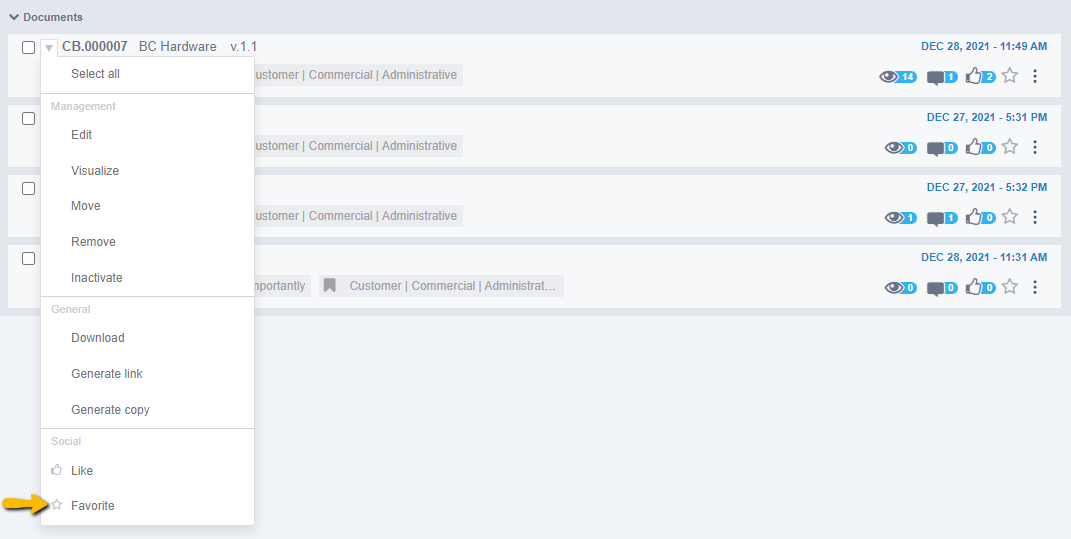
Or click on the star next to each document in the central document list:

To favorite a document, click to view it, then in the upper right corner, click on the star icon:
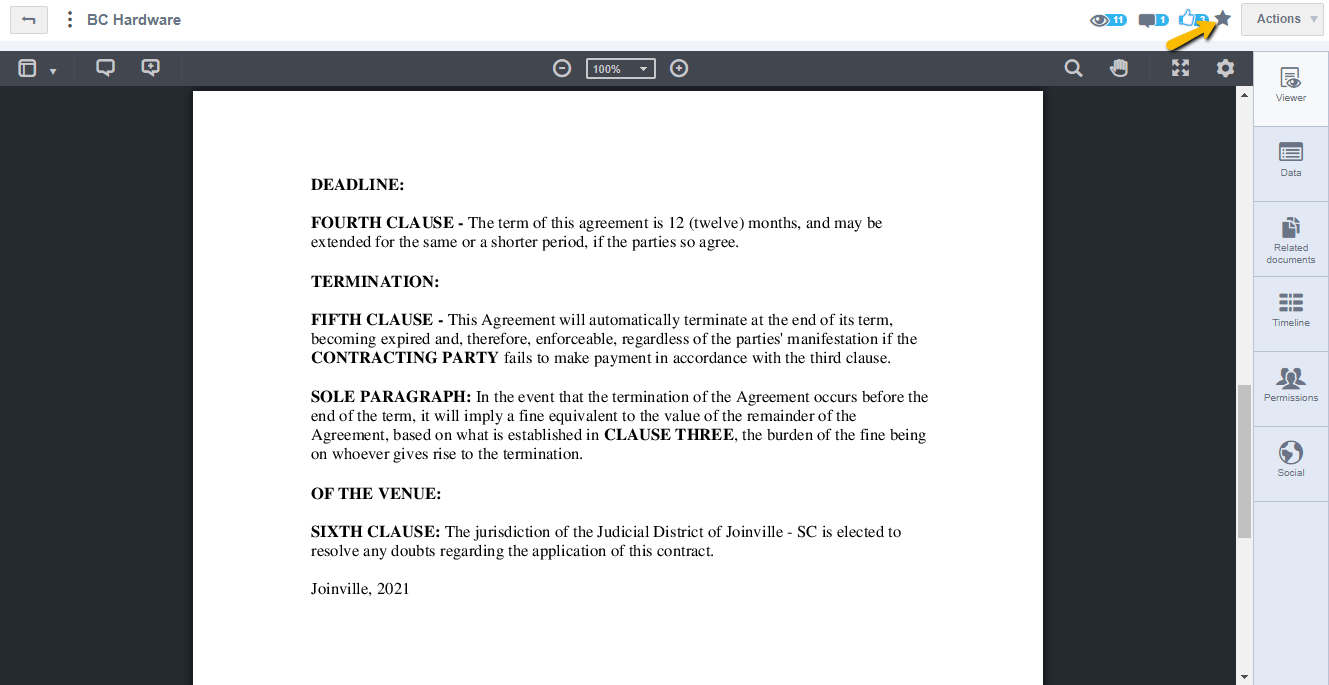
Note: Documents marked as favorites have the star icon filled in.
Exporting Master List
The master list is a report of all documents published in Fusion. You can generate master list only for selected documents, or for all documents in a folder or even the result of a query performed. To generate a master list, go to Documents > Document Central.
Access a folder where you have the documents you want, or, if necessary, perform a search so that you can export a report of the results presented. In the following example, a search is performed for all documents published with the user Ana Carolina Ferreira. In the search result display screen, click the Export Master List option as the following screen displays:
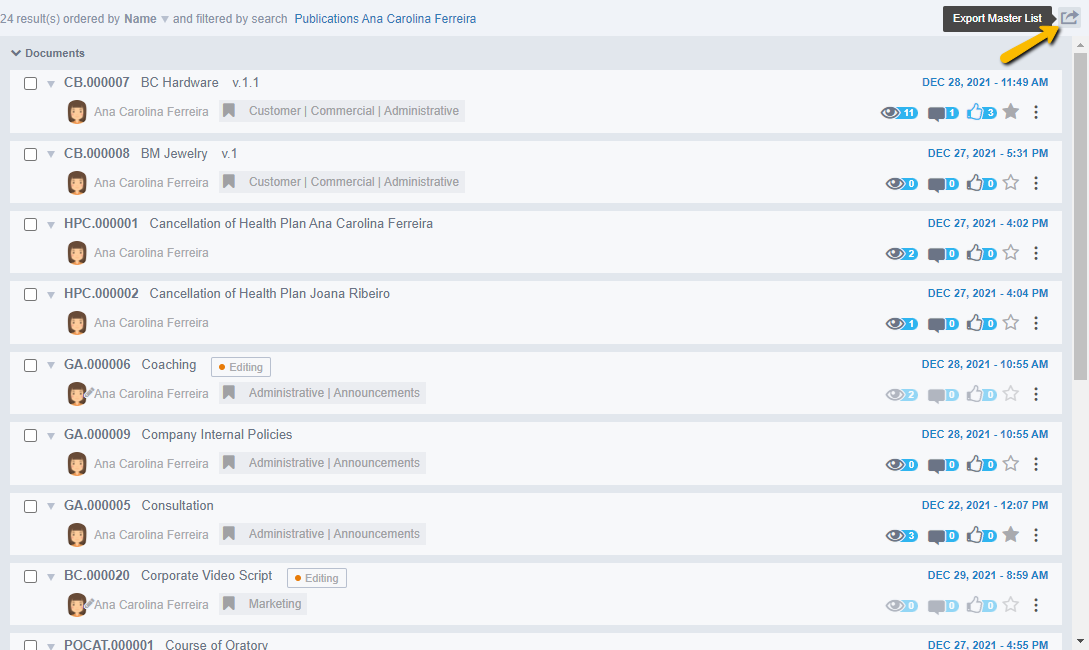
Clicking should display the screen to configure what will be exported in the master list, as shown in the following image:
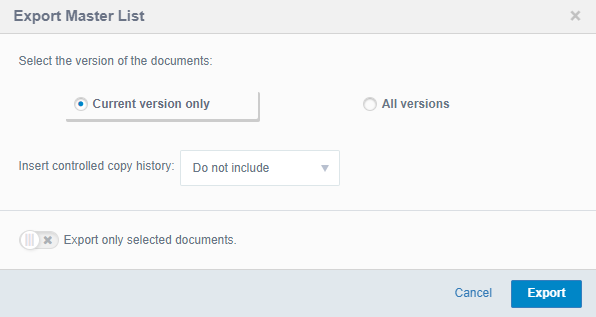
The options displayed for selection are:
- Current version only: Selecting this option should only export the current version of the documents.
- All versions: Select this option so that the result contains all versions that the document has already passed.
By default in the option to include controlled copy history, the option is selected as Do Not Include, but you can change it to include Active Copies Only, or even All Copies, the following image shows the options:
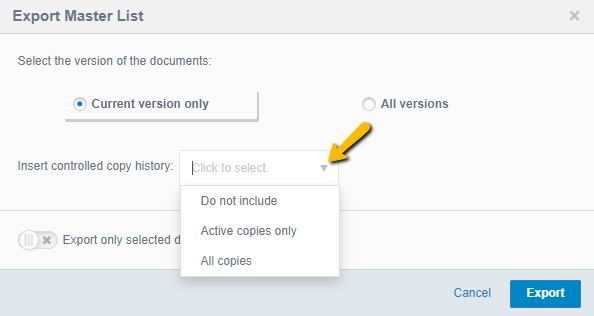
Attention: If the user wants to export only the selected documents, this option must be checked.
When you click on the Export option, you must inform that the user will be notified as soon as the report is available for download.
Accessing the notifications, click the notification that informs you that the master list of documents is available, as shown in the following screen:
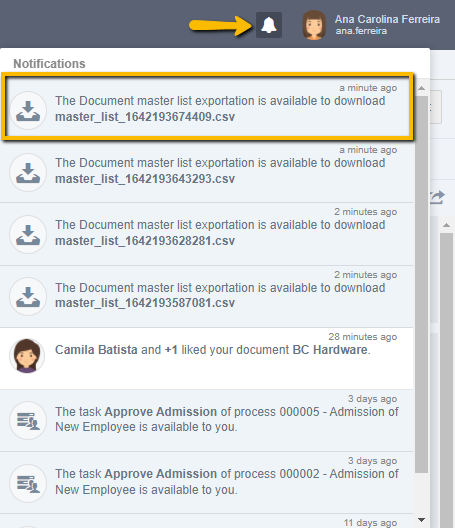
After clicking on the notification, the file starts downloading. The file will be generated in Excel format.